Cherry Sourdough Cake

Yes, the sourdough madness continues. I hate to throw food away and whilst I can’t always use my sourdough starter, especially when I have to remove half to feed it, I am now finding ways to bring it into other recipes.

We’ve had bread, and pizza, so now it’s time for something sweet. I’ve noticed too that there’s not too much fat used in these recipes, and I tend to use olive oil rather than butter, so I’m finding lower fat alternatives which has been a bonus.

As I was playing around with my cake recipe, the lovely Teleri at Olives & Artichokes, very kindly weighed, measured, baked and posted a gorgeous almond cherry cake made with olive oil (I’d asked her about her baking!). Thanks Teleri, this one is being baked today Up the Mountain!

Cherry Sourdough Cake (2)

I found several recipes for cakes on line and decided to be brave and adapt, mix and match. What was the worst that could happen? The chickies would have had cake for breakfast. Luckily for us, and unluckily for them, my first attempt worked well, so no Cherry Chickie Cake this time.

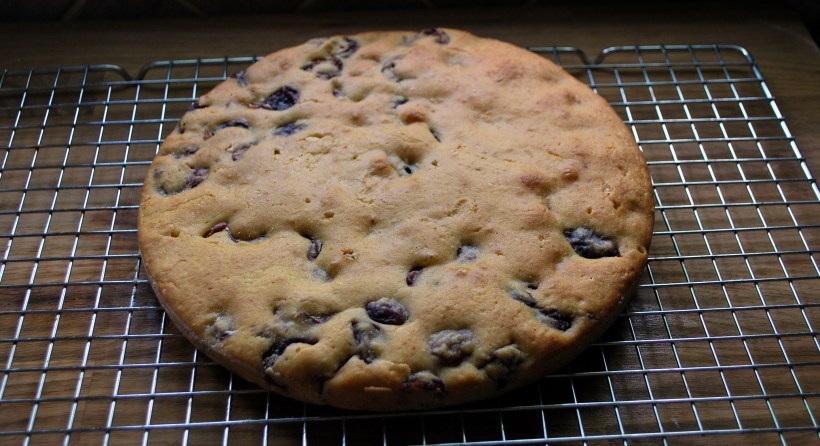
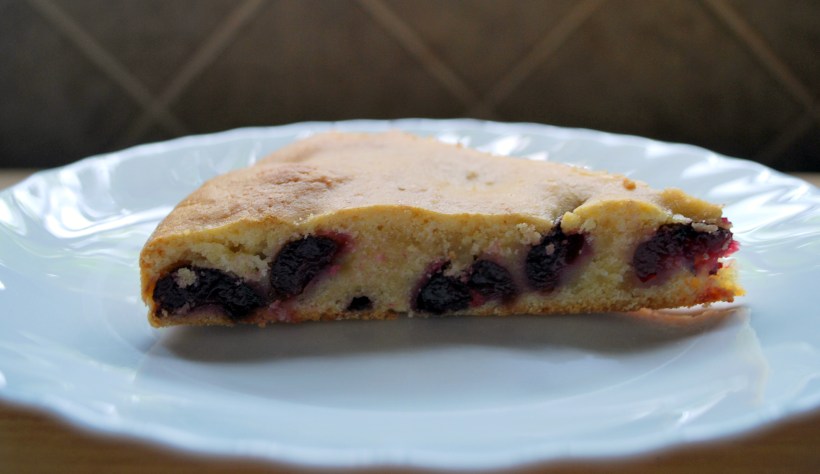
The texture of the finished cake was somewhere between a sponge cake and a scone (US biscuit). We ate it cold and it was lovely, not dry at all and not heavy (which I was concerned about). I think this would also be good warmed slightly and served with cream or ice cream. Or both.

Ingredients (cake serves 8-10 slices)

  • 1 cup of sourdough starter
  • 1/3 cup oil (I used olive oil)
  • 1 egg, lightly beaten
  • 1 cup of plain flour
  • ¾ cup sugar                          
  • ½ teaspoon salt
  • 1 teaspoon baking powder
  • 1 teaspoon vanilla essence
  • 1 cup of chopped, stoned cherries

Mix together the starter, the oil and the egg. Add the dry ingredients and mix in well and then add the cherries.

Put into a greased and floured cake time and bake for about 45 minutes at 180 degrees (until a skewer poked into the centre of the cake comes out clean and the cake is lightly browned).

Cherry Sourdough Cake (3)

This cake doesn’t rise much, but my next experiment will be to make the batter with self raising flour and then leave it to rise to see how the texture of the cake varies. Oh the things I do for you….

For more cherry recipes, click here or here.

Advertisement

Cherry and Banana Cake

One of our local villages is famed for its cherries, and even has a fiesta dedicated to this beautiful fruit next weekend. What lucky folk we are! I am back from my trip toLondon where I was spending time with Best Friend Ria who was not long out of hospital. She is on the mend and we spent a week doing things very slowly…always best when you are feeling sore and tired.

On a trip into the village (before leaving for the UK) to buy som of the famed cherries, I was also given half a dozen over-ripe bananas as the fruit lady knew that I used them to make cakes. “Let me know what you do with them” she called, so I made an extra large batch of batter and sent her over some little cup cakes I made with the extra mixture.

To make one large cake though, follow this simple recipe. You won´t regret it!

Ingredients

  • 1 cup of chopped cherries soaked in dark rum (or strong black tea) I usually heat this and let it cool while I make the cake
  • 1 cup + 2 tablespoons of self raising flour
  • ½ teaspoon salt
  • ½ cup oil (I use olive oil)
  • ½ cup sugar
  • 2 large eggs
  • 4 small ripe bananas mashed
  • 1 teaspoon vanilla essence

Heat the oven to 180ºC and line either a large round or loaf tin or two small ones with greaseproof paper.  Beat the oil and sugar together then beat in the eggs. Add the banana, cherries and vanilla and stir then gradually stir in the flour. Pour into a prepared tin and bake for 1 hour (large tin) or about 45 mins (2 smaller tins).

This recipe is adapted from my banana bread recipe. And if you´re feeling like you need a little drink to go with your cake, why not try a glass of Cherry Brandy or a Cherry and Watermelon Granizada. Don´t you just love summer fruits?!

Baked Cherry Cheesecake

A slightly sad looking final slice of cheesecake....

I am sure we all have “go to” recipes for times when we are in a hurry, or just want to return to an old favourite.  I adore baked cheesecake and have been using an adapted version of a BBC Good Food one for several years now.
When I found out that I had been asked to make a dessert for lunch with friends, I got out my cream cheese and eggs and quickly got to work. Apologies for the photo, I forgot to snap it in all its glory before we attacked it!

Ingredients

  • 12 crushed digestive biscuits (graham crackers)
  • 50g melted butter
  • 600g cream cheese
  • 2 level tablespoons of flour
  • 175g sugar
  • 3 eggs
  • 150ml whipping cream (or heavy cream)
  • 1 teaspoon vanilla essence
  • 1 jar of cherry jam plus I used some of my cherries in brandy (drained)
  • 1 sachet of flavourless gelatine or vegetarian substitute

Heat the oven to 180º C or gas mark 4.  Mix the crushed biscuits with the butter and press into a springform tin. Bake for 10 minutes and leave to cool.

Beat the cream cheese, flour, sugar and eggs together then add the cream and vanilla essence and then any fruit filling (not the jam).  Blend gently, pour into the tin and bake for 45 minutes.  It will still be slightly wobbly in the centre but leave to cool out of the oven.  It will continue to cook slightly.  I have to confess mine always cracks, I don´t know if there is a way around this – I´d be happy to learn!

For the topping you can either just cover with fruit or make a jelly fruit topping.  I did this by adding a sachet of powdered gelatine to about 4 tablespoons of cold water.  In a small pan warm the jam until it starts to bubble then pour it over the gelatine and mix well until all the granules have dissolved.  Leave it to cool down until almost cold and starting to set then pour over the cheesecake (still in the tin).  Refrigerate for at least 2 hours and remove from the fridge an hour before serving to reach room temperature.

Boozy Christmas Fruit

One of my “go to” books at Christmas is Delia Smith´s Christmas.  Sometimes I follow the recipes with just a few tweaks, and other times the book just inspires me to try something new.

My parents are coming out to Spain this year to celebrate Christmas with me and Big Man.  To say I´m excited would be a huge understatement.  When I was growing up, and ever since to be honest, they always made Christmas a very special and magical time for me and my brother.  My grandparents lived with us (my mum´s parents) and next door was my godmother, Zia Luciana, and her two daughters who were all part of our extended family.  I have very happy and treasured memories.

Although I have entertained my parents before at Christmas, it´s been a while, so this year I really want to make it extra special.  Of course, one of the ways I can do this is through the food I prepare for us to share.

My dad requested a Light Christmas Pudding, which features in the Delia Smith book that I have made previously.  I´ll post that soon.  I´m also going to make an ice cream inspired by another recipe and I´ve just made some Boozy Christmas Fruit.  The recipe in the book uses mainly glacé fruit, but it´s a recipe that is flexible.

Here´s what I used (quantities are up to you)

Dried cherries, dried cranberries, dried apricots (chopped), chopped mixed peel, glacé cherries and ginger

All these are put into a jar and covered in a sweet dessert wine (I used a local wine which is very much like Vin Santo).  The recipe calls for Madeira.  I took the shot before it was mixed up to show you the different fruits.  This will now sit quietly in a cool dark place until Christmas Day when it will be spooned over the ice cream and any other desserts we fancy eating it with. I may have to do a few quality control spot checks beforehand though…just to be sure its maturing nicely you understand.

Cruising the High Seas with a Tot of Something Fruity

Planning some Christmas Recipes

I was going to give this post a Christmas heading, but it´s about fruit flavoured liqueurs, and who needs Christmas as an excuse to open a bottle and share with friends?!

Every year for the last few years, I have made a batch of orange flavoured liqueur (which is made from vodka as it´s virtually impossible to buy pure alcohol here).  It´s rather like Limoncello and the recipe comes from the BBC Good Food website.

I won´t reproduce it here, just click on the link above and you can see how easy it is to do.  And if you fancy a batch for Christmas to either drink at home or to put into pretty bottles as gifts…well, you still have time.

I have also now “tested” my Cherry Brandy which I made back in the summer.  Remember this?  Well, all I can say is “wow”!  I´m so pleased with how it has turned out and I know we´ll be enjoying it over the coming months. The cherries are amazing too and I am planning to serve a few this weekend with a citrus sponge cake and vanilla ice cream.

Digressing a little, Cherry Brandy always reminds me of my Great Aunt Joan, my darling Grandmother´s older sister.  Joan was a stout old spinster, a little gruff, but caring deep down as she dedicated her life to running children´s homes.  She spent her spare time entering competitions and must have been pretty good at it as she won things like holidays, cars and cruises.  My lucky grandmother was often chosen to accompany her on these little jaunts, and it was mostly good fun for them both.

I say mostly, because Aunt Joan was teetotal, and always frowned at anyone letting the smallest drop of alcohol pass their lips. My Grandmother, on the other hand, enjoyed a drink almost right up to her dying day aged 93 – she said it kept her young.  They were on a cruise on the QEII, when a young boy was taken ill with appendicitis and the Captain announced that the ship would turn back to the last port so that he could be operated on.  This would cause a delay of about 10 hours to their journey, and during this period the bars would be open free of charge to all guests.

My grandmother happily planned an afternoon of white wine drinking and sun bathing when Aunt Joan had a bit of a panic attack.  The already over worked Ship´s Doctor was called and prescribed a small glass of Cherry Brandy to calm Joan´s nerves.  As it was being “prescribed” rather than poured by a bar tender, Aunt Joan felt that this was acceptable.  It seems she took to keeping bottles of Cherry Brandy all over the place which she took frequent “nips” of as her “calming tonic”.  My grandmother was able to spend her afternoon as planned as Aunt Joan lay in her cabin dozing, happy and taking little sips of her Cherry Tonic.

Cheers – It´s 4th July!

Cheers!

Cherry Brandy & Ginger Beer

Being the sort of girl who needs no excuse to raise a glass, here´s a big “Cheers” to all my new blogging pals celebrating the 4th July. Hope it´s a great day for you all.

As you know, it´s cherry season here up the mountain and after stoning far too many kilos for jam making, I decided to ring the changes and make something gorgeous for the cooler months.  I came across a wonderful recipe over on Olive and Artichokes for a cherry liqueur they have made with Eau de Vie.  We can´t get that here, at least, I´ve never come across it…but I didn´t let this stand in my way!

I bought a bottle of Spanish Brandy, not one of the rough ones might I add, and got my sugar, cherries and bottles ready.

Not many ingredients...

I followed the instructions given in the recipe, that is layering cherries and sugar and then filling the containers with liqueur. 

Get Layering...

Hopefully in a few months time I´ll have a delicious cherry flavoured brandy and some brandy flavoured cherries.  Can´t wait!

Fill....and wait!

Just over three weeks ago I started to make some alcoholic ginger beer.  If you want to give it a go, you´ll find the recipe here.

It´s very simple, all you need is a sachet of yeast, a jar of powdered ginger, sugar and a jar or jug you can loosely cover.

This is what you´ll need

After a week of adding yeast and sugar to your initial mixture (see the recipe) you´ll add water, lemon juice and more sugar to make about 7 litres of ginger flavoured drink.

Get Squeeeeeezing...

You need to leave some space in your plastic bottles for expansion, so only fill them about three quarters and then squeeze some of the air out before sealing them. If you don´t do this you´ll have exploding ginger beer all over the place and it´s very sticky.  I know this from experience!

Not long to wait now!

Once you´ve been patient you will be rewarded with gorgeous sparkling, lemony, gingery Ginger Beer.  I don´t know exactly how alcoholic it is, although it does get stronger the longer you leave it.  After about 3 months it starts to taste acidic, but I don´t suppose you´ll have it for that long as it´s delicious. And if you can´t wait 3 weeks, wait a week and mix it up with soda or water for a refreshing, non alcoholic drink.

So good, even Alfi wants to get in on the act!

Happy Independence Day!

Summer Cherry Jam

Ready to wing their way to the UK!

Yes, it´s back to jam again today.  You may, or may not, recall that a nearby village is famed for its cherries. We had a very, very long and wet winter which meant that a lot of the blossom this year was lost from the cherry trees. Such a shame for those whose livelihoods depends greatly on selling their crop, a shame for the cherry fiesta which is coming up next weekend, and a shame for all the customers who were hoping for a bumper crop.

We were very lucky in that a friend gave us a kilo the other day.  We tried a few and they were delicious, but I wanted to make my first cherries into jam, to capture a special moment at the start of summer.  Cherries are quite hard to get to set (at least, these were!), so in this jam I used a sachet of pectin powder, the setting agent which occurs naturally in some fruit like apples and citrus fruits.  If you can´t get hold of it (or the liquid pectin) don´t worry, a little grated apple or the pith of a lemon plus a few minutes extra boiling should do the trick.

After pitting the cherries (that´s a messy job!) I ended up with 600g of fruit to which I added 400g of sugar and the juice of 2 lemons.  Feel free to vary these quantities a little if you like your jam less tart and more sugary.

As with most recipes for jam, start it off at a low temperature until the sugar has dissolved. This is when I added the pectin powder and then turned the heat up and got it bubbling

This slideshow requires JavaScript.

Keep it bubbling away for about 10 minutes.  Don´t get distracted or walk away!  If you have a jam thermometer, do use it, it saves having to reboil the jam later if it doesn´t set.  Otherwise you can drop a spoonful of jam onto a saucer which you have previously placed in the freezer.  When the jam cools on the saucer you push it slightly – if it wrinkles, it´s at setting point.  If not, boil a little longer then repeat.

Leave the jam to cool down a little for 5-10 minutes so that when you pour it into still warm, sterilized jars (I run mine through the dishwasher to do this), the fruit will not float to the top.

Seal the jars while they are still hot and this will keep for at least a year.  It´s delicious on bread but also fantastic on ice cream, especially if you warm it a little first.

Sorry, I only took a photo of it in the jars, and they are already earmarked to wing their way back to the UK with my friends!  Luckily Big Man came home with several cartons of cherries this morning, so tomorrow I´ll be busy stoning cherries again for the next batch.