Very Easy Chinese Style Chicken

Chinese Style Chicken (3)

My love affair with the slow cooker continues. My mum even gifted me one (thanks Mamma!) to take with me to Spain to use in the heat of the summer when I can’t (won’t) turn the oven on!

Chicken is a favourite in most households because it’s usually pretty economical (although I am very much an advocate of buying the best you can and eating it less often) and it offers so many ways to be prepared. Big Man and I are both thigh folk.  He’s a skin off, I’m a skin on and we’re both bone in! You pick what you like best and go with it, although breasts are more pricey and don’t really benefit from long slow cooking.

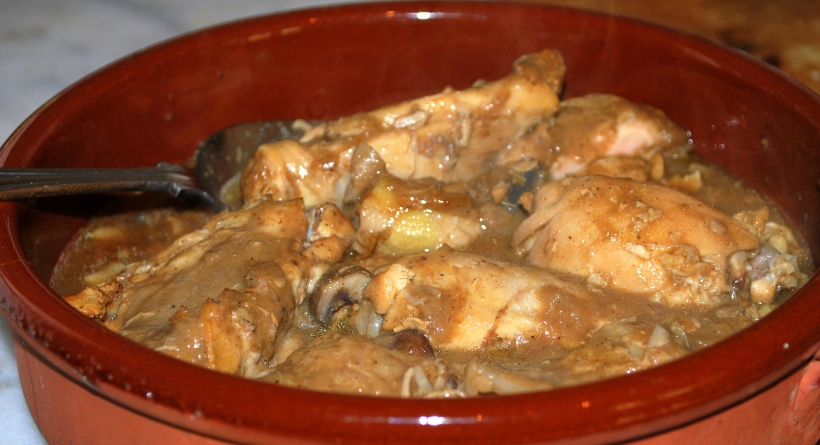
This dish was really simple to prepare, (although I’m sure it’s not authentically Chinese!) but the flavour was amazing. Actually, if you took the ginger and star anise out it was very similar to any meat dish in Spain prepared “al ajillo” ….with lots of garlic. Sorry about the photo…real life cooking and eating here folk….I just plated it up, took a snap and we tucked in!

Ingredients (to serve 4)

  • 2 tsp grated ginger
  • 4-6 crushed garlic cloves
  • 2 star anise
  • 150ml Chinese rice wine (or use dry sherry)
  • 2 tbsp dark soy sauce
  • 1 tsp sesame oil
  • 5 tbs water
  • 8 chicken thighs or drumsticks (skin off is better for this dish unless you want to brown them first with the skin on)
  • Shredded spring onion to garnish (clearly I forgot this bit!)
  • Plain boiled rice to serve

Mix together the ginger, garlic, star anise, rice wine, soy sauce, sesame oil and water and pour over the chicken. Leave to marinate for a few hours or overnight if you have time.  Place everthing into a saucepan and bring the chicken and marinade to the boil.

Transfer to the slow cooker (or an ovenproof dish with a lid) and cook on low for about 4 hours (or 2-3 hours in a low oven) until cooked through and tender.

When done, remove the star anise. If the sauce is too liquid, reduce for a few minutes in a saucepan and pour over the chicken to serve.

(Tastes even better the next day)
Honey, Ginger, Sultana and Orange Welcome Home Cake

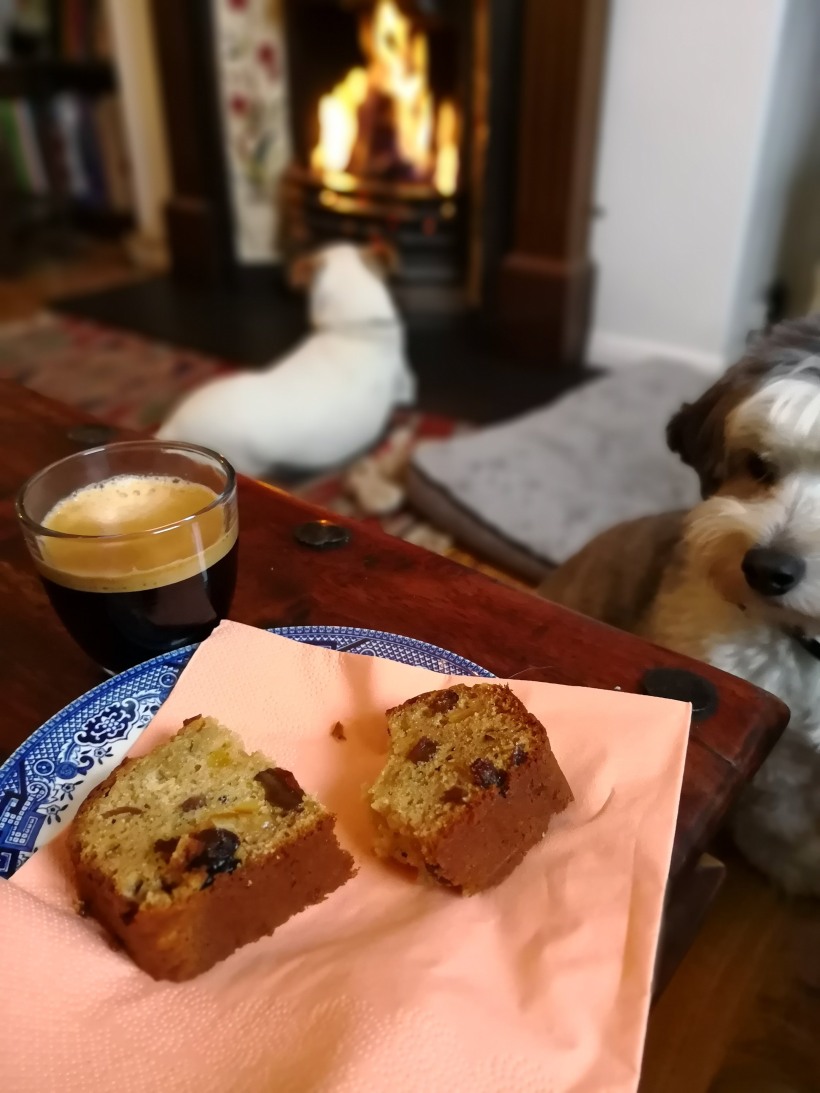
Big Man has been in Spain for a couple of weeks so the day before he returned I cooked some dishes he would enjoy to welcome him home. This included a cake, as a special treat, and it was perfect for sitting around the next day (which was cold and snowy) with some good strong coffee while we had a good old catch up.

IMG_20180301_085500
Where there’s cake, there’s usually a dog…

Regular readers of the blog will know that I don’t make many cakes, and when I do I mostly go down the “all in one” route and tend to use olive oil rather than butter. Not for health reasons, but because when I first started living in Spain it was more difficult for me to get hold of good quality butter (and getting it home before it melted in the summer was an adventure in itself). As we produce our own wonderful olive oil each year, it made sense to substitute this for the butter and I soon found that it produced light and delicious cakes…so I simply kept on using it.

This is more of a tea loaf than a sponge cake and would be delicious spread with butter (the best of both worlds! ) although it’s delicious as it is. I baked this in a 23cm x 13cm loaf tin and it cuts into about 12 slices.

Ingredients

  • 100g of sultanas soaked in your favourite tea (I used a ginger tea but Earl Grey would also be fantastic) then drained and cooled
  • 100g chopped candied peel
  • Approx 1 tablespoon of fresh grated ginger
  • 175g self raising flour mixed with ½ teaspoon of salt
  • 60ml olive oil
  • 2 large eggs
  • 150g of runny honey

Preheat the oven to 185° fan oven or 195° regular oven and line a loaf tin with greaseproof paper.

Beat the oil and honey together then add the eggs one by one. Mix in the drained sultanas,  candied peel and fresh ginger then mix in the flour and salt. This cake mix is as forgiving as  most of my others, so you don’t need to fold things together or be particularly gentle.

Pour the mix into the prepared loaf tin and bake for approx 45 minutes. Check if it’s done by inserting a skewer and if it comes out clean, you’re done. If it needs a few minutes longer and is beginning to brown, cover with some aluminium foil and give it another five minutes before checking again.

Cool for 5 minutes in the tin before turning out and cooling completely on a rack. Will keep for about 3 days in an airtight container.

If you enjoy citrus flavours, take a look at this Sticky Citrus and Marmalade cake.

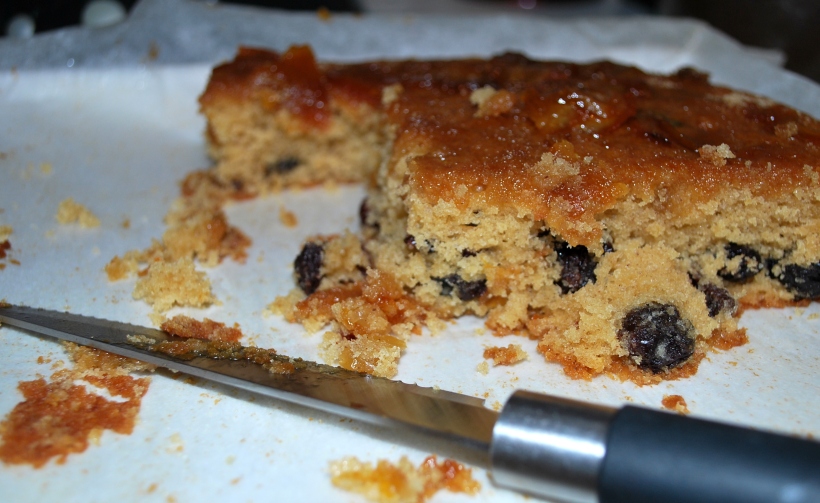
Sticky Citrus and Marmalade Tray Bake (4)
Going, going….nearly gone!


Chinese Style Braised Beef

I wish I had a “taste-o-blog” or a “screen-sniff” option, because the photo of this dish really doesn´t do it justice.

During Operation Clear Out The Freezer, I came across a piece of stewing beef. It´s not really casserole weather here right now, but I knew I´d need to give it a long slow cook.  Inspired by the success of the flavours in my Pork Belly dish, I decided to head to the Orient for my ingredients.  Adapted from a BBC Good Food Recipe, this is a beautiful, prepare ahead dish which is even better the next day and would work really well too with pork. I served it simply with basmati rice and steamed runner beans.

Ingredients (to serve 4)

  • 3 tbsp vegetable oil for frying
  • Beef for slow cooking (my piece weighed about 1 kilo) cut into bite sized chunks
  • 1 large onion
  • 50g peeled fresh ginger
  • 6 cloves of fresh garlic
  • 2 heaped tsp Chinese five spice powder
  • 4 whole star anise
  • ½ tsp freshly ground black pepper
  • 80g brown sugar
  • 50ml soy sauce
  • 50ml of dry sherry (or use rice wine or water)
  • 2 tbsp tomato purée
  • About half a cup of chicken stock (or beef if you have it, otherwise water)

Heat the oil in an ovenproof dish and seal the meat on all sides (in batches if necessary). Remove the meat and reserve in a separate bowl.

Blitz the onion, garlic and ginger to a paste with a little water in a food processor then fry gently in the same pan you used for the meat until it has softened. Add the five spice, star anise and ground pepper then after a minute add the sugar, soy sauce, wine and tomato purée. Add the beef to the pan with any juices then add just enough stock to cover the meat.

Bring to the boil then reduce to a simmer then cook either very slowly on the stove top for a couple of hours or on the lowest oven setting for about 3 hours.

When the time is up, remove the meat from the sauce then turn up the heat and reduce the sauce to your preferred consistency.

When you are ready to serve (and even better if you can make this a day ahead) pour the sauce over the meat and enjoy.

Stem Gingernuts

A recent post on cheesecake made with a biscuit base, started a dialogue about biscuits. The lovely Tia mentioned that she enjoyed Ginger Nuts, a biscuit enjoyed widely in the UK with a cup of tea or coffee.  I said I would try to find a recipe (and I did find a Delia Smith one which was a huge disaster), then the equally lovely Evie from Pendle Stitches sent me over the recipe she uses to bake for her family.

Of course, I had to give them a go.  Result? Fabulous, better than shop made and even without the Stem Ginger (which I couldn´t get hold of) they were amazing.  Thanks Evie, these will become a family favourite here too!

Here´s Evie´s recipe, and like her I added extra ground ginger (another half a tablespoon).

Stem Gingernuts (From The Great British Book of Baking)

  • 350g self-raising flour
  • 1 tablespoon ground ginger (I usually add a bit more because I love my gingernuts to have bite)
  • 1 teaspoon bicarbonate of soda
  • 200g caster sugar
  • 115g unsalted butter
  • 85g golden syrup
  • 1 egg, beaten
  • 3 pieces stem ginger, drained and finely chopped (this is ginger in a sweet syrup which you can buy or make your own)

Preheat oven to 170oC/350oF/gas 3.  Grease or line baking trays.  I just use parchment.

Sift the flour, ground ginger, bicarb of soda and sugar into a mixing bowl.  Gently melt the butter with the syrup in a pan over a low heat and set aside until barely warm.

Pour this mixture into the dry ingredients, add the beaten egg and the stem ginger and mix with a wooden spoon. When thoroughly combined, roll the mixture into 24 walnut-sized balls, using your hands.

Arrange on prepared baking trays, spacing well apart to allow for spreading.

Bake in preheated oven for 15 to 20 minutes until a good golden brown.  Keep an eye on them and, if necessary, turn the trays around halfway through the cooking period so that the biscuits brown evenly.

Leave the biscuits to cool on the trays for a couple of minutes, and then transfer to a wire rack and leave to cool completely.

Store in an airtight container, or make a large pot of coffee and scoff the lot!

Curried Meatballs

A recent tidy up of my cookery books turned up two Indian books by Anjum Anand which I had hardly read.  Time to put that right I thought, and next thing I was in the butcher´s shop ordering pork mince.

Of course, pork would not typically be a meat used in most Indian curries for religious reasons, but this would be great with any other meat. For a fantastic recipe using minced beef, check out Frugal´s gorgeous Beef Kofta Curry recipe.

As ever, I had to make a few small changes, but not too many. I had no fresh coriander so substituted dried, ground coriander and the same went for fresh ginger. We can get it here, I just didn´t have any to hand and when the craving for curry strikes, you have to go with it!

This recipe is adapted from Indian Food Made Easy.

For the meatballs

  • 300g lamb mince (I used pork)
  • 2 tbsp finely chopped fresh coriander leaves and stalks (I used 1 teaspoon of dried coriander)
  • ¾ tsp garam masala
  • 1 tsp finely chopped ginger (I used ¼ teaspoon of dried)
  • 3 cloves of crushed garlic
  • 1 large egg
  • Salt to taste

For the Curry Sauce

  • 1 medium onion finely chopped
  • Vegetable oil for frying
  • 2 bay leaves
  • 1 small shard of cinnamon
  • 2 ½ medium tomatoes (puréed) – I used 1 ½ cups of my conserva from last summer
  • 800ml water (I used about 300ml)
  • ½ tsp ground turmeric
  • ¼ – ¾ teaspoon of chili powder (to taste)
  • 2 tsp coriander powder
  • 1 tsp garam masala
  • Salt to taste
  • Chopped coriander

Mix all the ingredients for the meatballs together plus 3 tbs of the onion you have chopped for the sauce.

Heat the oil in a deep pan, add the bay leaves, cinnamon and remaining onion and fry until the onion is golden brown.

Add the tomatoes, ginger and garlic and cook gently for about 8 mins then add 200ml of water and cook until thickened.  Add the spices and salt and any remaining water (I didn´t add much as I continued cooking with a lid on my pan) and simmer. Meanwhile roll the meat into walnut sized balls and drop them into the sauce.

Cover and simmer, turning the meatballs gently half way through, for about 20 minutes. Add the coriander and serve with rice, naan bread, popadums…however you like.

We ate ours with my Sort of Saag Aloo made with the first of our spinach which is now ready to eat.

…and a cool and creamy raita (I´ll give you that easy recipe another time)…

This was a warm but not too hot curry with the lovely flavours of cinnamon and ginger, definitely one to make again.

Ginger Spiced Carrot and Split Pea Soup

Winter and soups go together. As do winter and colds and I´ve got one right now. Fortunately it´s not too bad, as I´m still cooking and enjoying my food. Shame really, as a day or two of fasting is probably no bad thing for me.

I fancied soup this morning but didn´t want to wait for hours for stock to simmer. Now that I´ve realised I can buy split yellow peas in our supermarket, I don´t even have to wait overnight for other legumes to soak before cooking.  They´re also super healthy, packed with protein and fibre and low in fat.  This means they fill you up without filling you out.

As my sense of taste and smell is a little dulled at the moment due to my cold, I decided to make a warming spicy soup to try and wake those senses up a little.

To serve 4 as a main course

  • 1 cup of split yellow peas (or you could use lentils) rinsed
  • 5 cups of water
  • 3 medium carrots, peeled and finely diced
  • 1 cup of minced tomatoes or conserva
  • 1 heaped tablespoon of tomato purée
  • 1 teaspoon of ground cumin
  • ½ teaspoon of chili powder
  • 1 piece of fresh ginger (about the size of your thumb) peeled and grated or use a teaspoon of dried ginger
  • 3 cloves of crushed garlic
  • Salt to taste (but do not add until the soup is cooked)

Put all the ingredients into a large saucepan, bring to the boil then cover and reduce to a simmer for about 30 minutes until the split peas and carrots are cooked.  Season to taste and either eat as is or purée with an immersion stick blender or in your regular blender.  It´s good with a dollop of creamy natural yogurt but I prefer a drizzle of olive oil, a squeeze of lemon juice and a sprinkle of extra cumin.  Serve piping hot, sitting by the fire.

Boozy Christmas Fruit

One of my “go to” books at Christmas is Delia Smith´s Christmas.  Sometimes I follow the recipes with just a few tweaks, and other times the book just inspires me to try something new.

My parents are coming out to Spain this year to celebrate Christmas with me and Big Man.  To say I´m excited would be a huge understatement.  When I was growing up, and ever since to be honest, they always made Christmas a very special and magical time for me and my brother.  My grandparents lived with us (my mum´s parents) and next door was my godmother, Zia Luciana, and her two daughters who were all part of our extended family.  I have very happy and treasured memories.

Although I have entertained my parents before at Christmas, it´s been a while, so this year I really want to make it extra special.  Of course, one of the ways I can do this is through the food I prepare for us to share.

My dad requested a Light Christmas Pudding, which features in the Delia Smith book that I have made previously.  I´ll post that soon.  I´m also going to make an ice cream inspired by another recipe and I´ve just made some Boozy Christmas Fruit.  The recipe in the book uses mainly glacé fruit, but it´s a recipe that is flexible.

Here´s what I used (quantities are up to you)

Dried cherries, dried cranberries, dried apricots (chopped), chopped mixed peel, glacé cherries and ginger

All these are put into a jar and covered in a sweet dessert wine (I used a local wine which is very much like Vin Santo).  The recipe calls for Madeira.  I took the shot before it was mixed up to show you the different fruits.  This will now sit quietly in a cool dark place until Christmas Day when it will be spooned over the ice cream and any other desserts we fancy eating it with. I may have to do a few quality control spot checks beforehand though…just to be sure its maturing nicely you understand.

Pear, Lime and Ginger Preserve

Fruity, Spicy and Tangy!

Over at Lavender and Lime, Tandy has set a Weekly Food Challenge to cook using citrus fruits.  Anyone who pops over to my blog regularly will probably have noticed that I use a lot of oranges in my cooking, particularly salads, so I felt inspired to take part in my first ever challenge!

I´m not sure if you´re allowed to submit two recipes, but I recently put up a post for one of my very favourite salads, Ensalada Cateta, so I´m putting that one forward too!

However, I also thought I´d like to try something different and as I´m in jam making mode this week, I had a little play around with ingredients. After the visit from my friends from the UK last week I had a few limes left over from a Mojito session, so I took it from there.

I love pears, but tend to either eat them as they are, or with cheese, or poached in wine.  How about trying a chunky, spicy preserve instead?  I could eat it on bread or toast, or serve it, almost like a soft quince jelly with cheese or, finally, as a sweet option drizzled over creamy vanilla ice cream.

In the end I decided to marry the pears with lime juice and fresh ginger, and I have to say I was thrilled with the results.  Just a hint of the tang of lime and the warmth of the ginger combined with the fresh taste of the pears.  Pears contain a lot of water so I cooked the preserve for about half an hour for the quantities given below on a gentle boil.  The final result left me with soft pear chunks which still held their shape and a jelly like syrup.

I used the following:

500g of pears (peeled weight) chopped into small chunks

250g sugar

A piece of fresh ginger (about 3cm in length) peeled and grated

The juice of two limes

For the method I used, please see either my Ruby Jewel Jam recipe or my Summer Cherry Jam recipe.  This quantity gave me two medium jars of preserve.  I do hope you enjoy it, it has an almost autumnal taste to it – I think it must be the ginger!

Cheers – It´s 4th July!

Cheers!

Cherry Brandy & Ginger Beer

Being the sort of girl who needs no excuse to raise a glass, here´s a big “Cheers” to all my new blogging pals celebrating the 4th July. Hope it´s a great day for you all.

As you know, it´s cherry season here up the mountain and after stoning far too many kilos for jam making, I decided to ring the changes and make something gorgeous for the cooler months.  I came across a wonderful recipe over on Olive and Artichokes for a cherry liqueur they have made with Eau de Vie.  We can´t get that here, at least, I´ve never come across it…but I didn´t let this stand in my way!

I bought a bottle of Spanish Brandy, not one of the rough ones might I add, and got my sugar, cherries and bottles ready.

Not many ingredients...

I followed the instructions given in the recipe, that is layering cherries and sugar and then filling the containers with liqueur. 

Get Layering...

Hopefully in a few months time I´ll have a delicious cherry flavoured brandy and some brandy flavoured cherries.  Can´t wait!

Fill....and wait!

Just over three weeks ago I started to make some alcoholic ginger beer.  If you want to give it a go, you´ll find the recipe here.

It´s very simple, all you need is a sachet of yeast, a jar of powdered ginger, sugar and a jar or jug you can loosely cover.

This is what you´ll need

After a week of adding yeast and sugar to your initial mixture (see the recipe) you´ll add water, lemon juice and more sugar to make about 7 litres of ginger flavoured drink.

Get Squeeeeeezing...

You need to leave some space in your plastic bottles for expansion, so only fill them about three quarters and then squeeze some of the air out before sealing them. If you don´t do this you´ll have exploding ginger beer all over the place and it´s very sticky.  I know this from experience!

Not long to wait now!

Once you´ve been patient you will be rewarded with gorgeous sparkling, lemony, gingery Ginger Beer.  I don´t know exactly how alcoholic it is, although it does get stronger the longer you leave it.  After about 3 months it starts to taste acidic, but I don´t suppose you´ll have it for that long as it´s delicious. And if you can´t wait 3 weeks, wait a week and mix it up with soda or water for a refreshing, non alcoholic drink.

So good, even Alfi wants to get in on the act!

Happy Independence Day!