Fish Pie, a hug in an oven dish

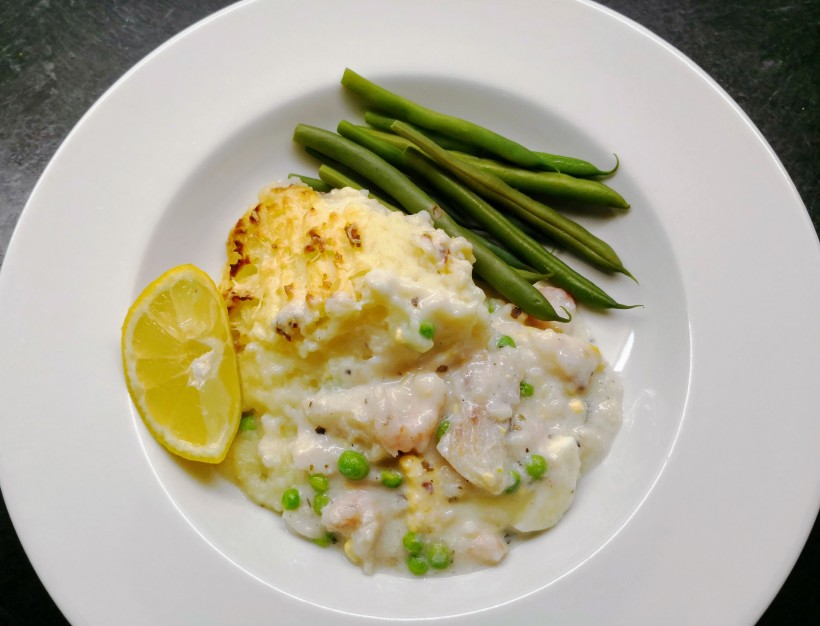
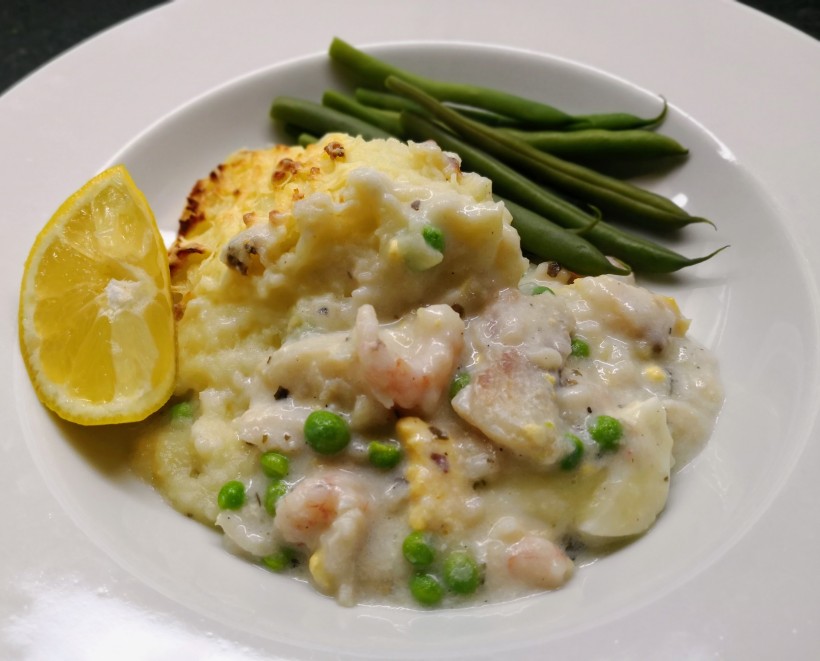
Fish Pie to me really is comfort food. Creamy sauce, chunks of beautiful flaky fish and fluffy, cheesy mashed potato. It’s not difficult to make, it just takes a little time. It’s a great prepare ahead dish if you bring it up to room temperature an hour or so before you want to cook it. We’ve had cold foggy days, gloriously sunshiny days…it’s so hard to know what to cook. This always seems to fit the bill though!
IMG_20180301_201111

You can keep it basic for a mid week family meal, or if you add scallops, prawns, capers and a mix of your favourite fish it really can be grand enough for entertaining. The  choice is yours, you don’t need to be rigid with the measurements…make it your own! I make my bechamel the easy, all-in-one way and use olive oil instead of butter, but do feel free to make it the more traditional way making a roux of flour and butter then gradually adding the milk if you prefer.

Ingredients (to serve 4 generously)

  • Approx 400g of mixed fish (I used cod, smoked haddock, salmon and prawns)
  • 2 hard boiled eggs, peeled and chopped into chunks
  • Approx 1kg floury potatoes, peeled and boiled until soft enough to mash
  • Olive oil (or butter to add to the mash plus about 100ml of milk)
  • 450ml of milk (full fat or semi skimmed)
  • A bay leaf and a few peppercorns
  • 2 heaped tablespoons of plain flour
  • 1 tablespoon of olive oil
  • A cup of frozen peas or 2 cups of washed fresh spinach
  • About 2 tablespoons of grated cheese (I used cheddar)
  • Salt and pepper
  • Optional: a tablespoon each of finely chopped parsley, capers and gherkins

Place the fish in the milk with the bay leaf and peppercorns and heat gently. Once bubbles appear on the surface of the milk, remove the fish with a slotted spoon  and set aside. Allow the milk to cool completely. This stage can be carried out the day before if it’s easier.
IMG_20180301_200659

Add the flour and olive oil to the cold milk and bring gently to a simmer, whisking as you do. The sauce will start to thicken. Simmer for 2 or 3 minutes then remove from the heat. Break the fish into chunks then stir into the white sauce with the chopped egg and capers, gherkins and parsley if using. Now add the frozen peas (no need to defrost, they’ll cook in the oven)  or spinach and stir to mix in well. Season, taste and adjust if necessary.

Pour the  mixture into an ovenproof bowl (deep enough for a layer of mashed potato on top). Allow to cool down a little.

Mash the cooked potatoes while they are still hot, adding a generous slug of olive oil or a large knob of butter as you mash. When it’s free of lumps, whisk in the milk adding enough to give a soft, smooth purée that will hold its shape. Don’t use all the milk if it starts looking too wet, add extra if the potatoes are particularly dry.

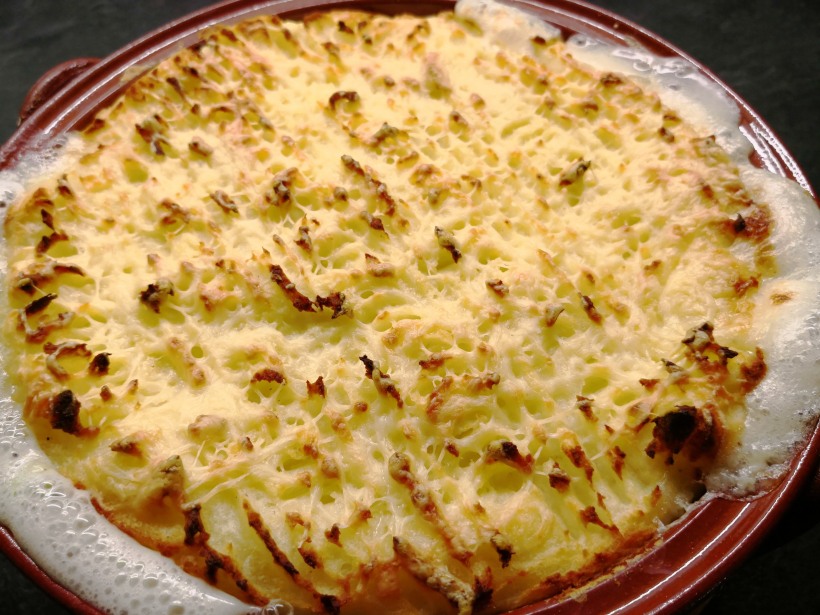
Spoon (or pipe, if you’re that way inclined) the potato on top of the fish. Run a fork over it if you haven’t piped it as this will give you lots of lovely tiny peaks which will go brown and crunchy in the oven.
IMG_20180301_201119

Bake at 180° fan (190° regular oven) for 30 minutes then sprinkle the grated cheese over the potato and bake for a further 10 minutes until the pie is bubbling and browned.

Leave to stand for 5 minutes before serving. Enjoy the fish pie love and hopefully someone else will offer to do the washing up…
Very Easy Chinese Style Chicken

Chinese Style Chicken (3)

My love affair with the slow cooker continues. My mum even gifted me one (thanks Mamma!) to take with me to Spain to use in the heat of the summer when I can’t (won’t) turn the oven on!

Chicken is a favourite in most households because it’s usually pretty economical (although I am very much an advocate of buying the best you can and eating it less often) and it offers so many ways to be prepared. Big Man and I are both thigh folk.  He’s a skin off, I’m a skin on and we’re both bone in! You pick what you like best and go with it, although breasts are more pricey and don’t really benefit from long slow cooking.

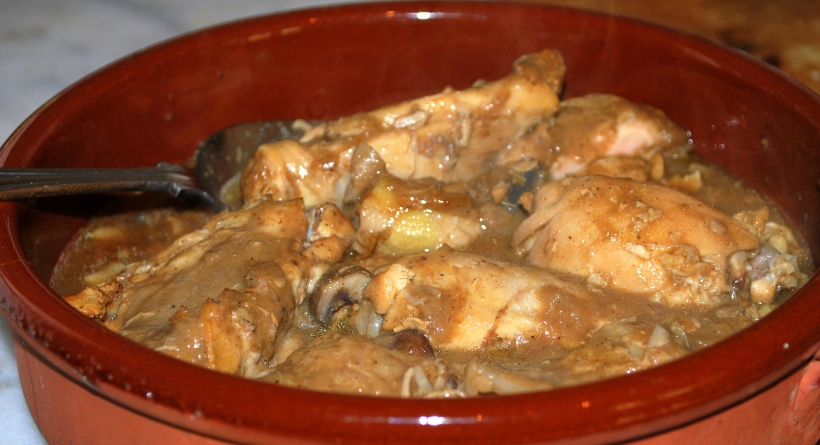
This dish was really simple to prepare, (although I’m sure it’s not authentically Chinese!) but the flavour was amazing. Actually, if you took the ginger and star anise out it was very similar to any meat dish in Spain prepared “al ajillo” ….with lots of garlic. Sorry about the photo…real life cooking and eating here folk….I just plated it up, took a snap and we tucked in!

Ingredients (to serve 4)

  • 2 tsp grated ginger
  • 4-6 crushed garlic cloves
  • 2 star anise
  • 150ml Chinese rice wine (or use dry sherry)
  • 2 tbsp dark soy sauce
  • 1 tsp sesame oil
  • 5 tbs water
  • 8 chicken thighs or drumsticks (skin off is better for this dish unless you want to brown them first with the skin on)
  • Shredded spring onion to garnish (clearly I forgot this bit!)
  • Plain boiled rice to serve

Mix together the ginger, garlic, star anise, rice wine, soy sauce, sesame oil and water and pour over the chicken. Leave to marinate for a few hours or overnight if you have time.  Place everthing into a saucepan and bring the chicken and marinade to the boil.

Transfer to the slow cooker (or an ovenproof dish with a lid) and cook on low for about 4 hours (or 2-3 hours in a low oven) until cooked through and tender.

When done, remove the star anise. If the sauce is too liquid, reduce for a few minutes in a saucepan and pour over the chicken to serve.

(Tastes even better the next day)

Chocolate and Amaretto Semifreddo

Now please don’t send the dessert police round if this is not really an authentic semifreddo. I’ve just looked at the Wikipedia definition and it seems like it should have ice cream mixed in with the whipped cream.  Oh dear, Chica taking shortcuts again.

Regular readers of this blog will probably have already noticed that I don’t post a huge number of dessert recipes. Mainly because I’m not very sweet toothed, and secondly because Big Man and I don’t really need to be eating too many naughty treats and generally stick to fruit and yogurt at the end of a meal.

But sometimes, yes sometimes, life calls for pudding and with some new pals round recently for supper, this was such an occasion. Obviously, after a long day of house renovation, I needed a meal which I could prepare in advance so that I could relax and enjoy the food and company.

The main course was Pollo Cacciatore, made the day before. Dessert was made the evening before, inspired by part of a programme presented by Nigella Lawson. I missed the detail of the recipe, so this is my version and it worked out perfectly. I am my own Domestic Goddess.

Semifreddo (4)

Ingredients (serves 6-8….well 4-6 in my house)

  • 600ml of double or whipping cream
  • 100g of your favourite chocolate which you need to put into the fridge for an hour or so
  • 2-3 tablespoons of amaretto (or your favourite liqueur)
  • 4 ready-made meringue nests (or you could be a complete Domestic God or Goddess and make your own)
  • A loaf tin or plastic ice cream tub lined with cling film

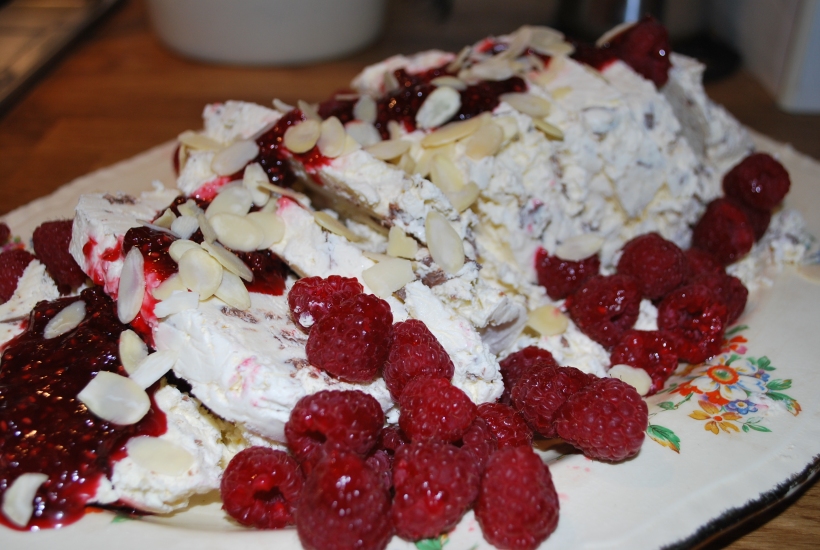
Beat the cream until is softly whipped (but not stiff). Finely chop the cold chocolate and add it to the cream with the liqueur then crumble in the meringue (break it up into small pieces). Mix gently with a large spoon until combined and then spoon it into your container. Cover with cling film and freeze until you are ready to serve. Take it out of the freezer a few minutes before you want to eat and slice it (I found it easiest with a bread knife) into portions.

I served mine with fresh raspberries, a raspberry coulis (made with one cup of raspberries and half a cup of icing sugar, cooked then sieved) and some flaked almonds. It’s not the most beautiful photo in the world, I apologise, but it was taken as I served it up after an evening of food and wine conviviality, at about 10pm in an underlit kitchen.

Easy, delicious and very little effort. Perfect!

Pollo Cacciatore – Hunter’s Chicken

How many ways can you make Chicken Cacciatore? Quite a lot if you go by the recipes that pop up if you do an internet search. I imagine that the most authentic recipes rely on very few ingredients if they were cooked out doors by the hunters over an open fire. But perhaps they were cooked indoors by the hunters’ wives for their return.  I imagine that when they went out hunting they were probably tracking wild boar or something that really offered a sporting challenge. I don’t think Chicken Hunting would provide much of an adrenalin rush to the boys out for a day of testosterone, alcohol and guns.

Pollo Cacciatore (3)

Enough wondering about hunters and authentic recipes, here’s my version which relies mostly on store cupboard ingredients (well, I did have to hunt out my smoked pimentón from the back of the cupboard so I think it counts).

Ingredients to feed 6 hungry hunters

  • 1 large chicken jointed (I jointed mine into 14 pieces – 2 legs, 2 thighs, 2 wings, each breast cut in two, the rest of the carcass into 4 – all with the bone in)
  • About 2 cups of your favourite homemade tomato sauce or use tinned tomatoes
  • A tablespoon of tomato purée
  • 3 fat cloves of garlic, peeled and thinly sliced
  • An onion peeled, halved and cut into medium slices
  • About half a cup of olives
  • A large glass of red wine
  • Salt and Pepper
  • A teaspoon of smoked pimentón or paprika
  • A red pepper thinly sliced
  • About 6 rashers of smoked streaky bacon cut into small pieces (or use lardons)
  • A few sprigs of rosemary
  • Olive oil for frying

Start by heating a few tablespoons of oil in a large pan and (in batches) brown the chicken pieces and set aside. Add more oil if necessary. In the same pan gently fry the peppers, garlic and onions until soft then add the bacon and fry (on a higher heat) until the bacon starts to crisp.

Pollo Cacciatore (1)

Add the tomatoes, tomato purée, wine, rosemary, pimentón and seasoning and bring it up to a bubble. Add the wine, olives, chicken and rosemary and cover. Cook gently on the stove top for about an hour or in the oven on low for a couple of hours. Check every so often and if the sauce is starting to dry out, add a splash of water.

When ready to serve, cook for a few minutes on the hob to thicken up the sauce if necessary and serve with mashed potatoes or rice. Tastes even better if made the day before. Any leftovers are wonderful with pasta. And a little glass of that red wine…

Apricot Stuffed Pork Loin

Apricot Stuffed Pork (1)

Rest assured that despite the hard work, rubble and paint that is our life right now, we never go hungry!  In fact, we even manage to do a little small scale entertaining and this dish was one I made when Best Pal Ria and her brother-in-law came to visit and see what we had been up to.

I was inspired to cook this dish after having seen a beautiful recipe from ChgoJohn, take a look at this beautiful Roast Loin of Pork with Fig Preserves.

It was a great dish as it can be prepared ahead and served hot or cold, leaving you time to catch up with your guests.

Ingredients

  • A loin of pork (or a boned shoulder) mine weighed about 1.75kg 8 (which serves 6-8 people)
  • 10 finely chopped dried apricots soaked overnight in orange juice
  • 1 tablespoon of harissa paste
  • 2-3 tablespoons of pine nuts dried fried until toasted (or you can do this in the oven)
  • Salt and pepper
  • A glass of white wine (or chicken stock)
  • Olive oil

Use a long sharp knife to cut a slit through the middle of the pork loin (think of a hollow tube) so that you can then fill this with “stuffing”. Mix together the apricots and the juices, the pine nuts, the harissa and about 2 teaspoons of olive oil. Season the mixture and use it to fill the pork loin.

Season the outside of the loin and rub a couple of teaspoons of oil into it. Place the meat into a deep dish, cover with a lid or tightly with foil and cook at a medium low heat for about 3-4 hours. Remove the meat from the juices (which you will save) and chill the meat. Don´t skip this step, it makes serving so much easier!

The next day, thinly slice the meat into rounds. Warm the sauce and reduce a little. If you want to serve the meat cold, serve the sauce separately. If you want to serve it warm, pour about a third of the sauce over the meat, cover with foil and put into a medium oven for about 20 minutes and serve the rest of the sauce on the side.

I served mine with cous cous with mint, lemon zest, pomegranate and pine nuts but we ate if before we remembered to take a photo!

Lamb Shanks with Borlotti Beans

Any regular readers of this blog will know that in the colder months, when I can light the oven in Spain (or pretty much any time in England) I am a huge fan of slow cooked comfort food.

Lamb Shanks with Borlotti & Harissa (1)

In Spain we often eat pork shanks, in England we got to enjoy lamb instead.  Here´s a simple recipe that is great for those cold winter days or nights and also a useful dish for entertaining as it can be prepared ahead and then forgotten about for several hours before serving.

Ingredients (to serve 2 people, easily doubled)

  • Two lamb shanks
  • 1 can (400g approx) of borlotti beans
  • About 1 cup of chopped tomatoes (tinned are fine at this time of year)
  • A sprig of rosemary
  • 4 cloves of crushed garlic
  • A glass of red wine
  • A teaspoon of olive oil
  • A teaspoon of tomato purée
  • Salt & Pepper

Mix all the ingredients (except the meat) together and season, pour them over the lamb using a deep oven proof dish. Cover with a lid or wrap tightly in foil and cook in a low oven for about 4 hours.

Serve with creamy mashed potato and make sure to finish that wine you opened to make the dish.

Curried Meatballs

A recent tidy up of my cookery books turned up two Indian books by Anjum Anand which I had hardly read.  Time to put that right I thought, and next thing I was in the butcher´s shop ordering pork mince.

Of course, pork would not typically be a meat used in most Indian curries for religious reasons, but this would be great with any other meat. For a fantastic recipe using minced beef, check out Frugal´s gorgeous Beef Kofta Curry recipe.

As ever, I had to make a few small changes, but not too many. I had no fresh coriander so substituted dried, ground coriander and the same went for fresh ginger. We can get it here, I just didn´t have any to hand and when the craving for curry strikes, you have to go with it!

This recipe is adapted from Indian Food Made Easy.

For the meatballs

  • 300g lamb mince (I used pork)
  • 2 tbsp finely chopped fresh coriander leaves and stalks (I used 1 teaspoon of dried coriander)
  • ¾ tsp garam masala
  • 1 tsp finely chopped ginger (I used ¼ teaspoon of dried)
  • 3 cloves of crushed garlic
  • 1 large egg
  • Salt to taste

For the Curry Sauce

  • 1 medium onion finely chopped
  • Vegetable oil for frying
  • 2 bay leaves
  • 1 small shard of cinnamon
  • 2 ½ medium tomatoes (puréed) – I used 1 ½ cups of my conserva from last summer
  • 800ml water (I used about 300ml)
  • ½ tsp ground turmeric
  • ¼ – ¾ teaspoon of chili powder (to taste)
  • 2 tsp coriander powder
  • 1 tsp garam masala
  • Salt to taste
  • Chopped coriander

Mix all the ingredients for the meatballs together plus 3 tbs of the onion you have chopped for the sauce.

Heat the oil in a deep pan, add the bay leaves, cinnamon and remaining onion and fry until the onion is golden brown.

Add the tomatoes, ginger and garlic and cook gently for about 8 mins then add 200ml of water and cook until thickened.  Add the spices and salt and any remaining water (I didn´t add much as I continued cooking with a lid on my pan) and simmer. Meanwhile roll the meat into walnut sized balls and drop them into the sauce.

Cover and simmer, turning the meatballs gently half way through, for about 20 minutes. Add the coriander and serve with rice, naan bread, popadums…however you like.

We ate ours with my Sort of Saag Aloo made with the first of our spinach which is now ready to eat.

…and a cool and creamy raita (I´ll give you that easy recipe another time)…

This was a warm but not too hot curry with the lovely flavours of cinnamon and ginger, definitely one to make again.

Baked Chicken Breast with Cream Cheese Stuffing and Tomato Sauce

When you breed chickens for eating, you´re going to have to deal with the chicken, the whole chicken, and nothing but the chicken.

Most of our Fat Boys end up being cut up into individual portions with the skin off – they´re easier to store in the freezer that way and you don´t have to pluck them.  Chicken Breast has always been my least favourite part…typically it can be a little dry and bland.  Now that we get to eat our own chickens, I can at least say that the breasts are neither dry nor bland and taste great just done on the griddle with olive oil and salt and a squeeze of lemon juice at the end.

Some of our chickens are real monsters though – and with no artificial feed.  Just corn, wheat and a long-ish life (at least in terms of chickens for eating) pecking around our olives.  One chicken breast can weigh about 500g and is plenty to feed two.  Sometimes it´s nice to jazz it up a little, and this is a firm favourite.

  • One monster chicken breast or two regular
  • Two tablespoons of cream cheese mixed with one crushed clove of garlic, a sprinkle of salt and a tablespoon of your favourite herb finely chopped (I like basil or chives with this)
  • About four tablespoons of tomato sauce (i.e. made from fresh or tinned tomatoes)
  • Grated cheese
  • Seasoning
  • Olive oil

Split the chicken breast in two without cutting all the way through.  Fill with the cream cheese and close.  Season with salt and pepper and drizzle a little olive oil over, massaging it in all over.

Put into a baking dish and pour over the tomato sauce.  Bake on medium for about 30 minutes.  Check that it is done by piercing it – if the juices run clear, you´re done.  If not, cook for a further 10 mins, check and repeat if necessary.  When cooked, grate cheese over the top, pop it under a hot grill until the cheese is melted and bubbling, and serve.

This is a great prepare ahead dish (up to the stage before you start to cook) and if the breast is large, serve cut into slices with a little extra tomato sauce on the side for your loved ones who prefer things saucy!

Christmas “Pudding” Jewelled Ice Cream

If you don´t like cake, or stodgy puddings, a great alternative at Christmas is ice cream.  To me there is something very decadent, almost naughty, about eating ice cream in the depths of winter. Of course, if you live somewhere that Christmas falls in the middle of summer, then it´s even more perfect.

We´ll be eating this not as an alternative to pudding, but as well as!  I´ll serve it with my Light Christmas Pudding and Boozy Fruits….and who knows, a few mince pies may sneak onto the table too.

It´s very easy to prepare, and can obviously made ahead of the Big Day. It´s another Delia Smith´s Christmas recipe, which I have tweaked a little over the years.

The night before you want to make the ice cream, soak about 100g of your favourite mixed candied peel (chopped) and raisins, plus some glace cherries in about 6 tablespoons of rum or your favourite liqueur and stir in 3 tablespoons of honey. I also used dried apricots and cranberries – it´s up to you!

For the ice cream, using an electric whisk, beat 4 egg yolks with 100g of caster sugar until pale.  Grate about 75g of creamed coconut into 400ml of double or whipping cream and heat it gently until the coconut has melted.  Stir over the egg mixture while whisking (it should thicken a little, but don´t worry if it doesn´t) then when it has cooled a little stir in 200ml of thick, creamy, Greek yogurt and add about a teaspoon of vanilla essence (optional).  Finally stir in the fruit and alcohol with honey and pour into a 1litre pudding basin.  Cover with a lid or a few layers of foil and freeze.

When it is about half frozen (it took about 8 hours in my very packed freezer) spoon the mixture out into a bowl and mix it gently to distribute the fruit which will have sunk to the bottom, then pack it back into the pudding basin.  Cover, freeze and forget about it until you are ready to serve.

This ice cream stays fairly soft, so you can turn it out and serve it immediately.  I usually hold a hot wet tea towel around the bowl for a few seconds before turning it out. It doesn´t look quite as pretty in the photo today as it will on the Big Day on a beautiful plate and drizzled with boozy fruit.

Mussel Soup – A hearty bowl of mussels cooked with garlic and tomatoes

A Rare Sunny April Day in the Garden

Well, it´s been a while since I posted anything at all, let alone a recipe.  It´s been a hectic 5 or 6 weeks with 3 lots of visitors, which was wonderful.  Also, a fall down the patio steps (am still feeling rather delicate in the nether regions) and a broken camera which meant that I couldn´t take any pictures.  All very frustrating but the derrière is now on the mend and we´ve bought a new camera.  Hurrah!

Fish Man came by this morning, and I decided to see what he had tucked in the back of his little van.  I´d been fancying a warming soup as we´ve had the worst (and wettest) Easter here in Andalucía for 80 years, and the rain and storms are set to last for a few days more.  Combine this with the most dreadful hay fever and I feel like I have a bad dose of flu with a serious hangover on top.  I don´t actually have a hangover, although it might have been fun putting in the work to achieve it, just the pain! Fortunately Fish Man had some beautiful mussels, not of the bicep kind you understand, so I bought a kilo.

I was torn between doing them in a creamy, oniony, white wine base or a garlicky, tomatoey one.  The tomato won – I felt that my nose needed a good assault of powerful smells! This is a very easy and quick to cook dish that looks as though you spent hours in the kitchen creating something “gourmet”.

The serving I made would feed two as a main course or four as a starter.

Ingredients used were:

    • A kilo of mussels
    • 3 fat cloves of garlic, crushed
    • Half a medium onion finely chopped
    • About a cup or half a tin of chopped peeled tomatoes
    • Olive oil for frying
    • Small glass of white wine
    • About 2 tablespoons of finely chopped parsley
    • Salt and pepper
    • Water (optional)
Rinse the Mussels Several Times
    Start by cleaning the mussels.  Not as tricky as it may seem.  I usually rinse them three or four times in cold running water.  Throw away any that are cracked or open.  You then need to remove the “beard” which is the small strand of seaweed looking stuff which usually just pokes out of the straighter side of the mussel.  Hold the mussel in one hand with the point facing down and the curved part into the palm of your hand.  Grab the seaweedy strand with your thumb and forefinger of the other hand and pull it upwards – it will slide out and you´re done!
Cleaned and De-Barnacled!

If your mussels have any barnacles attached, you can pop these off with the blade of a flat (butter) knife.  Finally a quick scrub (I use a metallic pan scrubber for this) and a final rinse and they´re done.

Put the mussels to one side and start on the base.  In a deep saucepan which has a lid, heat some olive oil (enough to sweat the onion and garlic).  On a low heat, sweat them off for a few minutes until soft and transparent. I used a red onion today as it was what I had, but it´s just as good, if not better, with a stronger tasting white onion.

Gently sweat the onion and garlic

Now add your tomato (you can also add a teaspoon of tomato puree if your tomatoes are a bit pale or lacking in flavour).  Keep on a low heat and put the lid on and leave to simmer for about 5 minutes.  Remove the lid, add your wine and seasoning and bring to a bubble then reduce to a simmer and leave to cook gently for 5 minutes.

Make the tomato base for the soup


The base is now ready and you can stop here until you´re ready to eat – the final stages will only take you about another 5 minutes, so this is a good “prepare ahead when you´ve got guests” dish.

Finally...add the mussels and parsley

When you´re ready to eat, warm the tomato sauce, add the mussels and the chopped parsley and put the lid on.  I usually do this on a medium heat and after about 2 minutes check and see how the mussels are doing.  You may need to put the lid on and give the pan a shake to move the mussels around a little.

Once they´re all open they´re ready to eat.  The mussels will release their juices so see how much you have in the pot.  If you feel you´d like a little more liquid, add a glass of water (or fish stock or wine), if not, they´re fine as they are. I don´t usually add more liquid, these measurements give two large bowls of mussels and enough stock for two good bowls of soup.

Enjoy - but don´t forget the wine!

You can serve with a salad and plenty of crusty bread to mop up the juices.  I recommend serving with a spoon and fork.  The fork is for getting those mussels out of their shells for those guests who don´t want to use an empty shell to do this, and the spoon is for the soup part.  They´re also nice, particularly if you serve them with less liquid, with crispy chips and garlicky mayonnaise.  Don´t forget to put an empty bowl on the table to chuck the shells into and a bottle of chilled white, rosé or red wine.  Yes, I do mean chilled red, believe me, it works! It´s one of those dishes that works with any wine.  A bit like me really…