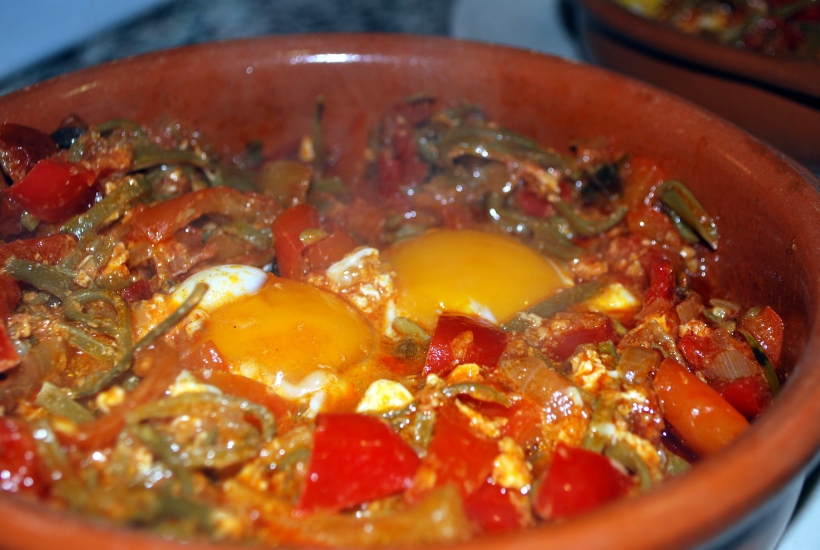
Fish Pie, a hug in an oven dish

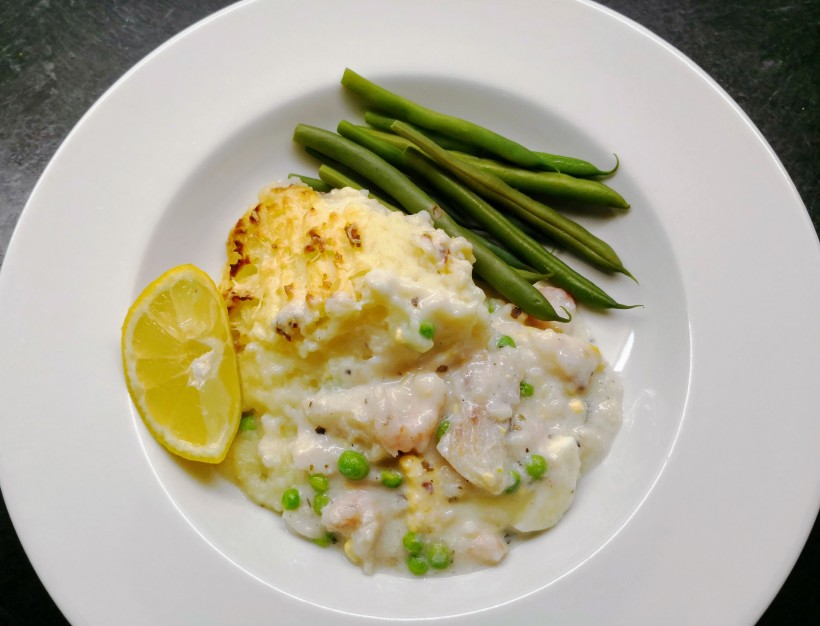
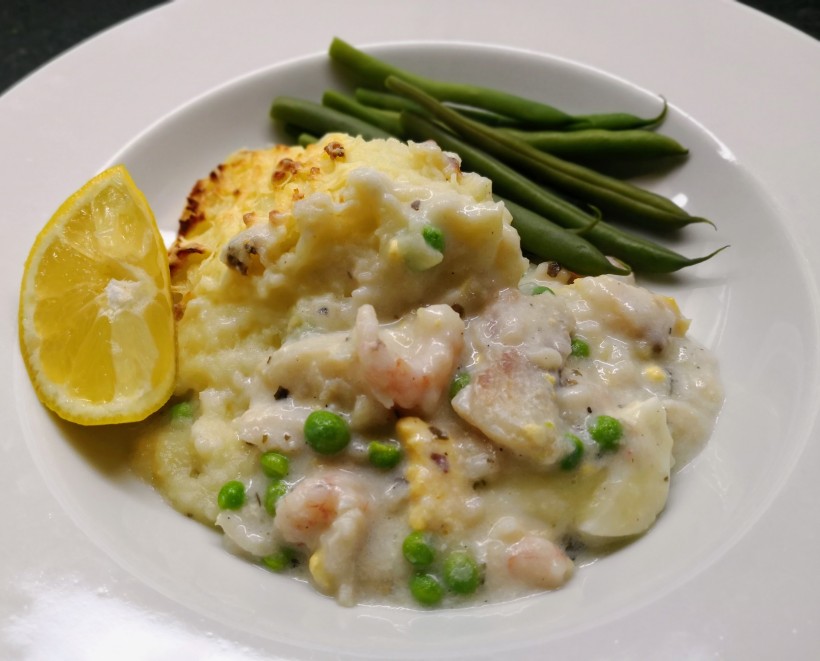
Fish Pie to me really is comfort food. Creamy sauce, chunks of beautiful flaky fish and fluffy, cheesy mashed potato. It’s not difficult to make, it just takes a little time. It’s a great prepare ahead dish if you bring it up to room temperature an hour or so before you want to cook it. We’ve had cold foggy days, gloriously sunshiny days…it’s so hard to know what to cook. This always seems to fit the bill though!
IMG_20180301_201111

You can keep it basic for a mid week family meal, or if you add scallops, prawns, capers and a mix of your favourite fish it really can be grand enough for entertaining. The  choice is yours, you don’t need to be rigid with the measurements…make it your own! I make my bechamel the easy, all-in-one way and use olive oil instead of butter, but do feel free to make it the more traditional way making a roux of flour and butter then gradually adding the milk if you prefer.

Ingredients (to serve 4 generously)

  • Approx 400g of mixed fish (I used cod, smoked haddock, salmon and prawns)
  • 2 hard boiled eggs, peeled and chopped into chunks
  • Approx 1kg floury potatoes, peeled and boiled until soft enough to mash
  • Olive oil (or butter to add to the mash plus about 100ml of milk)
  • 450ml of milk (full fat or semi skimmed)
  • A bay leaf and a few peppercorns
  • 2 heaped tablespoons of plain flour
  • 1 tablespoon of olive oil
  • A cup of frozen peas or 2 cups of washed fresh spinach
  • About 2 tablespoons of grated cheese (I used cheddar)
  • Salt and pepper
  • Optional: a tablespoon each of finely chopped parsley, capers and gherkins

Place the fish in the milk with the bay leaf and peppercorns and heat gently. Once bubbles appear on the surface of the milk, remove the fish with a slotted spoon  and set aside. Allow the milk to cool completely. This stage can be carried out the day before if it’s easier.
IMG_20180301_200659

Add the flour and olive oil to the cold milk and bring gently to a simmer, whisking as you do. The sauce will start to thicken. Simmer for 2 or 3 minutes then remove from the heat. Break the fish into chunks then stir into the white sauce with the chopped egg and capers, gherkins and parsley if using. Now add the frozen peas (no need to defrost, they’ll cook in the oven)  or spinach and stir to mix in well. Season, taste and adjust if necessary.

Pour the  mixture into an ovenproof bowl (deep enough for a layer of mashed potato on top). Allow to cool down a little.

Mash the cooked potatoes while they are still hot, adding a generous slug of olive oil or a large knob of butter as you mash. When it’s free of lumps, whisk in the milk adding enough to give a soft, smooth purée that will hold its shape. Don’t use all the milk if it starts looking too wet, add extra if the potatoes are particularly dry.

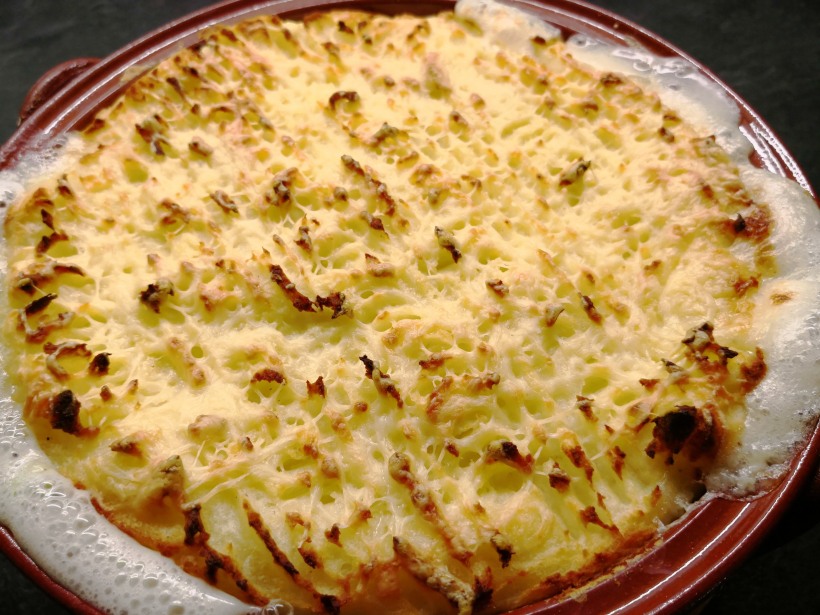
Spoon (or pipe, if you’re that way inclined) the potato on top of the fish. Run a fork over it if you haven’t piped it as this will give you lots of lovely tiny peaks which will go brown and crunchy in the oven.
IMG_20180301_201119

Bake at 180° fan (190° regular oven) for 30 minutes then sprinkle the grated cheese over the potato and bake for a further 10 minutes until the pie is bubbling and browned.

Leave to stand for 5 minutes before serving. Enjoy the fish pie love and hopefully someone else will offer to do the washing up…

Give us this day our daily bread…

I make our bread several times a week. I enjoy the process and now that I’m using my starter Hercules, Son of Priscilla (thanks Celia!), my loaves are going from strength to strength. I confess that most of the time I make my usual sourdough loaf, starting the process the night before and baking early evening of the next day.

DSC_0032

Other times I use Celia’s overnight sourdough recipe which gives fantastic results and I took on board her tip of dusting the loaf in semolina flour for a crunchy crust. Clearly, as she’s my bread making heroine/guru and I am her keen student/bread making stalker, I also made some teeny tiny loaves (like she did) using some small loaf tins I had bought to make cakes in but had never used. They turned out wonderfully and were the perfect size for a hugely filling lunch roll.

Bread 001

The last few weeks have given me time too to do a little experimenting and for Easter Sunday my father requested a loaf with whole eggs baked into the top of the dough, as this is what his mother used to make when he was a boy. I Googled Calabrian Easter bread and most of the recipes led me to make a slightly sweet bread, gently flavoured with anis and made using eggs and milk. The least said about the egg dyeing the better, but everyone enjoyed it. We all felt that it was like milk bread or pan de leche as it’s called in Spain and would probably prefer to eat it as a breakfast or tea time bread. I’m going to experiment making it again in small rolls so once I’ve perfected it, I’ll post the recipe.

Italian Easter Bread 001

The most recent experiment was to use my sourdough starter to make a whole grain loaf. I wasn’t really sure what sort of results I’d get as wholemeal flour tends to rise more slowly than white flour and give a heavier bread. Combined with a slow rising, heavy sourdough loaf I was a little concerned I’d end up baking the cornerstone of our next building project, but using a mix of a flour which contained wholemeal, wheat flakes and bran with a strong white bread flour, I got fantastic results. The bread was malty, tangy and chewy and delicious spread with butter or drizzled with olive oil. I followed the same process as my usual loaf, but didn’t add olive oil. I added an extra knead and a slightly longer bake.

Ingredients

For the sponge

  • 100ml of unfed sourdough starter (mine is fed with the same volume of flour and water)
  • 250g wholemeal flour with flakes and grains
  • 300ml water

For the dough

  • 300g strong white bread flour
  • 10g salt

The night before you want to bake (or fit this into your usual baking routine), mix the ingredients for the sponge, cover and leave overnight or for about 8 hours. Don’t forget to feed your original starter to replace what you took out!

Bread 006

The next day, add the remaining flour and salt and in a mixer with a dough hook (this is quite a wet dough) knead for 10-12 minutes until the dough looks stretchy and elastic.

Turn it into a large, oiled bowl and cover with oiled cling film. Leave it to double in size, mine took about 5 hours, but it will be different for everyone. Turn out of the bowl onto an oiled surface, knock it back, form it into a ball and put it back into the oiled bowl and cover again. Leave to rise again, this should only take a couple of hours, and turn out onto a lightly floured surface. I didn’t use semolina but feel free to use whatever you like best.

Knock back and shape either onto a round or put into a floured banneton (which is what I did). Cover with a tea towel and leave to double in size.

Bread 004

Just before you are about to bake, turn your oven on to heat at top “volume” with an oven tray inside if you are going to turn out from a banneton. Once the oven has reached its temperature, carefully take the tray out and turn your loaf onto it. Slash with a very sharp or serrated knife, put it in the oven and turn the temperature down to 150C (Fan) and bake for about 55 minutes until nicely browned and it sounds hollow when tapped on it’s lovely wholemeal bottom.

Drive yourself crazy for a few hours while it cools with the wonderful smell of your freshly baked loaf and enjoy whichever way you most enjoy bread!

Asparagus and Sour Cream Tart

There’s something about asparagus that makes me happy. Well, a few things really. It tastes wonderful, it looks pretty and has an amazing colour which screams “spring”! It also feels like a luxury ingredient, which it most certainly used to be, but in reality is one which is now readily available and easily affordable. Mind you, in a few weeks when we have the start of the wonderful English asparagus season, we may pay a little more but oh it will be worth it for the flavour!

Asparagus & Sour Cream Tart (4)

Blogging too makes me happy, it allows me to keep a record of dishes I enjoy cooking and eating, it allows me to share my passions with like-minded folk and it has introduced me to new pals around the globe. New cuisines are available at the click of my mouse and one such cuisine which I am gradually learning more about comes from Germany. A wonderful blogger, Ginger, shares her recipes and memories over at Ginger and Bread. A German, with a Chilean partner living in London. Do pop over if you get the chance. She recently shared a recipe for a traditional onion quiche and I was intrigued by the use of sour cream in there with the rest of the more familiar ingredients. Time to buy a carton of sour cream and give this style of quiche a go!

Ingredients (to serve 6)

  • 1 packet of puff pastry (I used puff as this is what I had to hand, use short crust, or make your own – you decide)
  • 1 bunch of Asparagus
  • 3 eggs
  • 300ml of sour cream
  • 100ml milk
  • About 50g grated cheese (I used smoked gouda)
  • Salt & Pepper

Start by snapping off the woody ends of the asparagus and blanching the spears in lightly salted boiling water for about 3 minutes. If you don’t have a wide enough saucepan to take the spears whole, use a deep frying pan filled with water. Drain, rinse in cold water and put to one side.

Turn the oven on to medium (180C in my fan oven)

Line a tin with greaseproof paper (optional) and lay the pastry inside. If you use a flan tin with a loose bottom you don’t need to line – it just makes life easier when it comes to lifting the tart out when it’s cooked if your tin does not have a loose bottom.

Trim the pastry to fit and prick lightly with a fork.

Beat the remaining ingredients (except the asparagus) together and season. Pour into the pastry case then lay the spears gently on top.  Bake for about 45 minutes until lightly puffed up and just starting to turn golden.

Delicious hot or cold, but leave it to cool down slightly for at least 5 minutes before cutting. The addition of sour cream gives you a soft, fluffy filling, almost mousse like. Lovely with a simple dressed salad and great too for picnics.

Bean meaning to mention…..

Beans! Well, not just beans but Winter salads.  Winter doesn´t have to mean an end to fresh delicious salads, but the colder weather means we probably want something a little more robust but no less fresh and delicious to eat as a light meal or to accompany grilled meats, fish or whatever takes your fancy.

Especially after Christmas, and all that heavy food, these are welcome light meals to ease the strain on the waistband. And talking of Christmas, belated greetings to you all and apologies for the silence. Almost regular service will be resumed this week, and I hope that you all had a wonderful time with your loved ones, I will be slowly catching up with your blog posts over the next week or so.

Anyway, back to the food.  We´ve been trying to support local shops as much as possible and to buy locally grown, seasonal vegetables in the absence of our own veggie garden or store cupboard. Sometimes though, you just have to give into cravings and buy things that are out of season or grown elsewhere. Green beans seem to be everywhere in the supermarkets now, along with mange tout and runner beans. Maybe it´s my body craving something fresh and crunchy that makes me respond to the vibrant green colour. Who knows, but the beans were delicious!

Ingredients are flexible in these two tasty dishes, they´re just meant to inspire you, not dictate to you. Use what you have available, enjoy the fresh flavours.

Bean & asparagus salad (1)

Green Bean and Asparagus Salad

  • Blanch green beans and asparagus until just tender, then run under cold water to stop them cooking further. Chop into bite sized pieces, add halved cherry tomatoes, a chopped avocado and some hard boiled egg. Sprinkle over some sliced jamon or grilled bacon (leave out for a veggie version) and dress a mix of with balsamic vinegar, olive oil, English mustard, a pinch of sugar and seasoning.

 Potato, bean & caper salad (4)

Potato, Roasted Red Pepper, Bean and Caper Salad

  • Mix together cubed boiled potatoes, strips of roasted red peppers, green beans and halved caper berries.  Make a dressing of olive oil, lemon juice and zest and salt and pepper. Mix the salad gently. As a little added luxury, drizzle over some truffle oil.

Veggie Garden Eggs

Well, we´ve been home a week and, as expected, it´s been a week of running around seeing folk, catching up with all that awaits you after a 2 month absence and lots of eating and drinking!

Veggie Garden Eggs (10)

When I first used to visit Big Man before I lived in Spain, he was puzzled as to why I used to complain at the lack of vegetables in our diet. Spain has beautiful vegetables pretty much all year round. The problem is, when you live in the mountains and are eating in restaurants, the focus is on heavy mountain dishes – predominantly meat. Of course, this week, he´s come to understand what I was talking about and started groaning that he couldn´t face another meat heavy meal.

No problem, the little bit of veggie gardening we managed to do this year was tucked happily in our freezer and our lovely hens were happy to oblige with delicious free range eggs.  The result? A delicious, home cooked, not too heavy, but satisfying meal made entirely from home grown ingredients.

It´s similar to a Spanish dish called Huevos a la Flamenca, which I´ll show you another time, but today it was less about the jamon and the chorizo, and all about the vegetables. Leave out the eggs and you have a vegan meal, add them in and it´s vegetarian.

Ingredients for 2 people as a main course

  • 1 sweet onion, halved and thinly sliced
  • 4 cloves of garlic, peeled and thinly sliced
  • 1 cup of crushed tomatoes
  • 3 mixed peppers, cut into thick slices
  • About a cup of a favourite green vegetables (I used our runner beans, thinly sliced)
  • 2 tablespoons of tomato purée
  • A sprig each of oregano and rosemary
  • A glass of wine (or water) Salt & Pepper
  • Olive oil

Start by gently frying the onions and garlic in a little oil until they start to soften then add in the peppers. Cover with a lid and when the peppers start to soften add the rest of the ingredients. Cover with a lid and allow to simmer gently for about 20-30 minutes until the peppers have broken down and are very soft.  Taste and adjust the seasoning and if too liquid, cook for a minute or two to reduce the sauce and remove the herbs.

Veggie Garden Eggs (2)

Transfer into individual (heat proof) serving dishes if you like, then crack two eggs into each portion. You can either pop the dishes into the oven on a medium heat for about 10 minutes until the eggs are set, or continue to cook on the stove top (this is what I did). If you like a soft yolk, using a chop stick or the “wrong” end of a spoon, gently stir the white into the vegetables as it cooks, avoiding the yolk. The white will “scramble” into the vegetables and the yolk will stay soft.

A foggy morning Up the Mountain

Eat with plenty of crusty bread and listen to your body thanking you for giving it a welcome hit of Vitamin C. A glass of wine also helps, but then it´s made of grapes and grapes are fruit…right?!

Prawn and Mushroom Quiche

Now, I know quiche isn´t remotely Spanish, but just think of it as a tortilla in a pastry case!  I have introduced Big Man to quiche over the last few years and it has become a big favourite.

It´s also an easy dish for me to prepare right now with just a few pots and pans at my disposal and (yes, I confess) I used ready made pastry this time.

Remember Clara´s Pastry for my mince pies? Well, here it is again, it´s a very versatile and tasty pastry. And when I´m not being so lazy or covered in dust, I´ll make my own again!

Ingredients for the pastry

  • 200g plain flour
  • Pinch of Salt
  • 50g each of cold butter and lard
  • One egg, beaten
  • Milk

Rub the fat into the flour and salt until it resembles fine breadcrumbs or pulse in a food processor.  Using a broad knife, work the egg into the flour.  Start to gently bring the pastry together with your hands.  You will probably need to add a very little milk but add drops rather than slugs.  Do not knead or overwork the pastry.

Now wrap in plastic and leave to rest in the fridge until you are ready to use it, but bring it up to room temperature first.

Roll it out on a well floured surface and place into your tin, prick the base with a fork and then fill with baking beans or pulses placed on top of greaseproof paper. Trim off any excess and bake at 180ºC for 15 minutes, or until it just starts to brown.

For the filling

  • 5 eggs and 100 ml of single cream beaten together
  • A cup of peeled cooked prawns
  • A cup of thinly sliced mushrooms (lightly sautéed first)
  • Seasoning

Mix all the ingredients together, if your tin is particularly large, add a drop more cream or milk.  Pour into the pastry base and bake for about 25 minutes at 180ºC or until the centre is set.

Remove from oven and eat hot or cold.

Salmon Spanakopita… Sort Of

The gorgeous dish of Spanakopita hails from beautiful Greece. A delicious spinach pie, filled with feta cheese and egg and then wrapped in filo pastry – it´s a wonderful combination of flavours.

The weather here has turned overnight into summer with temperatures in the early 30s. Although we have used our gas barbecue on and off throughout the winter, we haven´t eaten outside. The weather now is perfect and we are going to make the most of it to eat in the garden, before the tremendous heat of summer drives us back inside to eat in the cool of the house.

I had bought a large salmon fillet (half of a whole salmon) which weighed about 1.5kg to cook for friends. The best laid plans and all that…well, the lunch didn´t happen and I had a massive piece of salmon to cook for two people.

The first lunch we simply cooked the whole thing on the barbecue, sprinkled with salt and served it with lemon juice and home made mayonnaise. We ate about a third of it so I divided the remaining piece into two and froze one piece. In this dish I used about 250g of cooked salmon so still have plenty left over to make a rice dish with prawns and salmon tomorrow.

I fancied making something different from fish cakes and remembered this lovely dish from Greece and set about recreating it, albeit with a few Up the Mountain twists. Or Making Do with what I had available. I realise that the traditional dish doesn´t contain meat or fish, but this is an interpretation rather than a faithful reproduction!

Ingredients (to serve 4 as a main course or 6 as a starter)

Please note, the ingredients are approximate, so feel free to add a little more or take a little away it it suits

  • One pack of puff pastry (275g) rolled out thinly (or use filo if you have it)
  • 180g of feta (I used fresh goat´s cheese made by a neighbour). Do check out Chgo John´s amazing method to make feta here.
  • About 250g cooked salmon, flaked
  • 225g Greek yogurt
  • 3 spring onions finely chopped (I used 1 small onion finely chopped)
  • 125g fresh spinach finely chopped and wilted (I put mine in a large metal colander and pour boiling water over it) with all the water squeezed out
  • 2 large eggs
  • ½ cup each of finely chopped dill (I used wild fennel tops which grow round here) and parsley
  • Seasoning

Heat the oven to 180ºC. Place the pastry on a flat baking tray which has been lined with greaseproof paper (or use a small one about half the size of your pastry which is a little deeper).

Mix all the ingredients together and season (you may not need much salt if you use feta).  Put the filling into the middle of the pastry and bring the pastry up and over to cover it, neatening the corners to seal the filling in. Use some water on the edges if necessary to help seal them.

Tastes great even if you didn´t seal the top up properly….

Brush with milk or beaten egg and bake for about 45 minutes until golden brown. Leave to cool slightly before eating. Perfect with a salad and a cool glass of wine.

Any ideas for that last piece of cooked salmon in my freezer? Go on, inspire me!

Back to the 70´s – Prawns in Lettuce Cups

Getting Groovy with the Prawns

Do you remember the 1970s? Well, I am sure some of you do, even if you were only babes in arms.  I was a young teenager at the end of the 1970s but it was a time in London when great changes were afoot in the world of food.  The height of sophistication at the time for a dinner party was probably something along the lines of prawn and avocado cocktail, steak with pepper sauce and Black Forest gâteau for dessert. And nothing wrong with any of that I say…but the 80s were soon going to herald the advent of Nouvelle Cuisine (or really tiny portions) and strange mixtures of ingredients such as Loin of some Obscure and Almost Extinct Creature Marinated in a Gooseberry and Guinness Jus. Well, you know what I mean.

Having watched a DVD of Abigail´s Party (I wish I knew how to insert video clips), I was clearly feeling nostalgic and decided to go a bit retro with my peeled prawns. Sometimes you just have to go with the flow and accept you´re getting old…

Ingredients for 4 people as a starter

  • Two lettuce hearts (use 8 of the bigger outside leaves and use the rest for salad)
  • 1 cup of peeled prawns, cooked and cut in half if large
  • 2 hard boiled eggs, chopped (not too finely)
  • 1 ripe avocado (chopped into small cubes)
  • 1 tablespoon of chopped parsley
  • Salt & pepper to taste
  • Half a cup of Marie Rose sauce (I made mine using 3 tablespoons of tomato ketchup, 3 tablespoons of mayonnaise, 1 heaped teaspoon of horseradish sauce, 1 teaspoon of Lea & Perrins Worcestershire Sauce and 1 tablespoon of sweet chili sauce)
  • Pimentón to taste

Simply mix all the ingredients together and spoon into the lettuce leaves.  Sprinkle with hot or sweet Pimentón.

Now, put some groovy 1970s dinner party music on the built in Hi-fi, slip into a glamorous kaftan and enjoy the evening….

Tortilla de Patatas – Potato Omelette

This was a two egg omelette made in a small, deep frying pan

I can´t believe that I haven´t posted my version of this Spanish classic.  Probably one of the most famous tapas dishes in Spain, simple, economical and delicious. Can be served hot or cold. There is always a great debate about how to cut the potatoes.  Ask 5 people and you´ll get five different answers – the choice is yours.

Ingredients per person

  • One large potato peeled, halved and cut into thin (but not wafer thin) slices or chunks
  • Half a medium onion, finely chopped (optional)
  • 2 eggs
  • 1 tablespoon of milk
  • ½ teaspoon of cornflour (optional)
  • Salt
  • Olive oil for frying

Put the potatoes (and onion if using) into a deep frying pan with straight sides if possible. This helps with turning the tortilla.  Choose the size of pan according to how many people you are cooking for – you want the tortilla to be deep, so a smaller diameter and a larger depth works well.  Cover with plenty of olive oil (this can be drained and reused) and use a low heat to braise the potatoes until they are tender, turning them over gently a few times during cooking.

Drain the potatoes and save the oil. In a large bowl beat the eggs and milk together and if you want a thicker, spongy texture to your tortilla, add the cornflour to a little of the milk then mix in with the eggs.  Season with salt then add the potatoes to the eggs and mix gently. The secret to a successful tortilla, I´ve found, is to have a high quantity of “filling” in relation to egg.  The egg binds the potatoes (or whatever vegetable you choose to use) together.

Pour a little oil into your frying pan and when it is hot, turn the heat down low, add the eggs and potatoes and cover with a lid.  This now needs to cook very, very slowly until it sets in the middle and the bottom starts to brown.

Turn the tortilla using a large plate and then slide the uncooked side into the pan. Timings will depend on how large your tortilla is.  If you are unsure about flipping the tortilla, pop the frying pan under a hot grill for a few moments to completely set the top, then flip it.  Once it is browned nicely on both sides, turn out onto a plate and enjoy it hot or cold.

For a less authentic but less calorific version of this dish, use potatoes cooked in their skins. Peel and slice or cut into chunks and then warm them through in a very little oil before adding to your egg.  I use this method more often than the “oil braising” method to help in the waistline war, and no one has noticed the difference!

For another version, take a look at my Potato and Brocolli Tortilla here.

Setas Asadas – Fire Roasted Oyster Mushrooms with Poached Eggs

I have mentioned previously that we have some mushrooms growing, intentionally I might add, in our garage.  It was a slow start, but we are now getting regular supplies of oyster mushrooms to enjoy.

After a week away, they had gone a little crazy, and some of the ordinary mushrooms which we are also growing had turned into monsters which I´ll chop up and use in sauces or soups.

Back from London with not much in the fridge, we had to “make do and mend”, as my grandmother used to say.  The fire was blazing merrily, so we put some of the larger mushrooms onto our parilla (which is a grill which you can sandwich things between) and cooked them over the embers of the fire. You could do this over a barbecue or even under the grill (for grilling I´d recommend you brush them lightly with oil first).

Once they were done we seasoned them with Maldon sea salt, freshly ground pepper then drizzled some olive oil over and added a little squeeze of lemon juice. With a softly poached egg and a plate of jamon we enjoyed a simple supper but felt that we had dined like Kings!

PS. Our dogs Luna and Alfi stayed with our lovely neighbours while we were away. Our dogs love being there and they get loads of walks.  It seems this week they discovered the joys of goat manure and spent lots of time playing in it, which was much less fun for our neighbours who had to deal with two very stinky dogs.  Alfi is now in need of a major haircut and they were both happily exhausted yesterday when we got them home.  I took this snap of them “recovering” from their week of fun whilst trying not to laugh too much at Alfi´s lack of energy to get either into or out of the bed.