Córdoba and its weirdly wonderful soup, Mazamorra

Finally the weather has improved and just as we’re getting into gear to make our way back to England, the sun has come out.
IMG_20180628_162829

It’s been a busy month with house repairs but also time to catch up with friends and loved ones and a return to a very favourite city, Córdoba. My bestie came to visit and we took her there for a visit as she had never been. We saw the beautiful Mezquita, now a Catholic cathedral but packed full of Moorish history.

IMG_20180604_161938

We also went back to Medina Azahara, declared this week a UNESCO world heritage site. Hopefully that will mean an investment of money to allow more of this amazing first century Arab Muslim city to be excavated.

IMG_20180605_113319

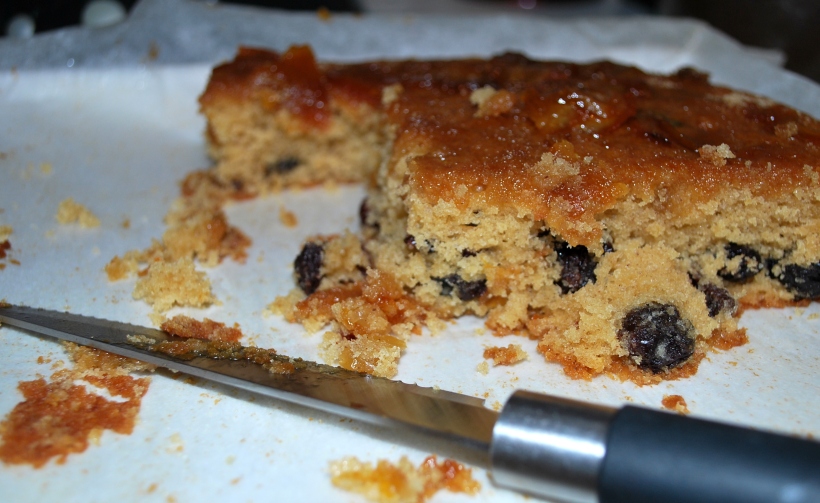
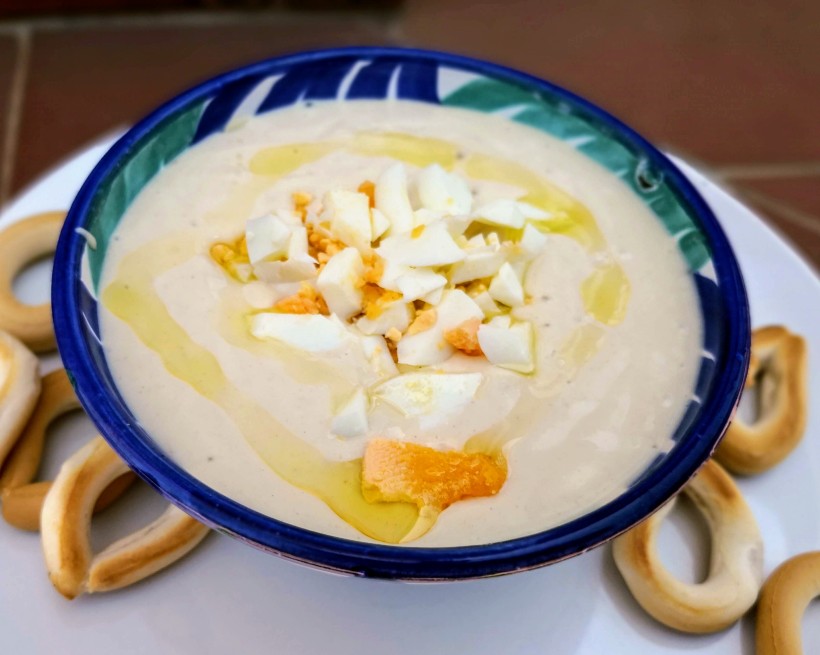
Of course, we made sure we ate and drank well and we all tried, for the first time, a chilled Cordoban soup called Mazamorra. Based on very simple ingredients, like many of the gazpachos of Spain, but giving an amazing finished result which we all loved. It’s an incredibly thick and filling dish, we shared one portion in the restaurant and when I made it at home recently, we decided that it would be perfect served in shot glasses as part of a mixed tapas selection.

You don’t need to be too precise about the weight of ingredients, just try to keep roughly to the proportions. But do give it a try, you might be as weirdly and wonderfully surprised by it as we were!

Ingredients (this makes one large bowl of soup which would serve about 8 shot glasses or 4 tiny bowls)

  • Approx 100g stale bread (use the best quality you have as this will greatly influence the flavour of the finished soup e.g. sourdough or ciabatta) soaked in a little water until soft
  • About 35g of blanched almonds
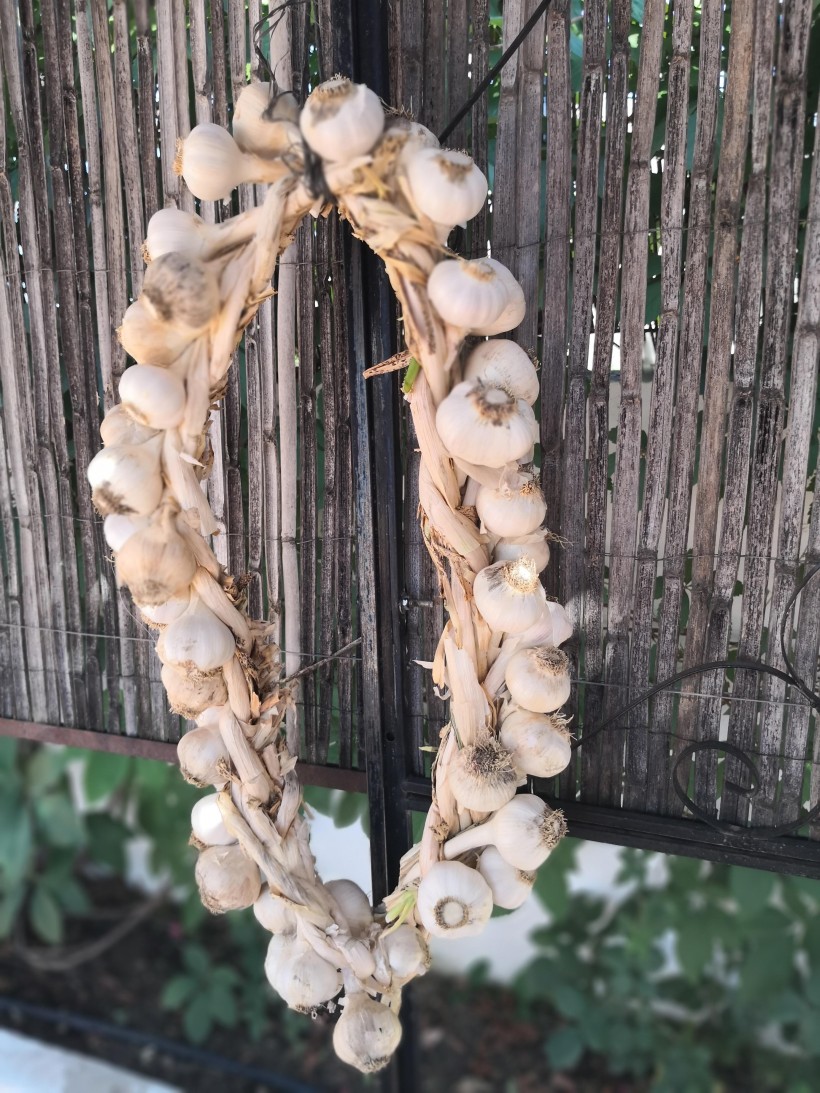
  • A small clove of garlic, peeled
  • Half a teaspoon of fine salt
  • One teaspoon of white wine vinegar
  • About 100 ml of extra virgin olive oil
  • Cold water
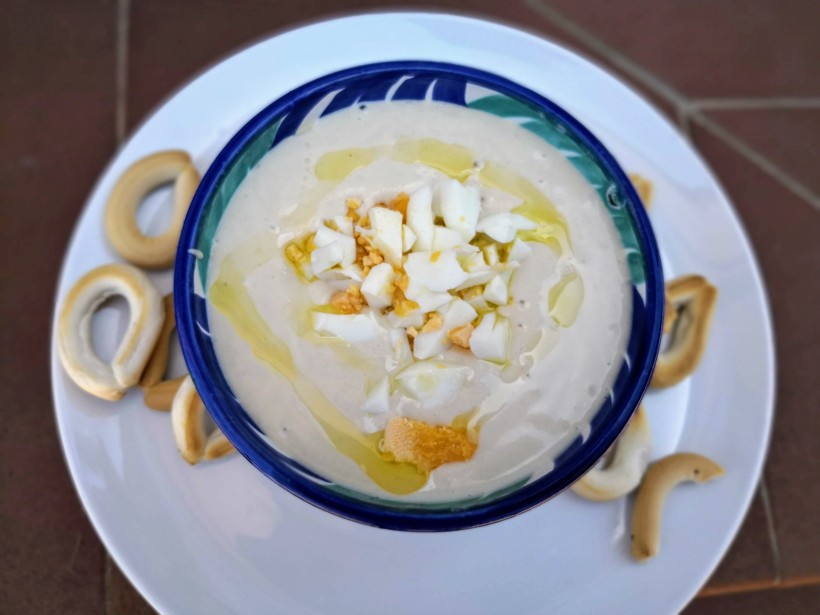
  • To garnish – chopped hard boiled egg, some chopped black olives (I didn’t have any) and a drizzle of olive oil

Put the soaked bread, the almonds, garlic, salt and white wine vinegar into a blender (I used a jug and a stick blender) and blend until you have a paste. I added a few drops of water to help things along. Now gradually add the olive oil and keep blending and adding until you have a smooth, thick paste. It should look rather like hummus. Now add a tablespoon of water at a time and keep blending. You want to end up with a mixture rather like custard. Taste and add a little more salt if you need it then chill until ready to serve.
IMG_20180627_093527
A useful gift from a generous neighbour

The restaurant we tasted this in was rather fancy and the soup was drizzled with a mango purée, which was delicious.  Traditionally, chopped hard boiled egg and chopped black olives are used. A drizzle of olive oil really works well and serve with crunchy breadsticks for dipping.
IMG_20180626_143534

If you’d prefer a more familiar gazpacho, take a look at my recipe, or perhaps you’d enjoy my very favourite, Salmorejo,  which is a chilled tomato and bread soup, also from Córdoba. All delicious, each very different from the other. Buen Provecho!

Honey, Ginger, Sultana and Orange Welcome Home Cake

Big Man has been in Spain for a couple of weeks so the day before he returned I cooked some dishes he would enjoy to welcome him home. This included a cake, as a special treat, and it was perfect for sitting around the next day (which was cold and snowy) with some good strong coffee while we had a good old catch up.

IMG_20180301_085500
Where there’s cake, there’s usually a dog…

Regular readers of the blog will know that I don’t make many cakes, and when I do I mostly go down the “all in one” route and tend to use olive oil rather than butter. Not for health reasons, but because when I first started living in Spain it was more difficult for me to get hold of good quality butter (and getting it home before it melted in the summer was an adventure in itself). As we produce our own wonderful olive oil each year, it made sense to substitute this for the butter and I soon found that it produced light and delicious cakes…so I simply kept on using it.

This is more of a tea loaf than a sponge cake and would be delicious spread with butter (the best of both worlds! ) although it’s delicious as it is. I baked this in a 23cm x 13cm loaf tin and it cuts into about 12 slices.

Ingredients

  • 100g of sultanas soaked in your favourite tea (I used a ginger tea but Earl Grey would also be fantastic) then drained and cooled
  • 100g chopped candied peel
  • Approx 1 tablespoon of fresh grated ginger
  • 175g self raising flour mixed with ½ teaspoon of salt
  • 60ml olive oil
  • 2 large eggs
  • 150g of runny honey

Preheat the oven to 185° fan oven or 195° regular oven and line a loaf tin with greaseproof paper.

Beat the oil and honey together then add the eggs one by one. Mix in the drained sultanas,  candied peel and fresh ginger then mix in the flour and salt. This cake mix is as forgiving as  most of my others, so you don’t need to fold things together or be particularly gentle.

Pour the mix into the prepared loaf tin and bake for approx 45 minutes. Check if it’s done by inserting a skewer and if it comes out clean, you’re done. If it needs a few minutes longer and is beginning to brown, cover with some aluminium foil and give it another five minutes before checking again.

Cool for 5 minutes in the tin before turning out and cooling completely on a rack. Will keep for about 3 days in an airtight container.

If you enjoy citrus flavours, take a look at this Sticky Citrus and Marmalade cake.

Sticky Citrus and Marmalade Tray Bake (4)
Going, going….nearly gone!


Vanilla Scented Apple and Sultana Cake


I’m a lazy cake baker. Probably because I’d generally prefer to eat something savoury or spicy. Even for dessert! But there are times when the cake baking urge takes over and I give in. Usually with very little grace and I bake something wonderfully simple like Banana Bread. Recently I came across a small portion of stewed apple in one of my periodic freezer tidy ups (Christmas is looming and I need to make space!). It was 150ml and I  suspect I had put it aside to eat with porridge over a couple of mornings.

20161206_181823

I guessed that the 4 small mashed ripe bananas in the banana bread recipe were probably about the same volume as the stewed apples, and ignoring all the Mary Berry warnings about fruit adding liquid to cakes and causing all sorts of potential hazards, I ploughed ahead regardless. I made a few small changes to the original recipe, cooked it at a slightly higher temperature, and voila,  a lovely light and fragrant cake. Sometimes you just have to push the rules to their limits.

The cake has the same moist and slightly dense texture of banana bread, very filling!

Ingredients (to fit a 9″ × 5″ lined loaf tin)

  • 100g of sultanas soaked in your favourite tea (I used a lovely rooibus with vanilla gifted to me by the even lovelier Mandy over at The Complete Book), then drained and cooled
  • 175g self raising flour mixed with ½ teaspoon salt
  • 60ml olive oil (or use vegetable oil)
  • 150g sugar
  • 2 large eggs
  • 150g stewed apples
  • 1 teaspoon vanilla extract

Preheat the oven to 190 degrees (fan) or 200 conventional oven

Mix the oil with the sugar then add the eggs one by one. Next stir in the apple followed by the sultanas and vanilla extract.

Mix in the flour and salt (you don’t need to be too gentle, it’s a very resilient cake mix) and pour into a lined loaf tin.

Bake for about an hour, covering with foil towards the end if it’s browning too quickly. It should be gently browned on top and a skewer  or sharp knife inserted into the middle should come out clean.  Cool for about 10 minutes in the tin then remove to a cooling rack and resist for as long as you can then enjoy with a cup of your favourite tea or coffee!

Extra Virgin

Any time from November to early March in Andalucia means it’s time to pick and crush olives. The date for this depends on several factors. The weather for a start, and how it has allowed the olives to grow and mature.

20160111_135958

20160111_112426

Some people like to pick their olives very early, when they are still smaller and green. This will give a lower yield of olive oil but of a very high quality. Think of those amazing tasting and expensive olive oils you can find in specialist shops. It’s wonderful for eating “raw” – which means in salads or as a dip – but not suitable really for cooking with. It can be hard to find a mill open to deal with the olives so early on on the season, at least it is where we live.


20160111_112514

20160111_112744

There’s also usually a minimum quantity that you can mill (about 250kg) so it’s not really an option to mill some early and then more later on in the season. At the other end of the calendar you have the folk who pick late when the olives are fat and dark. You’ll get a much higher yield of oil but it will have a much less distinctive taste. A good all rounder but with no particularly distinctive flavour. Fine for eating raw, great for cooking. Much of the oil we all buy in supermarkets will be this type. Round here the olives are sold to the co-operatives and everyone benefits from the profit of the sale of the olives and/or oil.

In the middle are people like us. Many who have enough trees to provide them and their families with oil for the year. The olives are picked when they are green/black. You get a good yield of oil with a wonderful flavour which will become more gentle as the year goes on and whatever is left from the year before becomes your oil for cooking.

20160111_112731

20160111_112807

Now, I won’t lie to you and say that Big Man and I participate in the picking. Although Big Man has done in the past. Like many others we come to an arrangement with neighbours who don’t have trees or land of their own. We provide the trees and look after them during the year. They pick the olives. We all take them to be milled and then divide the spoils. Perfect!

20160111_132806

This year from our 30 trees (although sometimes when we count we get to 29 or 31, we can’t seem to agree) a fantastic 1732 kg of olives were collected. Last year was not a good year, and next year will probably not be as good as this one. That’s the way it goes with olives, up and down. That means about 60kg of olives from each tree and am almost 19% yield for any of you who love numbers like me! And no sprays or pesticides. Rain water and chicken poo are all our olives get to see them through the year.

20160111_132849

In the past we’ve headed down to the coast to an old mill which cold stone presses the olives. The old boy who runs it is now winding things down, so unless you’re super organised and have made an appointment weeks in advance, it’s not practical now to use his mill. A shame.

20160111_132741

But, nil desperandum. A neighbour’s son and his wife decided 2 years ago to set up a little mill just a few km from us next to our local village. It’s up a very inconvenient wiggly track but the views are amazing! They mostly bought second hand machinery, which I like the thought of, and the very effective little mill serves the locals like us for a few months a year when we want to mill our own olives and enjoy our own oil.

20160111_133951

Yesterday was the big day, and the whole process took about 5 hours (one of which was spent fixing a little breakdown). Ever prepared for such an emergency, we had bought beers, soft drinks and tapas so no one minded waiting. We ended up with an amazing 320 litres of fantastic oil to be split 2 ways. Mostly it gets put into 25 litre containers but you can also buy smaller 5 litre ones. We made sure we filled some smaller ones to load into the car for when we head back to England in a couple of weeks.

20160111_155406

20160111_161738

I wish I could share the flavour and the incredible smell with you, but alas the technology doesn’t exist…yet!

What’s my favourite way to use our oil – very simple, the best breakfast in the world (well, apart from a Full English)!

Pan Con Tomate y Aceite

If you’d like to see how we crushed the oil the “old” way, take a look at this post from a few years back.


Sticky Citrus and Marmalade Tray Bake

My mum had a bit of a marmalade making session last week and gave us several jars of her delicious marmalade to enjoy. Thanks Mamma! Putting the marmalade in the cupboard, I came across a jar of my own marmalade from last year which I decided to use up quickly so that I could get onto enjoying the fresh batch more quickly. I decided to make a quick cake and at the same time try out a new baking tin I had just bought – well…why not?!

Going, going....nearly gone!
Going, going….nearly gone!

A BBC Good Food recipe caught my eye, I substituted a mild olive oil for the butter which (I think) makes this cake suitable for vegans as it contains no egg. The vinegar in the recipe sounds odd, but don’t leave it out as it helps the cake to rise and it won’t taste of vinegar, I promise!

Ingredients (to fit a baking tray approx 28 x 23 cm)

  • 200g self raising four
  • ½ teaspoon each of ground ginger and cinnamon (original recipe uses 1 teaspoon of mixed spice which I didn’t have)
  • 100g golden caster sugar
  • Zest of 1 orange and ½ lemon
  • 100g mixed dried fruits
  • A pinch of salt
  • 100g of olive oil (original recipe calls for 140g butter which is then melted), weigh the oil as you add it to the mix
  • 5 tablespoons of marmalade
  • 125ml milk
  • 1 teaspoon of white wine vinegar
  • 2 tablespoons of icing sugar
  • 1 tablespoon of brown sugar

Heat the oven to 160c/140c (fan)/gas 3 and line your baking tray. The original recipe uses a 900g/2lb loaf tin and cooks it for 60 minutes.

Place the flour, spices, sugar, zests, dried fruits and a pinch of salt into a bowl and mix. Put the oil (or butter) into a saucepan with 2 tbsp of the marmalade and melt. Mix well, add the milk and then pour over the dry ingredients. Add the vinegar and mix well.

Pour the mixture into your prepared baking tin and bake for about 45 minutes, or until an inserted skewer comes out clean.

Sticky Citrus and Marmalade Tray Bake (3)

While the cake is baking heat the remaining marmalade with 2 tablespoons of water and the icing sugar. Pour this over the cake when it comes out of the oven then sprinkle it with brown sugar and leave to cool in the tin. You’ll end up with a delicious, citrusy, sticky cake which best pal Ria suggested would also be great served warm with custard. Now you’re talking….

Shallow Fried Cod with Vegetable and Saffron Risotto

Ok, so the photo doesn’t do this dish much justice but I’m an honest Chica and I don’t have photoshop. We also eat ridiculously late so there’s no natural light. But what I show you is a delicious meal which would also be an amazing light vegetarian lunch or supper without the cod.

The risotto is creamy and delicately flavoured and, as a bonus, pretty healthy and low in fat too as it contains no cream or cheese. Granted, coating cod in flour and frying it in olive oil sort of cancels that out, but fish and olive oil are good for us, we all know that, so not only does this taste great it’s good for you too!

DSC_0017

Ingredients to serve 2 hungry people (and we’re always hungry)

  • 1 large piece of cod cut into about 6 large chunks and lightly coated in seasoned flour
  • About 150g risotto rice (I used carnaroli)
  • Approx half a litre of hot vegetable stock into which you dissolve about 5 strands of saffron
  • One roasted red pepper peeled and finely chopped
  • Half an onion finely chopped
  • 4 cloves of peeled and crushed garlic
  • 1 small courgette cut into fine dice
  • 1 large ripe tomato, peeled and finely chopped
  • About a dozen mangetout beans, finely shredded
  • Olive oil
  • Seasoning
  • Lemon to serve

The risotto is made in the usual way – start by softening the onion and garlic in a few tablespoons of olive oil, then add the pepper, tomato and courgette and cook until the courgette has softened. Add the rice and make sure it is coated in oil before gradually adding a ladleful of hot stock. Cook until the stock has been absorbed then add the next ladleful. Continue in this way until the rice is just starting to lose its bite.

At this point heat olive oil in a deep frying pan to a depth of about 1cm (you can also either deep fry or use less oil if you prefer). When the oil is very hot, gently lower in the cod pieces and cook on each side for 2-3 minutes until golden brown.

While the cod is cooking add the shredded mangetout to the rice and a final ladleful of stock. Taste and season then place the cod on top of the rice. Turn off the heat and leave the rice to rest for a few minutes before serving with wedges of lemon to squeeze over.

And when she got there, the cupboard was bare … Almost Panzanella

You know what it’s like when you get back from a holiday and there’s nothing in the fridge apart from a sad carrot and a stinky piece of cheese you thought might just last until you got back? Yes? I thought so! Well, imagine how little there was at home for us after an absence of almost 5 months. A deeply sad situation. Thank god for the local bar/restaurant where we were welcomed with open arms on our first night and sent home with bread, tomatoes and onions to see us through the next morning.

After my favourite Spanish breakfast I got to thinking about how inventive we can all be when we have very little to play around with. Every country has a dish for leftover bread and the Italian bread and tomato salad called Panzanella came to mind.

Sunshine is a glorious extra!

We have litres and litres of our very own beautiful olive oil which was milled just a few weeks ago and our lemon tree is loaded with lemons. I added a tin of tuna from the larder (not very authentic but what the heck) and a handful of parsley from the garden. Honestly, I should leave the fridge bare more often so that I can remember to enjoy dishes like this.

Ingredients (you choose the quantities)

  • Stale bread cut into small cubes
  • Roughly chopped tomato and onion
  • Chopped parsley (basil is more authentic though)
  • A finely chopped clove of garlic
  • Coarse salt and freshly ground pepper
  • Lashings of olive oil and plenty of lemon juice or wine vinegar
  • Add some chopped cucumber if your fridge is being kind to you
  • Optional – a tin of tuna (omit to keep it vegetarian)

Put all the ingredients (except the seasoning and dressing) in a bowl and mix with your hands. Dress lavishly with oil, add lemon or vinegar to taste and season. Mix again with your hands, squishing the tomato a little so that the juices run out. Leave it for at least 10 minutes so that it can absorb all those wonderful flavours and enjoy!

Caramelised Red Onion Tart with Jamón and Stilton

WordPress tells me that the top search on my blog, pretty much constantly, is for Olive Oil Pastry. Those of you who regularly follow my blog will know that until recently I was a self-confessed pastry cheat, using ready made pastry most of the time. In the summer though, I experimented with the pastry made using olive oil instead of butter and in the autumn, with delicious English butter available, I tried out the deliciously naughty Rough Puff Pastry.

The olive oil pastry is a healthier option for more frequent use and as there are so many searches for this recipe, I thought I should make an effort to show some of the ways I use it in the kitchen. This is a delicious tart which serves 4 as a main course or 6 as a starter.

DSC_0011

Ingredients

  • 1 batch of olive oil pastry
  • 6 red onions
  • 2 small sprigs of thyme
  • Olive oil for shallow frying
  • 3 slices of jamón, prosciutto or bacon (omit if you want a vegetarian tart) cut into small pieces
  • About 3 tablespoons of crumbled stilton or some of your favourite cheese

No need for blind baking with this pastry, it goes crispy underneath, even when baked with the filling.

Half and finely slice your onions and fry slowly in about 3 tablespoons of olive until soft and slightly caramelised. This will probably take at least 20 minutes.  Season with a little pepper but you will probably not need salt if you are using the jamón and stilton which are both salty.

DSC_0015

Roll out the chilled pastry to fit your tart tin, prick the bottom and fill with the cooked onion mixture. Sprinkle over the jamón and cheese and bake at 200 (regular oven) or 180 degrees (fan assisted) for about 30 minutes or until the pastry is browned.

Leave to cool slightly – this is delicious served at room temperature with a salad.

Olive Oil Pastry – So simple, even I couldn’t mess it up….

I love pastry but am mostly too lazy to make it. Except at Christmas, when I make Clara’s Shortcrust Pastry. And sometimes I use it to make quiche.

Perhaps I don’t make it that often because

  1. In Spain, getting hold of butter and keeping it fresh before it reaches my fridge is a saga in itself
  2. In England, I’m either too busy ripping out nasty bathrooms or it’s easier to pop to the supermarket and buy it ready made (oops, did I just admit that in public?!)

Enough of this nonsensical pastry avoidance, Chica. Pull yourself together and make it with olive oil! So of course, I did. And you know what? It’s so easy, and so tasty, and so silky and forgiving should you break it (what, me?!) that I suspect we’ll be eating a lot more of it in the next few months. And also, with only 2 tablespoons of oil in a 4 person serving, it really can’t be bad for you, can it?

Veggie Garden Pie with Olive Oil Pastry

Ingredients to line a 24cm (9.2 inch) flan tin with enough left over to make a few cheese and marmite nibbles (my grandmother always used to make these as a treat with the leftover scraps of pastry), this is what you need:

  • 150g plain flour
  • 2 tbs olive oil (30ml)
  • Up to 4 tbs iced water (60ml)
  • ½ teaspoon of salt

I made mine in my food processor, but if making by hand, follow the same steps, it will only take you a couple of minutes longer.

Blend the flour and salt together then add the olive oil and blitz (or rub with your fingers) for a few seconds. Slowly add the water with the motor running but stop as soon as the mixture clumps together.

Press the mixture into a ball and chill (optional) for half an hour wrapped in cling film.

Cheese & Marmite Nibbles

You can roll this pastry out really thinly if you like, it behaves well. Use it to make your favourite quiches and pies. I made a vegetable pie with a filling of sautéed peppers, onions, tomatoes and blanched runner beans which sat on top of a mix of 2 tablespoons of cream cheese with one beaten egg, and topped wth sliced tomato.

And because pastry is rather dull to look at (never start a sentence with the word “and” Chica), I thought I’d show you a lovely photo from New Zealand, taken way too many years ago!

OLYMPUS DIGITAL CAMERA

Groundhog Day Peperonata

If you haven’t seen the film Groundhog Day, you won’t know what I’m talking about. In summary, it’s about a man who wakes up each morning and experiences the same day over and over and over again. Of course, he learns from his experiences and it all ends well.

When we got back Up the Mountain we were dreaming of months of rest and long lazy days which did not involve DIY, house repairs or anything to do with a paintbrush. There was a slightly damp smell in the house which we put down to the very wet winter which Andalucía has experienced and the fact that our house has been unheated and unlived in for quite some time.

Alas, we were deluding ourselves and some damage caused a few years back by a leak in the roof plus the wet winter has caused a significant amount of damp, particularly in my beloved “despensa” or larder.  Today we had to remove everything, including the shelving, from the despensa.

Groundhog Day (2)

The house is in chaos and we are climbing over things to get from one place to another. It will all be put right soon, I know, but I think we both had a moment or two today of wanting to run away and hide from it all.

Groundhog Day (3)

Salvation lay in the freezer and with the arrival of Fish Man with fresh calamares.  Last summer’s produce was tucked into the freezer and there it awaits us.  I cooked a quick peperonata (for which there are quite possibly as many recipes as there are Italian Mammas) and served it with calamares cooked on the griddle pan and drizzled with our olive oil and some sweet balsamic vinegar.

Ingredients for the Peperonata (serves 4) Serve hot or cold

  • About 500g of crushed tomatoes
  • 1 large onion finely sliced
  • About 4-6 large peppers (use a mix of colours if you can) cut into bite sized chunks
  • 2-3 large clove of garlic, crushed
  • A small glass of red wine (optional)
  • Fresh herbs (I used oregano but basil is also good)
  • Olive oil
  • Seasoning

Peperonata (3)

Simmer the garlic and onions in a little oil until soft, then add the peppers. Turn up the heat and fry until the edges of the peppers start to turn brown.  Add the tomatoes, herbs and wine (if using) season lightly and simmer for about 30 minutes until reduced and the sauce thick and the peppers starting to melt.

Squid with Balsamic (1)

Taste and adjust the seasoning and remove any large pieces of herbs. Great too stirred into pasta but I love it best eaten cold with a little squeeze of lemon juice and plenty of crusty bread.

For a quick lesson on how to clean squid (calamares) if you can’t find it ready prepared, take a look here.

Ok, lunch break over, back to work Chica!