Fish Pie, a hug in an oven dish

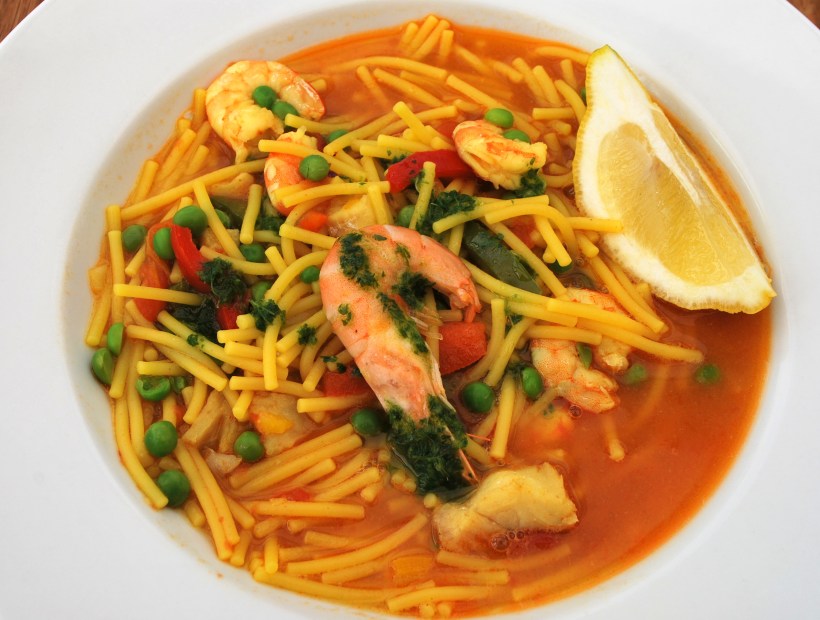
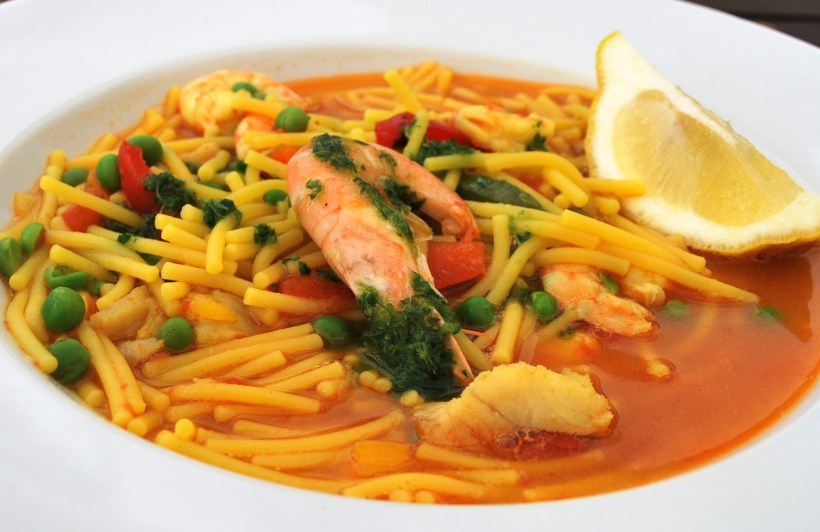
Fish Pie to me really is comfort food. Creamy sauce, chunks of beautiful flaky fish and fluffy, cheesy mashed potato. It’s not difficult to make, it just takes a little time. It’s a great prepare ahead dish if you bring it up to room temperature an hour or so before you want to cook it. We’ve had cold foggy days, gloriously sunshiny days…it’s so hard to know what to cook. This always seems to fit the bill though!

IMG_20180301_201111

You can keep it basic for a mid week family meal, or if you add scallops, prawns, capers and a mix of your favourite fish it really can be grand enough for entertaining. The  choice is yours, you don’t need to be rigid with the measurements…make it your own! I make my bechamel the easy, all-in-one way and use olive oil instead of butter, but do feel free to make it the more traditional way making a roux of flour and butter then gradually adding the milk if you prefer.

Ingredients (to serve 4 generously)

  • Approx 400g of mixed fish (I used cod, smoked haddock, salmon and prawns)
  • 2 hard boiled eggs, peeled and chopped into chunks
  • Approx 1kg floury potatoes, peeled and boiled until soft enough to mash
  • Olive oil (or butter to add to the mash plus about 100ml of milk)
  • 450ml of milk (full fat or semi skimmed)
  • A bay leaf and a few peppercorns
  • 2 heaped tablespoons of plain flour
  • 1 tablespoon of olive oil
  • A cup of frozen peas or 2 cups of washed fresh spinach
  • About 2 tablespoons of grated cheese (I used cheddar)
  • Salt and pepper
  • Optional: a tablespoon each of finely chopped parsley, capers and gherkins

Place the fish in the milk with the bay leaf and peppercorns and heat gently. Once bubbles appear on the surface of the milk, remove the fish with a slotted spoon  and set aside. Allow the milk to cool completely. This stage can be carried out the day before if it’s easier.

IMG_20180301_200659

Add the flour and olive oil to the cold milk and bring gently to a simmer, whisking as you do. The sauce will start to thicken. Simmer for 2 or 3 minutes then remove from the heat. Break the fish into chunks then stir into the white sauce with the chopped egg and capers, gherkins and parsley if using. Now add the frozen peas (no need to defrost, they’ll cook in the oven)  or spinach and stir to mix in well. Season, taste and adjust if necessary.

Pour the  mixture into an ovenproof bowl (deep enough for a layer of mashed potato on top). Allow to cool down a little.

Mash the cooked potatoes while they are still hot, adding a generous slug of olive oil or a large knob of butter as you mash. When it’s free of lumps, whisk in the milk adding enough to give a soft, smooth purée that will hold its shape. Don’t use all the milk if it starts looking too wet, add extra if the potatoes are particularly dry.

Spoon (or pipe, if you’re that way inclined) the potato on top of the fish. Run a fork over it if you haven’t piped it as this will give you lots of lovely tiny peaks which will go brown and crunchy in the oven.

IMG_20180301_201119

Bake at 180° fan (190° regular oven) for 30 minutes then sprinkle the grated cheese over the potato and bake for a further 10 minutes until the pie is bubbling and browned.

Leave to stand for 5 minutes before serving. Enjoy the fish pie love and hopefully someone else will offer to do the washing up…

Autumn Labours

When we were based more permanently in Spain, one of the few occasions that Big Man and I  worked together in the kitchen was for the autumn making of Quince Jelly. Practically everyone round our way over there has a couple of Quince trees and come mid October for about six weeks, we were inundated with offers of bags of Quince.

They’re a funny sort of fruit, looking like over sized pears, smelling sweetly perfumed, tasting sour and dreadful if you bite into a raw one, heavenly after cooking gently with plenty of sugar or honey.

IMG_20171019_123652

We were walking through Bexhill town centre this morning, where we’re blessed still with small independent traders selling fish, meat, fruit and veg, making curtains, looking after our teeth and eyes and selling us clothes and gifts. Big Man suddenly stopped in his tracks causing a bit of a pile up with me and the two dogs bundling into him, and was sniffing the air like a police tracker dog. “Can you smell that?” he asked excitedly.  Nope…nothing was jumping out at me but I’m recovering from a cold, so hardly surprising.  “Quince, I can smell Quince,  and they must be good if they smell so wonderful”.

IMG_20171019_130022

We reversed back up the road a few metres and outside the fruit and veg shop the marvellous sight of a small crate of smooth skinned, golden yellow Quince awaited us. Needless to say,  we snapped them all up (just over 4kgs in total) which the lady in the shop was intrigued by as she didn’t know what they were and was curious to know what we were going to do with them.

We eventually got home lugging our 4kgs of Quince,  a 5kg bag of sugar (we didn’t need that much but it was a bargain) two confused dogs and several library books.


IMG_20171019_125115

Big Man got straight to work chopping and less than two and half hours later we were done, we’ve got it down to a fine art now. We were sustained during our labours by a very large gin and tonic. He’d bought me back a bottle of Gin Mare  (a new one to us) from duty free, flavoured with olive, thyme, rosemary and basil. Absolutely delicious but very strong!

IMG_20171019_142334

Tomorrow we’re going to take a little tub of our Quince jelly, or dulce de membrillo to the lady in the shop so that she can try it with some cheese. Hopefully she’ll enjoy it as much as we do and if you’d like to give it a go, follow this link for the recipe which can be scaled down easily, or you could make this delicious crumble, or this incredible savoury lamb dish.

Slow Cooked Cuban Style Pork

Long slow cooked dishes usually make me think of the cooler months, but using the slow cooker means the kitchen doesn’t get all hot and steamy, and I don’t get all hot and bothered. And with a little planning, if you need to use the oven,  head out for a few hours to enjoy the sunshine  and come home to a delicious meal!

edf

I bought a shoulder of pork the other day, a not expensive cut of meat which goes a long way with a little crowd, or it can be used for a few meals when it’s just the two of us. I’d seen a few recipes for Cuban Mojo Pork which included the juice of citrus fruits like orange , lemon and lime and the fresh flavours appealed. I also recently discovered a lovely new blog, Iowa Girl Eats. Lots of lovely gluten free recipes for those that don’t/can’t eat gluten, and for others like me who can…just a lot of lovely,  beautifully photographed recipes! This dish follows  her recipe pretty much exactly (thank you Kristin!) and I can highly recommend it. We ate the dish, as she suggested with rice, guacamole and I made some spicy Black Bean dip. Lots of lovely leftovers too, so a win-win situation.

Ingredients (to serve 6 approx)

  • Pork shoulder  (about 2kg), skin removed
  • 3/4 cup chicken stock or water
  • 1/2 cup orange juice
  • 1/4 cup each of lime and lemon juice
  • 1 red onion, finely sliced
  • 1 hot chili (cut open but left whole)
  • 1 whole head of garlic, cloves separated and peeled
  • Salt and pepper to taste
  • 1 or 2 teaspoons of dried oregano 
  • 1/2 teaspoon each of dried cumin and smoked pimentón 
  • 2 bay leaves

Put all the ingredients into the slow cooker and cook on low for about 10 hours. The meat should shred easily (like pulled pork) or you can leave it in chunks. I put the pork shoulder in whole but you can cut into  large chunks if it fits better into your pot that way.

If cooking in a conventional oven, I’d recommend cutting the pork into about four or six pieces, using a cup and a half of chicken stock and cooking on low for about 3 hours. Check the liquid half way through,  you may need to add more as you want the final dish to be juicy with some of the lovely sauce it creates to spoon over.

edf

Serve with whatever you fancy. I make my guacamole by mashing a large ripe avocado then adding in some finely chopped spring onion, a finely chopped ripe tomato,  finely chopped coriander and chili and seasoning.

If you enjoy slow cooked pork dishes, check out my Chinese Style Slow Cooked Pork.

PS. Am playing around with a “new look” on the blog. Let me know what you think, all criticism happily accepted! And if anyone knows how to add a “search” button to the top of the page, I’d love to know how…


Chicken Liver Paté (for poorly folk with half a kitchen)

You can’t keep a good woman down, and you can’t stop Chica from interfering in the kitchen. Thank you for all the good wishes for my recuperation from the little gall bladder operation.  All is going well apart from feeling very tired and looking quite pale and interesting. Loved ones felt that I might be a little anaemic and my cravings for dried apricots and green leafy vegetables probably confirm that.

20161019_182757.jpg

The kitchen  is progressing slowly but well and the other evening I really wanted to make something from  scratch rather than just heat up a meal I had waiting in the freezer. The fact that I craved liver and still didn’t have a hob was not going to deter me and I  am showing you the grim reality of my current cooking arrangements in the spirit of honesty and to encourage anyone who doesn’t have a super swishy cooker. If you want to do it…you can!

20161019_182902

Slightly lower fat chicken liver paté for the stubborn and determined cook

  • 400g chicken livers trimmed of any sinews and soaked for about 30 minutes in milk to remove any bitterness
  • 100g low fat creme frâiche
  • 2 cloves of garlic peeled and grated or crushed
  • 1 shallot peeled and finely chopped
  • 1 tablespoon each of Port and Brandy
  • salt and pepper to taste
  • 40g approx unsalted butter, gently heated and white foam spooned off (clarified butter)
  • 2 tablespoons of olive oil
  • A sprig of something pretty from your herb garden to decorate

In a large frying pan, heat a tablespoon of the oil. Drain and dry the chicken livers well with kitchen paper and cook on a medium heat for a couple of minutes each side until browned but still pink in the middle. If you can’t bear bloody meat, go ahead and cook them through thoroughly. It’s your paté,  your choice!

20161019_182553

Remove from the pan to a plate and wipe the pan clean. Add the rest of the oil and gently fry the shallot and garlic until transparent and soft. Add the cooked chicken livers to the pan with the port and brandy and cook until most of the liquid has evaporated. Season lightly with the salt and pepper and allow to cool slightly for a few minutes.

Put the mixture into a blender (I used a stick blender so used the tall container that comes with it) together with the creme frâiche. Blend until smooth, taste and adjust the seasoning if necessary.

Spoon into a serving dish and pour over the clarified butter, decorating if you like.  If you prefer to use individual serving dishes you may need more butter. I think thyme is more usual as a decoration, but I used what I had!

20161019_182646

Chill for a few hours or overnight and enjoy. I understand this will keep for at least a week with the butter seal, once you start it though, eat within 2-3 days. Which is not a problem in our house as every time I open the fridge I do a little taste test…


Moroccan Spiced Chickpea Stew

Regular readers will know that in our house, pulses rule supreme and we often bring supplies of chickpeas and lentils grown locally in Spain, over to England. In a tidying up frenzy the other day (family are visiting from Spain soon!) we came across further supplies that we had forgotten about. Result.

I decided to try something different from our regular Puchero and came across various recipes using Moroccan inspired spices which I adapted to suit us. I included chicken in this version, but I feel sure that you could quite happily leave it out which would give you an amazing vegan main course dish.

????????????????????????????????????

Feel free to play with the spices, next time I’ll double the harissa to give more of a kick. I used my slow cooker but this could easily be cooked (covered) in a low oven, braised gently on the hob or even in a pressure cooker (although I don’t own one so can’t offer any advice on cooking times). If you prefer to use ready cooked, canned beans just skip the soaking stage and use double the volume in the ingredients list which will give you roughly the same quantity as the dried ones after soaking.

Ingredients (to serve 4 as a main course)

  • Approx 400ml of dried chickpeas (measure by volume) soaked overnight in plenty of cold water with a pinch of bicarbonate then drained
  • 4 chicken thighs or drumsticks (optional)
  • Approx 3 tbsp olive oil
  • 1 large onion, chopped
  • 3 cloves of peeled and crushed or chopped garlic
  • 1 level tablespoon of harissa (or chili powder to taste). Use more if you like a little tickle (and who doesn’t?!)
  • 1 teaspoon each of paprika, turmeric and ground ginger
  • 2 teaspoons each of ground cumin and cinnamon
  • 1 can of chopped tomatoes (mine was 390g)
  • 2 tablespoons of tomato paste
  • About 220 ml of water (If using a slow cooker, make sure everything is covered by about 2cm of liquid).  You may need to top up with more liquid if cooking in the oven or on the stovetop. Just keep an eye on it and add more hot liquid if necessary.
  • Salt (season after the dish is cooked to help the chickpeas soften when cooking)
  • To serve – a drizzle of extra virgin olive oil and some finely chopped radish, coriander and red onion.

Heat the oil gently ad add the onion and garlic. Cover and soften then add the spices and cook (uncovered) until the spices release their aroma.

????????????????????????????????????

Add the chicken (if using) and the tomatoes, tomato puree and liquid. Bring to a boil and cook on high for 10 minutes. Now put everything into whatever you use to cook (casserole dish, slow cooker etc) and cover. I cooked mine on slow in the slow cooker for 6 hours and the chickpeas were soft and creamy with the chicken cooked through and still holding to the bone. Stovetop should take about 2 hours and a slow oven about 4 hours. Add salt to taste once the dish is cooked.

????????????????????????????????????
Arlington Bluebell Wood

When you’re ready to serve (and it’s even better the next day), ladle into deep bowls and serve with the garnish and your favourite bread. Enjoy!

Bluebells (6)

PS. Because the photos of the stew weren’t great (although the stew was…photo quality is due to a desire to eat quickly!), I have included some gratuitous shots of a recent walk we took in a Bluebell Wood nearby, do hope you enjoy a little burst of English springtime.

If you enjoy chick peas and North African inspired spices, why not try this soup?

Fideuá de Pescado y Mariscos – Fish and Seafood Noodles

If Paella and Arroz Caldoso are half sisters to the Italian Risotto, then Paella and Fideuá are first cousins. The famous Paella is known to most of us, a delicious rice and seafood (or meat) dish which comes from the Valencia region of North East Spain. Less well known, outside of Spain at least, is its cousin…the Fideuá. It´s very similar to a paella but made with Fideos (short noodles). Fideos come in different sizes in Spain from very thin (called Angel Hair pasta) for dropping into broth right through to almost the thickness of spaghetti. This dish tends to use the ones at the thicker end of the scale, as they need to stand up to a little while cooking in the delicious broth.

Fideua de Mariscos (7)

Amounts used are flexible, use what you have, and play around with the ingredients. Like arroz caldoso, it’s quicker to cook than a paella and is a typical everyday lunch dish, for tucking into with a spoon (a plato de cuchara – a “spoon” dish), with lemon juice squeezed over and plenty of delicious bread. We can’t decide if we prefer arroz caldoso or fideuá caldosa – try them both and let me know what you think! I know Celia from Fig Jam and Lime Cordial enjoys making Arroz Caldoso for her family…Celia, I hope you like this version too!

Approximate Ingredients for 4 people (as a main dish)

  • 250g prawns (less if already peeled) – if they have the shells on peel them and use them to make a fish stock, if not use water or a cube
  • About 250g of mixed fish and shellfish (I used some white fish fillets but when I have mussels or clams I add them in too)
  • Half a red pepper finely chopped
  • A thin green pepper, finely chopped
  • A couple of tablespoons of peas
  • 2 cloves of garlic, minced
  • 1 large tomato peeled and finely chopped or half a cup of tomato conserva
  • 1 tablespoon of tomato purée
  • 1 teaspoon of sweet pimentón
  • A pinch of saffron
  • Seasoning
  • Olive oil
  • Approx 400g Fideos

Start by making a sofrito or tomato sauce. Lightly fry the garlic until soft then add the peppers and peas. Add the pimentón and saffron, cover the pan and let everything sweat gently until soft then add the tomato. Simmer for another 10 minutes.

Fideua de Mariscos (6)

For 4 people (and a soupy fideuá) add about 1.5 litres of stock and simmer for a further 10 minutes. If you have a paella pan, cazuela or a deep frying pan that you can use to serve, transfer the liquid to this. Now add your fideos – about 100g per person, but follow any guidelines on the packet. When they are about half cooked, add the fish (biggest chunks first) then the shellfish. Taste and season as necessary.

For a thick, dryer dish (more the consistency of a paella) you may need to use less liquid or just cook this way and spoon out some of the liquid at the end (save it for a light soup with some thin fideos thrown in!). Equally, if it looks a little dry as you are cooking it, just add a ladleful or two of hot stock.

Serve like paella with lemon juice, crusty bread and wine. A spoonful of alioli is also great with this dish.

Like a paella, you can vary the ingredients to make your fideuá according to what you have available. Make it veggie, or use meat instead of fish. It may not be absolutely authentic, but the influence will be there and the taste will be just as good!

Gigantes Plakis – Greek Style Giant Baked Beans

So, as you probably can guess, Gigantes refers to the size of the beans! And Plaki (I think) means that it’s something cooked in the oven or baked. Now, I’m not claiming that my version of this dish is authentically Greek. I’ve seen several versions, some which involved a few extra steps in the process, but here’s my interpretation of a delicious vegetarian dish which can be served as is, or as part of a meze. And you don’t even have to stress about it being served piping hot, Greek food is often dished up at room temperature!

Gigantes Plakis (4)

Ingredients (to serve 4)

  • 500g of large white beans (I used butter beans but others that can be used are lima beans) soaked overnight in water with a small pinch of bicarbonate of soda
  • About 500g of a simple tomato sauce made with tomatoes, garlic, some finely chopped celery (if you have it) and some chopped fresh parsley

Rinse the beans, cover with cold water and bring to the boil. Fast boil for 10 minutes, skim off any scum and reduce to a simmer for about an hour – you want them almost cooked but not quite.

Heat the oven to medium (about 160 degrees) and make sure your tomato sauce is hot. Drain the beans.

Gigantes Plakis (1)

Stir the beans and the tomato sauce together and put into an ovenproof dish. Bake for about 1 ½ – 2 hours until the beans are tender and a little dry/crispy on top. You may need to add a little water during cooking. Check for seasoning and adjust if necessary, add a little extra chopped parsley if you like and sit back and wait for them to cool down a little. Or just eat them piping hot and hope that no one reports you….

A return to the simple life

Although our time in Spain will be limited to about a month (a long “holiday” some might think, but for us it’s a case of changing one home for another for a short while) we need to make the most of our time here. Sorting out a house and garden that have been looked after but not lived in for many months. Catching up with family and friends. Running around and sorting out paperwork and the dealing with the “officialdom” that invariably comes with it.

Mayo 2015 010

The plan had been to eat out frequently – a menú del día (a daily set menu in many restaurants) is not expensive in Spain – and not to spend hours in the kitchen. So far, I haven’t spent too many hours in the kitchen, but the lure of fresh, local ingredients which are quick and easy to prepare has been irresistible. Add to that the fact that we can also cook outside and it’s mostly quicker to just get cooking while multitasking with the gardening.

We’ve eaten chicken (reared by a pal who gifted us two hefty chicken thighs and drumsticks) cooked in one of our cazuelas with peppers, onions, garlic, olive oil and wine.

Pollo a la Cazuela (1)

And rabbit, marinated in a paste made of thyme and rosemary from the garden with our own olive oil and lemon and a neighbour’s garlic then cooked on the barbecue.

Conejo a la Barbacoa (1)

The weather may have gone from 40 degrees to grey and miserable, but with full bellies and a glass of wine, who can complain?!

Crispy Prawns with Lemon Myrtle – Long Distance Herby Loveliness

I think many of us, regardless of whether we’ve been blogging for months or years, will understand the friendships that can grow up through the connections we’ve made via our blogs. People leave lovely comments, ideas, share in the ups and downs of whatever we choose to discuss on our blogs. Some very kind folk go as far as sharing gifts and giveaways, allowing us the opportunity to try something from their country which we otherwise would never have come across.

Herbs (2)

Recently the lovely Margot over at Gather and Graze hosted a giveaway of some herbs from her home country of Australia, Lemon Myrtle and Wattleseed. Have you heard of them? I certainly hadn’t. Lemon Myrtle is (and I’m quoting from the packet here) “a fragrant Australian native plant which bears leaves with an intense lemon fragrance”. The packet of ground lemon myrtle really does explode with a beautiful refreshing lemony aroma.

The Wattleseed (which is roasted and ground) comes from the seeds of a species of Australian native acacia which have a roasted coffee-like aroma. It works beautifully with chocolate, and I’ll soon be sharing a recipe with you.

If you can’t get hold of Ground Lemon Myrtle (and I’m guessing a lot of you can’t), I’d suggest substituting the same quantity of finely grated lemon zest. I know it won’t be quite the same, but perhaps a good approximation.

Myrtle Prawns (2)

The recipe comes from the packet sent to me (thanks again Margot!) and I served it with a salad and a lemon vinaigrette as a starter. I did change the quantities from the original recipe as I scaled the recipe down a little.

Ingredients (to serve 4 as a starter)

  • 16 large peeled and deveined langoustines
  • ½ cup of rice flour (use plain flour otherwise, but the rice flour does give a wonderful crunch)
  • ¾ tablespoon of ground lemon myrtle
  • ¾ teaspoon of smoked paprika (I used pimentón)
  • A pinch of chilli powder
  • Salt
  • ½ cup of cooking oil (I used olive oil)
  • 2 fresh chillies finely chopped

Mix the flour with the spices and toss the prawns in the mixture. Heat the oil over a high heat and cook the prawns quickly (they probably only need a minute or so on each side) until they have turned pink and crispy.

Drain on kitchen paper, sprinkle with salt and add the fresh chilli. Enjoy!

To see how Margot used her Lemon Myrtle, hop on over and check out her delicious Australian Apple Crumble recipe!

Asparagus and Sour Cream Tart

There’s something about asparagus that makes me happy. Well, a few things really. It tastes wonderful, it looks pretty and has an amazing colour which screams “spring”! It also feels like a luxury ingredient, which it most certainly used to be, but in reality is one which is now readily available and easily affordable. Mind you, in a few weeks when we have the start of the wonderful English asparagus season, we may pay a little more but oh it will be worth it for the flavour!

Asparagus & Sour Cream Tart (4)

Blogging too makes me happy, it allows me to keep a record of dishes I enjoy cooking and eating, it allows me to share my passions with like-minded folk and it has introduced me to new pals around the globe. New cuisines are available at the click of my mouse and one such cuisine which I am gradually learning more about comes from Germany. A wonderful blogger, Ginger, shares her recipes and memories over at Ginger and Bread. A German, with a Chilean partner living in London. Do pop over if you get the chance. She recently shared a recipe for a traditional onion quiche and I was intrigued by the use of sour cream in there with the rest of the more familiar ingredients. Time to buy a carton of sour cream and give this style of quiche a go!

Ingredients (to serve 6)

  • 1 packet of puff pastry (I used puff as this is what I had to hand, use short crust, or make your own – you decide)
  • 1 bunch of Asparagus
  • 3 eggs
  • 300ml of sour cream
  • 100ml milk
  • About 50g grated cheese (I used smoked gouda)
  • Salt & Pepper

Start by snapping off the woody ends of the asparagus and blanching the spears in lightly salted boiling water for about 3 minutes. If you don’t have a wide enough saucepan to take the spears whole, use a deep frying pan filled with water. Drain, rinse in cold water and put to one side.

Turn the oven on to medium (180C in my fan oven)

Line a tin with greaseproof paper (optional) and lay the pastry inside. If you use a flan tin with a loose bottom you don’t need to line – it just makes life easier when it comes to lifting the tart out when it’s cooked if your tin does not have a loose bottom.

Trim the pastry to fit and prick lightly with a fork.

Beat the remaining ingredients (except the asparagus) together and season. Pour into the pastry case then lay the spears gently on top.  Bake for about 45 minutes until lightly puffed up and just starting to turn golden.

Delicious hot or cold, but leave it to cool down slightly for at least 5 minutes before cutting. The addition of sour cream gives you a soft, fluffy filling, almost mousse like. Lovely with a simple dressed salad and great too for picnics.