Very Easy Chinese Style Chicken

Chinese Style Chicken (3)

My love affair with the slow cooker continues. My mum even gifted me one (thanks Mamma!) to take with me to Spain to use in the heat of the summer when I can’t (won’t) turn the oven on!

Chicken is a favourite in most households because it’s usually pretty economical (although I am very much an advocate of buying the best you can and eating it less often) and it offers so many ways to be prepared. Big Man and I are both thigh folk.  He’s a skin off, I’m a skin on and we’re both bone in! You pick what you like best and go with it, although breasts are more pricey and don’t really benefit from long slow cooking.

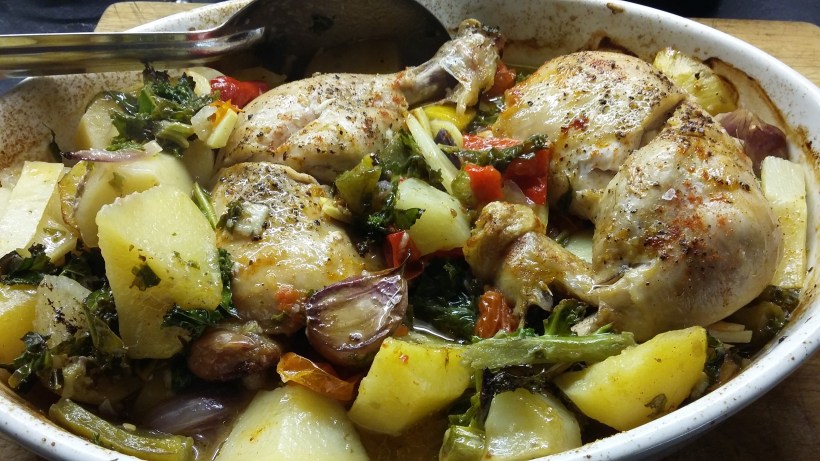
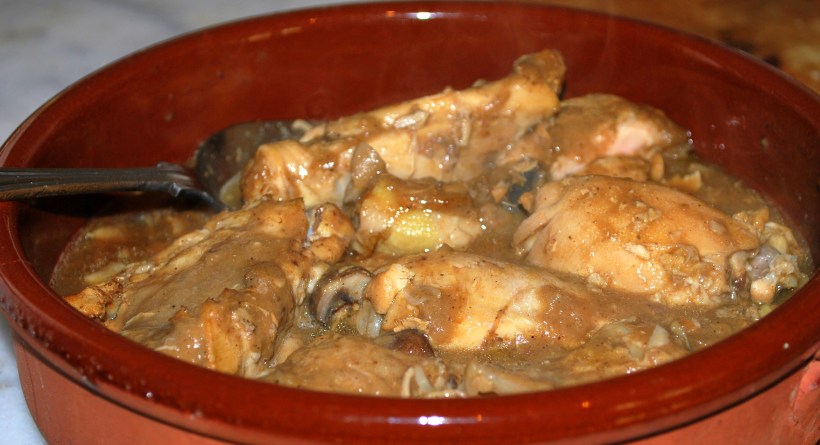
This dish was really simple to prepare, (although I’m sure it’s not authentically Chinese!) but the flavour was amazing. Actually, if you took the ginger and star anise out it was very similar to any meat dish in Spain prepared “al ajillo” ….with lots of garlic. Sorry about the photo…real life cooking and eating here folk….I just plated it up, took a snap and we tucked in!

Ingredients (to serve 4)

  • 2 tsp grated ginger
  • 4-6 crushed garlic cloves
  • 2 star anise
  • 150ml Chinese rice wine (or use dry sherry)
  • 2 tbsp dark soy sauce
  • 1 tsp sesame oil
  • 5 tbs water
  • 8 chicken thighs or drumsticks (skin off is better for this dish unless you want to brown them first with the skin on)
  • Shredded spring onion to garnish (clearly I forgot this bit!)
  • Plain boiled rice to serve

Mix together the ginger, garlic, star anise, rice wine, soy sauce, sesame oil and water and pour over the chicken. Leave to marinate for a few hours or overnight if you have time.  Place everthing into a saucepan and bring the chicken and marinade to the boil.

Transfer to the slow cooker (or an ovenproof dish with a lid) and cook on low for about 4 hours (or 2-3 hours in a low oven) until cooked through and tender.

When done, remove the star anise. If the sauce is too liquid, reduce for a few minutes in a saucepan and pour over the chicken to serve.

(Tastes even better the next day)

Where did January go?!

Normally a quiet month, a little flat after the excesses of Christmas. Not so here, it seems to have been busy and bright….and I’m not complaining.

20170120_122153

We have been pretty good about eating lighter, and eating less meat, but I have turned to an old standby favourite this month. Tray baked chicken  (although I used an oven dish!).

20170110_203541

It’s a quick dish to throw together using whatever is nestled in the fridge and although I mostly use skinned, bone-in chicken joints, it’s great with fish fillets or just veggies.

Peel and chop potatoes into large pieces, add vegetables like peppers, courgettes, tomatoes, carrots and a full head of garlic. I haven’t given quantities as this dish is great for one, two or a dozen people. Just judge how much your crowd will eat, add a little extra as they will always want to go back for more, and find an oven dish or tray to fit the quantity.  Put all the ingredients into the dish, preheat the oven to about 180 degrees.  Pour over some olive oil, season with coarse sea salt and freshly ground pepper then customise any other seasoning to whatever takes your fancy. This time I used some dried oregano from our garden in Spain, a little smoked pimentón and half a finely chopped lemon.

20170121_201102

Mix together well, hands work best for this to ensure everything is well coated, and add a good slug of white wine,  stock or water.  Cover tightly with foil bake for about an hour then remove the foil and bake for about 20 minutes more until everything is starting to brown nicely. If you want to add some tender vegetables (I used some chopped kale) stir into the dish about 10 minutes before you’re finished. Then it’s  straight to the table, perfect one pot cooking!

We’ve been enjoying the winter sunshine and taking walks along Bexhill beach.  Then a quick trip across the channel to stock up on wine (stocks were dangerously low) and a lovely night in Le Touqet were enjoyed last weekend.

20170120_152555

And little Alfi,  one of our pups, has started on a course of hydrotherapy to build up his leg muscles after an operation on his hind leg in November to repair a damaged cruciate ligament.

20170118_150937

He’s not a water loving dog so is highly unimpressed with being put into a warm pool then shampooed and blow dried afterwards. I’d be delighted at the opportunity of such pampering but there’s just no pleasing some pups….!

I’ve been cooking and have some recipes to share with you soon, but in the meantime, enjoy the last few days of the month.

Melting Spiced Pork with Aubergine

Not quite a curry, but with just a few fragrant spices and a gentle cook in the oven, you’ll be rewarded with a pot of melting meat and aubergine which will make you oh so happy! And for non meat eaters, read on to the end for a vegetarian alternative.

20161112_201643

Ingredients, to serve four with rice

  • 3 tbsp oil
  • 750g pork cut into bite sized chunks (I used skinless pork belly strips)
  • 2 aubergines cut into bite sized chunks
  • 2 tbsp brown sugar
  • 5 star anise
  • 1 cinnamon stick
  • 2 onions, peeled and very finely diced
  • 1 tbsp grated ginger
  • 1 red chili, finely chopped
  • 1 bunch fresh coriander (separate stems and leaves and finely chop both)
  • 1 tbsp fish sauce
  • Juice of a lime

Heat oven to 200C/180C Fan Oven/Gas 6. Heat the oil in an ovenproof pan that has a lid and fry the meat until browned (you may need to do this in batches), remove from the pan.

Add the aubergine and brown (you may need a little extra oil), remove from the pan and put with the pork.

Now add the sugar to the pan and allow to caramelise slightly, then return  the meat and aubergine to the pan with the cinnamon and star anise.

Put the onions, ginger, most of the chili (reserving a little for garnishing) and the chopped coriander stalks into the pan and cook for a couple of minutes. Add the fish sauce and enough water to cover the mixture completely.

Cover and place in the oven for an hour. Remove, stir in most of the coriander and adjust the seasoning if necessary. Garnish with any remaining coriander and chili and serve with boiled rice and vegetables.

For a vegetarian version, omit the pork, and replace with a mixture of robust mushrooms such as brown chestnut and shitake. Substitute the fish sauce with a light soy sauce.

 
Inspired by a BBC Good Food recipe

When life gives you pomegranates…

Big Man was born in the beautiful province of Granada. In Spanish, the word Granada means “pomegranate”. The capital city is decorated with many pomegranate symbols from stone bollards to metal work and even man hole covers. Just over the border where our little home is, in the province of Málaga we get to enjoy the real thing in the shape of fruit. The pomegranate plant (which grows into a sizeable tree) produces stunning red flowers, similar to a hibiscus, which then become the beautiful and delicious fruit.

20161114_194644

We’re pretty spoiled as when it’s pomegranate season many neighbours gift them to us. Huge,  beautiful, deep red on the outside, sweet, juicy and ruby coloured jewels on the inside. In England we have to buy them. Sometimes we get lucky and one or two of the little fruits will be sweet, but they’re never quite the same…or as big! You never know what a pomegranate is going to taste like until you get to taste it. And as for peeling a pomegranate…I’ve tried every new way.

20161114_175326

To make the most of a less than sweet fruit, I came across a wonderfully simple recipe using chicken and ras-el-hanout. The slightly acid taste works well with the warm, rose-scented spice. And I’m sharing with you another way to peel a pomegranate. Cutting it in half and bashing it has never worked for me. Usually I end up with a worktop covered in juice and the little pips of fruit stubbornly refusing to drop out. This method still involves a little work separating the pips but it does seem to make the whole job a little easier and much less messy.

20161114_175420

Ingredients (to serve 4 as a main course)

  • 8 skinless, boneless chicken thighs,  diced into bite sized pieces
  • 1 onion (red, if you have it) peeled and finely chopped
  • 3 cloves of garlic peeled and sliced
  • 2 rounded tablespoons of ras-el-hanout
  • Salt and freshly ground black pepper
  • 500ml chicken stock
  • 350g bulghar wheat
  • The fruit of a small pomegranate
  • About 2 tablespoons of finely chopped mint, to serve
  • Olive oil for frying

Toss the chicken in half the spice mix and fry in a little olive oil until beginning to brown. Add the onion and garlic to the pan and continue to fry gently until the onion becomes transparent. Add the remaining spice mix and season lightly. Fry for a minute then pour in the stock.

20161114_175609

Bring to a simmer and cook for about 25 minutes. Add the bulghar, stir, turn the heat off and cover the pan. Leave to stand for about 15 minutes when the stock will have been absorbed. Check the seasoning and adjust if necessary. Stir through the pomegranate and garnish with the fresh mint.

An easy dish with just a few ingredients. Unless you’re still doing battle with your pomegranate…

If you enjoy the challenge  of pomegranate peeling, take a look at this lovely recipe using lamb and quince. Note the difference in colour of the fruit in this recipe which was made with a pomegranate bought back from Spain compared to the one in the photos above!

The Emperor’s New Clothes – Red Emperor (Snapper), Pargo Rojo

In our little seaside town of Bexhill-on-Sea we are now lucky enough to have two wonderful fishmongers. As lovers of fish and shellfish we are spoilt for choice. This weekend I decided to try out the new shop, which goes by the enchanting name of The Angry Whelk.

Big Man and I decided to avoid the Valentine’s Day menus in local restaurants. Not from a “bah humbug” point of view, we just decided that we’d rather have a relaxed Sunday at home with the pups and a meal of our choice.

Red Emperor Pargo (10)

The fishmonger had a fantastic display of fish but what really caught my eye was a beautiful red monster. A red snapper, or Red Emperor. It really was huge, far too big for the two of us, but unable to resist a bargain or a challenge I was soon heading home with the beast which weighed about 2kg.

A quick check on the internet told me that if I wanted to cook it whole, it was best to keep it simple with a sauce or something interesting on the side. Am so glad I followed this advice as the cooked dish was incredible. The fish has a meaty texture (perfect for anyone who does not like to grapple with fish bones) and a delicate (not very fishy) flavour. My monster fish would easily have fed 6, so today we’ll be eating leftovers lightly pan fried in olive oil just to warm them through and I’ve also frozen the rest to make a lovely fishy fideua another day.

Red Emperor Pargo (1)

Ingredients (depends on the size of your fish as to how many it will serve)

  • 1 Red Emperor
  • 1 lemon thinly sliced
  • A handful of flat leaf parsley
  • Salt flakes (I used Maldon)
  • Olive oil
  • Freshly ground pepper

To serve

  • 2 slices of slightly stale sourdough bread (or similar)
  • 2 cloves of garlic finely chopped
  • 2 tablespoons of olive oil
  • The grated zest of an unwaxed lemon
  • About 2 tablespoons of finely chopped flat leaf parsley

Preheat the oven to 180 degrees C. If your fishmonger has not already cleaned and gutted your fish, you’ll need to do this. I kept the head on as I think it adds flavour but this is personal choice. pat the fish dry with kitchen paper.

Line a large oven dish or tin with aluminium foil – enough to allow you to make a tent around the fish. Drizzle a little olive oil over the foil and rub and place the fish on top.

Season the cavity with salt and pepper and fill it with the lemon slices and the handful of parsley. Season the top of the fish and rub a little olive oil all over it before sealing it up loosely in a parcel.

Cooking time will depend on the size of the fish, mine took just over an hour but you can check that it’s cooked by pulling gently on the fin which is on the side of the body (it will be facing up towards you). As soon as you can pull this away easily, you’re done.

While the fish is cooking make the crouton/gremolata. Cut the bread into small croutons and fry in the olive oil until it is just starting to brown. Add the garlic at this stage and fry until the bread and garlic are golden. Allow to cool slightly and mix with the lemon zest and parsley.

Red Emperor Pargo (3)

When you are ready to serve, peel back the skin from the fish (it is thick and although I generally eat the skin on fish, this time the dish was better without). The fish comes away from the bones easily in large chunks. Serve with the garlicky, lemon croutons and an extra drizzle of extra virgin olive oil and a squeeze of lemon.

Simple to prepare, you’ll dine like royalty….go on, be an Emperor or an Empress in your own lunchtime!

Lemon Rice With Cashew Nuts

I made this lemon rice dish to eat with the Rendang Style Beef I made recently. A local Indian restaurant serves lemon rice, and I always order it but felt it was time I learned to make it myself. As a vegetarian dish it would stand pretty well alongside some vegetables, and is great with many other dishes, not just curries.

Lemon Rice (3)

Ingredients (to serve 4-6)

  • 2 tbsp sunflower oil
  • 1  tsp black mustard seeds
  • 1 tsp ground coriander
  • ¼ tsp asafoetida (optional)
  • ½ small onion, finely chopped
  • 1 long green chilli (finely chopped and deseeded too if you prefer it less hot)
  • 10g fresh ginger, peeled and grated or chopped finely
  • About 10 fresh curry leaves
  • 100g unsalted cashew nuts
  • About 500g cooked and cooled basmati rice
  • juice of 1 large lemon plus the zest of ½ the lemonfinely grated
  • Optional – finely chop the remaining half of the juiced lemon
  • sea salt and freshly ground pepper

Heat the oil in a large pan or wok and add the mustard seeds, turmeric and asafoetida. Fry, stirring constantly, until the mustard seeds begin to pop.

Now add the onion, green chilli, ginger, curry leaves and the nuts and fry for a couple of minutes until the nuts take on some colour and the onion has softened.

Curry Night (9)

Add the rice into the pan and stir fry until hot (a few minutes) then add the lemon juice, zest and lemon pieces. Mix well and season with salt and pepper before serving.

Inspired by a recipe from The Hairy Bikers’ Great Curries.

Crackling and Stripping

That’ll be the crackling on a pork belly, and the stripping of a Victorian Fireplace. Not some traditional pre Christmas party games, sorry to disappoint!

First, the food…for who can work on an empty stomach? Inspired by a recipe in Hugh Fearnley-Whittingstall’s book “River Cottage Everyday” (his crackling was made with coriander and fennel seeds), I gave a thick piece of pork belly a few minutes of love before popping it into the oven with some whole sweet potatoes and ended up with a fabulous lunch and lots of lovely cold pork for leftovers.

Cumin & Anis Pork Belly 009

Ingredients (to serve 4)

  • 3 heaped teaspoons of cumin seeds (coriander in the original recipe)
  • 2 heaped teaspoons of fennel seeds
  • 1 piece of thick-end pork belly (scored, if possible) mine contained 4 ribs
  • sea salt and freshly ground pepper

Preheat the oven to 220C/Gas 7

Put the seeds into a mortar and crush them lightly. Rub the pork skin with the salt and pepper and just over half the seeds. Scatter the remaining seeds into a roasting tray and lay the meat on top. Cook on high for 30 minutes, turn the heat down to 180C/Gas 4 and continue to cook for 1 ½ hours.

If your crackling hasn’t fully crackled, turn the oven back up to high and check every few minutes until it is done to your liking. Remove the meat from the oven and leave it to rest in a warm placed (but uncovered) for about 15 minutes. It will stay warm and keeping it uncovered will keep the crackling “crackly”. If you need to leave it for longer before eating, remove the skin and keep that to one side, wrap the meat in foil and keep warm until serving.

Serve with your favourite veggies and be sure to make enough to enjoy leftovers another day!

Meanwhile, all other sensible folk are starting to get their homes in order for Christmas. We, on the other hand, pulled up some horrible carpet which will soon be gone permanently, then the floorboards in the dining room. This was to find the source of the mysterious bouncing floor. A rotten joist awaited us so Big Man set to repairing the damage.

Rotten Joist

Not wanting to be left out of the DIY session, I decided to start stripping the first of the three cast iron fireplaces which were fortunately not ripped out upstairs.

Little Bed Fireplace (1)

We have one in each of the bedrooms and one in the bathroom.

Little Bed Fireplace (3)Little Bed Fireplace (4)

As you can see, I think this may be a long job, but I have a lot of patience for jobs like this, and I love a challenge!

Apple Roses

This summer I have been lucky enough to have been invited to two very lovely tea parties. I’m talking about the real deal here with smoked salmon sandwiches, cucumber sandwiches, lots of lovely cakes and scones, a choice of beautiful teas and a couple of cheeky glasses of champagne.  Afternoon tea is a lovely tradition, not one I have the opportunity to indulge in too often, but a lovely way to get together with friends and loved ones for a proper catch up and to enjoy some delicious food.

Apple Roses (13)

The first tea party was hosted by a very dear friend Barbara as an opportunity to get together with some of her girlfriends. It was a beautiful, sunny afternoon and she really pushed the boat out for us. I was particularly impressed by some little apple pies that she made which looked like beautiful, icing sugar dusted roses. She confessed they were pretty straightforward to make, so when my mum hosted a tea party too, I decided to make some for us all to share.

This post is photo heavy, and not such great photos at that, but if you decide you’d like to make these, it’s a useful “how to”.

Ingredients (to make 12 mini or 6 large pies)

  • 1 pack of all butter puff pastry (ready rolled is easier)
  • 2 large red apples
  • water
  • 2 teaspoons of apricot jam
  • a little lemon juice
  • a teaspoonful of honey or a heaped teaspoon of sugar
  • icing sugar

Preheat your oven to 200 degrees C and you will need some cupcake cases to support the pies while they are baking

Start by cutting the apples in half and removing the cores. Slice fairly thinly and put all the slices into a bowl with 3 tablespoons of water, the sugar or honey and about a tablespoon of lemon juice. Mixx, cover the bowl and microwave on high for 3 minutes. You can also do this in a saucepan if you don’t want to use the microwave, simply boil the apples gently in the water, lemon and honey for about 3 minutes.

Apple Roses (3)

Whichever method you use, drain the apples and leave them to cool down slightly.

Next, roll out your pastry (if it is not prerolled) into a large rectangle and cut into 6 strips (lengthways). Dust your work surface with a little icing sugar to prevent the pastry from sticking.

Apple Roses (1)

Melt the jam with a teaspoon of water (microwave or saucepan).

Working with one strip of pastry at a time, brush the pastry with the melted apricot jam and lay overlapping slices of apple along the edge. Allow a little of the top of the apple slice to come over the top of the pastry strip.

Apple Roses (4)

Fold the bottom half of the pastry strip upwards and press down gently.

Apple Roses (7)

For large pies, roll up the whole slice (like a snail shell!), for smaller pies, cut the appe and pastry slices in two and roll up into two smaller rolls.

Put them into a cupcake case to support them and bake for about 45 minutes until the pastry is golden.

Apple Roses (9)

Apple Roses (11)

Allow to cool and dust with icing sugar before admiring your bouquet of apples roses!

Raya a la Gallega – Galician Style Skate

Anyone who has followed this blog for some time (and I thank you!) will know that I am a great admirer of the food from Northern Spain. A great favourite is Pulpo a la Gallega – Octopus Galician Style which basically means served with boiled potatoes and seasoned liberally with fruity olive oil, coarse salt and pimentón. I used this style of serving with other fish and seafood, it works fantastically with scallops.

Raya a la Gallega (7)

Time this week to turn my attention to Skate, which I generally pan fry or oven cook. Why not try it “a la Gallega” as well? Online recipes told me that the fish is indeed served like this but more traditionally it’s poached. Sorry, no poaching for me I just didn’t fancy it.  I lightly griddled it before placing it on top of cooked, diced (well…”chunked”) potatoes and then dressed it with our own olive oil, Maldon sea salt and smoked pimentón.

Raya a la Gallega (1)

Perfect, two small skate wings made a fantastic sharing dish for two hungry folk but would have been ideal as a starter for 4-6 people. Definitely a dish to be repeated and absolutely perfect with a chilled glass of Albariño.

Lemon and Chilli Mussels with Langoustines

Oh it’s so easy to slip comfortably back into our Spanish life. Friends and family keep asking us “which is better, Spain or England?”. We answer, absolutely sincerely, “we love them both, they’re different, you can’t compare, we make the most of each country and enjoy all the good things they each have to offer”.

Mejillones y Langostinos a la Cazuela 003

Fish Man seems to have disappeared from our route, but the supermarkets here have an amazing choice at good prices. Mostly fresh and local (or at least, from Spain) too. The other day I bought a kilo of mussels which came from near Pontevedra in the North of Spain. It’s famous for the mussel beds and we ate plenty on our trip there a few years back.

We ate SO many...the trays full of steamed mussels just kept coming!
We ate SO many…the trays full of steamed mussels just kept coming!

DSCF1277

I also bought some fresh langoustines but forgot to ask where they came from. Peppers, tomatoes and onions grown down on the coast and a rosé wine from Rueda were pretty much all the ingredients I needed to make this simple but delicious lunch dish. Oh yes, a lemon from our tree…

Rainy Sunday 24 Mayo 2015 004

Ingredients (for 2 people)

  • 1kg cleaned mussels
  • 8 langoustines
  • Half a small red and green pepper, finely diced
  • 3-4 cloves of garlic, peeled and chopped into small pieces
  • 1 medium tomato, finely chopped
  • A small glass of wine (whatever colour you like!)
  • Half a lemon cut into small chunks (and I also added half a teaspoon of my lemon myrtle)
  • Half a teaspoon of hot pimentón or chilli powder (or to taste)
  • Olive oil

I used a lidded cazuela to make this dish but a deep frying pan with a lid or a saucepan would also work.

On a low heat, warm the olive oil and add the garlic and peppers. Cover and sweat until soft. Add the tomato, wine and spices and cook for a few minutes. You can now turn this off if you’re not ready to eat and then just warm the sauce up a few minutes beforehand to finish the dish off, or continue to the last stage.

Add the mussels, prawns and fresh lemon, stir and cover. Cook for a few minutes until all the mussels are open. Don’t eat any that won’t open!

Mussels & Prawns (2)

Garnish with some freshly chopped parsley. Unless of course, Big Man has been gardening all morning and cleared all your herbs thinking they were weeds. Oh my, kitchen unexpectedness, I laugh in your face. Pour a glass of wine, and enjoy your lovely lunch with plenty of bread to mop up the juices and perhaps (as we did) a salad of tomatoes, olives, garlic and onion. No herbs though, obviously.