Córdoba and its weirdly wonderful soup, Mazamorra

Finally the weather has improved and just as we’re getting into gear to make our way back to England, the sun has come out.

IMG_20180628_162829

It’s been a busy month with house repairs but also time to catch up with friends and loved ones and a return to a very favourite city, Córdoba. My bestie came to visit and we took her there for a visit as she had never been. We saw the beautiful Mezquita, now a Catholic cathedral but packed full of Moorish history.

IMG_20180604_161938

We also went back to Medina Azahara, declared this week a UNESCO world heritage site. Hopefully that will mean an investment of money to allow more of this amazing first century Arab Muslim city to be excavated.

IMG_20180605_113319

Of course, we made sure we ate and drank well and we all tried, for the first time, a chilled Cordoban soup called Mazamorra. Based on very simple ingredients, like many of the gazpachos of Spain, but giving an amazing finished result which we all loved. It’s an incredibly thick and filling dish, we shared one portion in the restaurant and when I made it at home recently, we decided that it would be perfect served in shot glasses as part of a mixed tapas selection.

You don’t need to be too precise about the weight of ingredients, just try to keep roughly to the proportions. But do give it a try, you might be as weirdly and wonderfully surprised by it as we were!

Ingredients (this makes one large bowl of soup which would serve about 8 shot glasses or 4 tiny bowls)

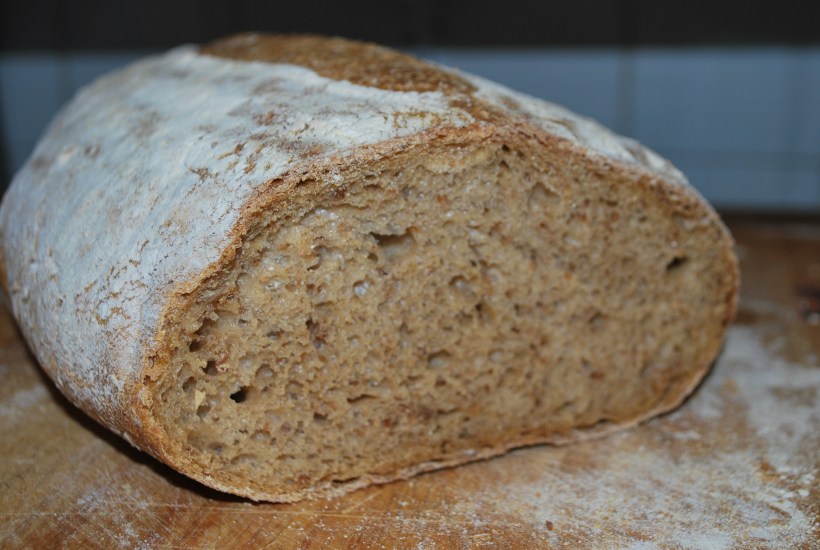
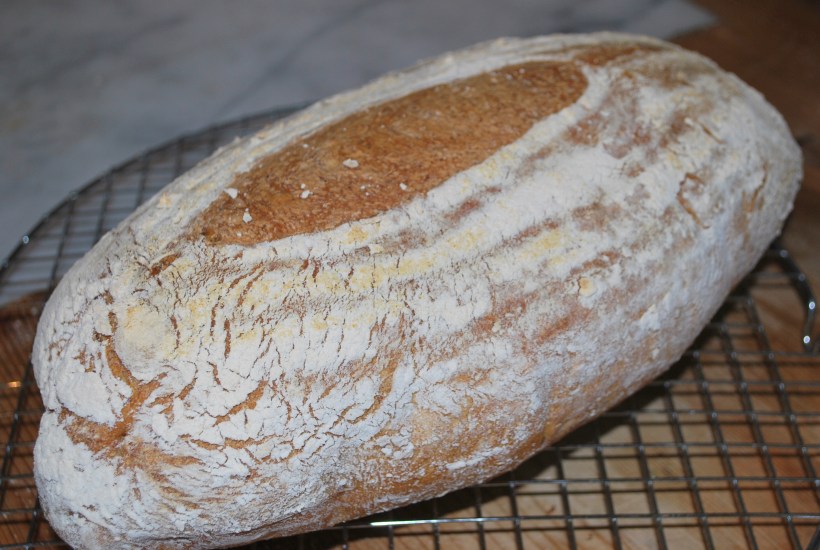
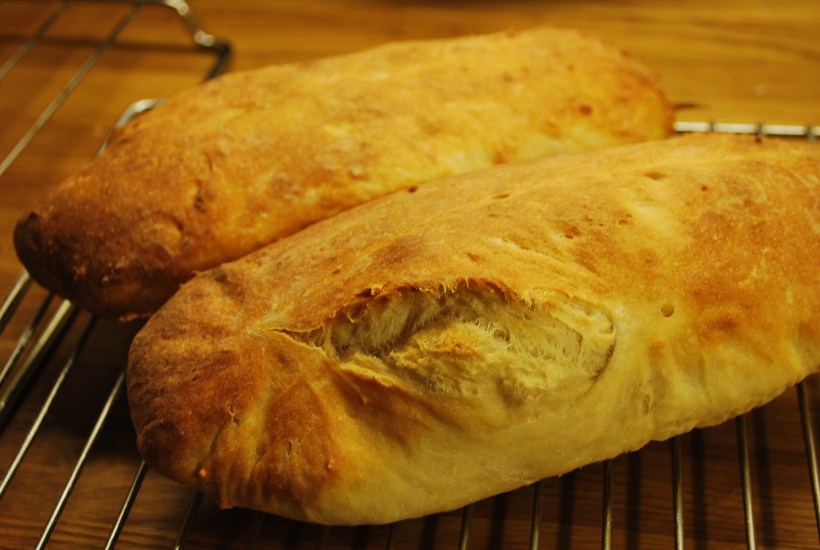
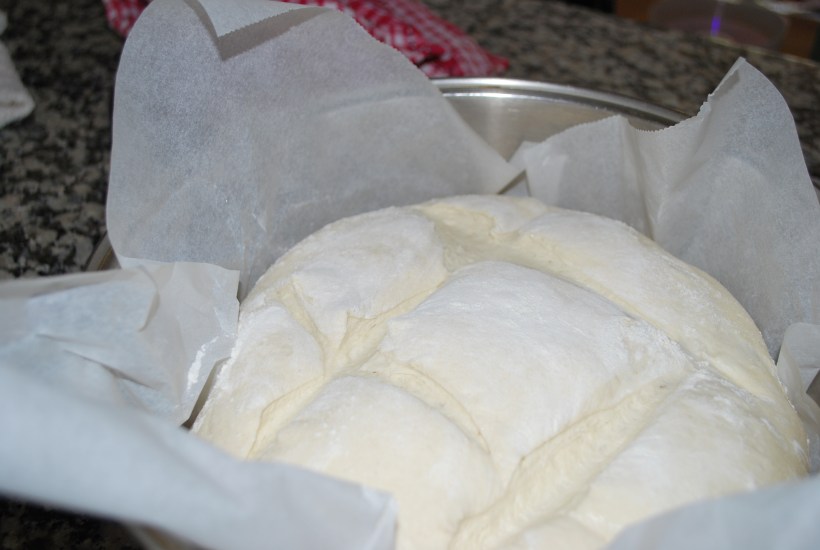
  • Approx 100g stale bread (use the best quality you have as this will greatly influence the flavour of the finished soup e.g. sourdough or ciabatta) soaked in a little water until soft
  • About 35g of blanched almonds
  • A small clove of garlic, peeled
  • Half a teaspoon of fine salt
  • One teaspoon of white wine vinegar
  • About 100 ml of extra virgin olive oil
  • Cold water
  • To garnish – chopped hard boiled egg, some chopped black olives (I didn’t have any) and a drizzle of olive oil

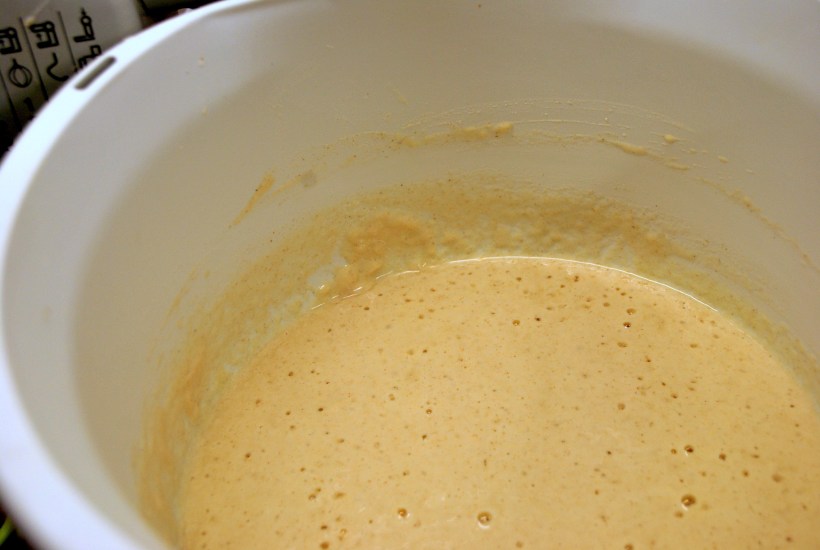
Put the soaked bread, the almonds, garlic, salt and white wine vinegar into a blender (I used a jug and a stick blender) and blend until you have a paste. I added a few drops of water to help things along. Now gradually add the olive oil and keep blending and adding until you have a smooth, thick paste. It should look rather like hummus. Now add a tablespoon of water at a time and keep blending. You want to end up with a mixture rather like custard. Taste and add a little more salt if you need it then chill until ready to serve.

IMG_20180627_093527
A useful gift from a generous neighbour

The restaurant we tasted this in was rather fancy and the soup was drizzled with a mango purée, which was delicious.  Traditionally, chopped hard boiled egg and chopped black olives are used. A drizzle of olive oil really works well and serve with crunchy breadsticks for dipping.

IMG_20180626_143534

If you’d prefer a more familiar gazpacho, take a look at my recipe, or perhaps you’d enjoy my very favourite, Salmorejo,  which is a chilled tomato and bread soup, also from Córdoba. All delicious, each very different from the other. Buen Provecho!

Looking forward to Spring

It’s been a full and busy February, the time seems to have flown by. We’ve had crazy weather in the UK with gloriously sunny days, biting winds and now a little snow with more predicted.

IMG_20180110_113637

Days have been filled with beautiful beach walks, even on the windiest of days…everything looks so much more dramatic and exciting.

IMG_20180118_121058

I took delivery of a wonderful new book, Artisan Sourdough Made Simple, written by a fellow blogger, Emilie Rafa who blogs over at The Clever Carrot. I’ve loved reading it and beginning to experiment with her wonderful recipes, starting with a brioche loaf which we loved and a fabulous sourdough focaccia .

IMG_20180129_123613IMG_20180211_112626

IMG_20180211_180604 IMG_20180118_162540

I’ve also been making my regular sourdough loaf which is our “daily bread”. For my mum I bake a rye and caraway loaf which she enjoys and Big Man is in charge of thinly slicing it for her once it has cooled.

Food has been comforting and warming with old favourites making regular appearances with a few new dishes being tried too. I made a sweet potato and kale curry…it was ok, but rather too sweet and not quite spicy enough for us. More work needed on that one!

IMG_20180114_191001

One particularly spectacular day Big Man and I hopped on a train heading West along the coast for an hour and spent the day in Brighton. We went on the i360, an enormous pod which holds about 200 people which rises up a 162m tower to give incredible views at a height of 138m across the channel, the city of Brighton and across the South Downs…and of course the panorama is a 360° one.  Absolutely fantastic and we had a cheeky glass of champagne to make the experience extra special.

IMG_20180212_123353

IMG_20180212_124347

IMG_20180212_130044

Today the cold weather is moving in, people are panic buying (ridiculous) in the supermarkets and I’m getting ready for Big Man to come back from a couple of weeks in Spain. In our house, this means making food…warming chicken and chickpea soup, pork and beans and maybe even a fish pie. Well…he says he’s missed my cooking!

IMG_20180221_081812

Despite the cold, there are little signs that spring is on its way with the bravest of bulbs pushing up through the ground,  defying the cold and reminding us that after the dark days of winter there is always sunshine and new life to look forward to.

Down By The Sea Soda Bread

It’s been years (really, it has!) since I gave you a soda bread recipe. It doesn’t mean I’ve stopped baking soda bread, but mostly we’re a sourdough household right now.

Best friend Ria baked herself a loaf recently, so jumping on her soda bread bandwagon, I baked one too. I used the whey from curd cheese making, once again, but the recipe usually calls for buttermilk. This recipe is different from my Up The Mountain Soda Bread as it does not include oats or butter. Try both and see which one you prefer!

Soda Bread Sliced 002

Ingredients to make one loaf (keeps well for about 4 days)

  • 250g plain flour
  • 250 wholemeal or granary flour (I used granary which gives it a slightly sweeter, nuttier taste and a slightly chewy texture)
  • About 400ml of buttermilk or whey (if you don’t have either, squeeze half a tablespoon of lemon juice into milk, stir and leave it to stand for 30 minutes at room temperature and then it will be ready to use)
  • 1 teaspoon of Bicarbonate of Soda
  • 1 teaspoon of salt

Mix the flours together with the salt and bicarbonate. Gradually stir in the liquid with a wooden spoon or your fingers. You may find you don’t need it all, but you want to end up with a slightly sticky mixture.

Dust your worktop with flour and shape the mix into a round. Try not to knead too much, it just needs to come together.

Place the loaf onto a baking tin lined with greaseproof (or baking) paper. Cut a deep cross into the loaf, almost all the way through. This will allow the heat to penetrate and the alkaline of the bicarbonate and the acid of the buttermilk will work together to make your loaf rise. I’m afraid I’m no great scientist, so apologies if my explanation of the bread magic is somewhat simple!

Dust the loaf with flour, cover with a clean tea towel and leave, if possible, for 30 minutes, You can bake immediately if you choose but this extra 30 minutes really seems to allow the acid and alkaline to start doing their thing so that the loaf is raring to go when it reaches the heat of the oven. Don’t expect it to rise before baking like a regular loaf.

Soda Bread 002

Heat your oven to 200 degrees and when you are ready, bake the loaf for about 30 minutes. It should be browned on the top and sound hollow when tapped on the bottom.

Leave to cool, if you can resist, and enjoy in the same way as a regular bread.

Molletes de Antequera – Soft Bread Rolls from Antequera

It’s funny that when you are away from home, apart from missing loved ones, food seems to feature highly on the list of things people miss. Or is that just us? We love good bread and are lucky to have relative success making our own as we don’t have any spectacular bakers close to our home in England and Bread Man from Spain just won’t deliver to us this far away!

Finished Molletes (1)

About 30km from our home in Spain is a town called Antequera. One of its main claims to fame is the delicious soft white bread rolls it produces and which are typically served for breakfast or “merienda” (afternoon tea). Usually they are just split, drizzled with olive oil and perhaps a sprinkle of salt. You could be more adventurous and spread them with fresh crushed tomatoes (my favourite Spanish breakfast), or go the whole hog (excuse the pun) and add some delicious slices of Jamon Serrano.

In England you can buy soft white breakfast rolls which are very good, but not quite the same. Time to see if we could recreate a favourite breakfast bread. It’s rather an unusual method, at least I thought it was, as it involved dropping a piece of dough into a bowl of warm water and waiting for it to bob to the surface like a supersized gnocchi. Stay with me, all will be revealed…

Ingredients to make 6-8 large rolls (these rolls are typically about 30cm in diameter and quite flat, they are also lightly baked so that they don’t take on any colour)

For the “Masa Madre” – the starter, or “mother dough”

100g strong bread flour

1x 7g sachet of easy blend yeast (or you can use 15g of fresh yeast)

50ml warm water

For the second dough

500g strong bread flour

320ml warm water

1x 7g sachet of easy blend yeast (or you can use 15g of fresh yeast)

50ml olive oil

Up to 20g salt (I used less, about 12g)

To make the Masa Madre – mix the easy blend yeast into the flour then add the water and mix to a dough. If using fresh yeast, add the yeast to the water, allow it to ferment then add to the flour. Form the dough into a ball, cut a cross into the top of it and put it into a bowl of hand warm water.

Molletes 001

The dough will start to release small bubbles into the water (it’s all quite entertaining to watch!) and will rise to the surface within about 10 minutes (or less). Pour away the water and use the dough immediately.

Molletes 003

To make the second dough. Mix the easy blend yeast into the flour then add the salt. In a separate bowl add the oil to the water then add half the flour, yeast and salt. If using fresh yeast, add the yeast to the water, allow it to ferment and add the oil. Then add half the flour with the salt.

Add the masa madre to the dough (which will be very wet at this stage, I used a mixer with a dough hook) and knead for a few minutes then add the rest of the flour. Continue to knead for about 10 minutes until the dough is silky, smooth and elastic. Place the dough into a bowl which has been floured or rubbed lightly with olive oil, cover with a damp tea towel and allow to rise until doubled in size. Mine took about an hour and a half.

Molletes 004

Knock back the dough and divide into 6 or 8 equal portions. Roll into balls which should be placed onto a flat baking sheet lined with baking paper. Flatten them with the plan of your hand, cover with a damp tea towel and leave to rise again. You don’t want a massive rise on the rolls, they should still retain a fairly flat surface.

Dust with flour before baking for an authentic finish. Preheat the oven to 250 C/475 F/Gas 9 and place a bowl of hot water at the bottom of the oven. Place the tray (or trays) into the oven and reduce the temperature to 200 C/400 F/Gas 6. Bake for around 20 minutes. I left mine in for a few minutes too long and they started to take on some colour which didn’t affect the flavour but is not typical for Molletes.

Molletes 009

Eat within 24 hours as they tend to dry out a little after this (but are delicious toasted or griddled). They freeze and defrost really well and are great used as picnic rolls. Now, to work out how to incorporate Hercules, Son of Priscilla, my sourdough starter into the next batch….


Give us this day our daily bread…

I make our bread several times a week. I enjoy the process and now that I’m using my starter Hercules, Son of Priscilla (thanks Celia!), my loaves are going from strength to strength. I confess that most of the time I make my usual sourdough loaf, starting the process the night before and baking early evening of the next day.

DSC_0032

Other times I use Celia’s overnight sourdough recipe which gives fantastic results and I took on board her tip of dusting the loaf in semolina flour for a crunchy crust. Clearly, as she’s my bread making heroine/guru and I am her keen student/bread making stalker, I also made some teeny tiny loaves (like she did) using some small loaf tins I had bought to make cakes in but had never used. They turned out wonderfully and were the perfect size for a hugely filling lunch roll.

Bread 001

The last few weeks have given me time too to do a little experimenting and for Easter Sunday my father requested a loaf with whole eggs baked into the top of the dough, as this is what his mother used to make when he was a boy. I Googled Calabrian Easter bread and most of the recipes led me to make a slightly sweet bread, gently flavoured with anis and made using eggs and milk. The least said about the egg dyeing the better, but everyone enjoyed it. We all felt that it was like milk bread or pan de leche as it’s called in Spain and would probably prefer to eat it as a breakfast or tea time bread. I’m going to experiment making it again in small rolls so once I’ve perfected it, I’ll post the recipe.

Italian Easter Bread 001

The most recent experiment was to use my sourdough starter to make a whole grain loaf. I wasn’t really sure what sort of results I’d get as wholemeal flour tends to rise more slowly than white flour and give a heavier bread. Combined with a slow rising, heavy sourdough loaf I was a little concerned I’d end up baking the cornerstone of our next building project, but using a mix of a flour which contained wholemeal, wheat flakes and bran with a strong white bread flour, I got fantastic results. The bread was malty, tangy and chewy and delicious spread with butter or drizzled with olive oil. I followed the same process as my usual loaf, but didn’t add olive oil. I added an extra knead and a slightly longer bake.

Ingredients

For the sponge

  • 100ml of unfed sourdough starter (mine is fed with the same volume of flour and water)
  • 250g wholemeal flour with flakes and grains
  • 300ml water

For the dough

  • 300g strong white bread flour
  • 10g salt

The night before you want to bake (or fit this into your usual baking routine), mix the ingredients for the sponge, cover and leave overnight or for about 8 hours. Don’t forget to feed your original starter to replace what you took out!

Bread 006

The next day, add the remaining flour and salt and in a mixer with a dough hook (this is quite a wet dough) knead for 10-12 minutes until the dough looks stretchy and elastic.

Turn it into a large, oiled bowl and cover with oiled cling film. Leave it to double in size, mine took about 5 hours, but it will be different for everyone. Turn out of the bowl onto an oiled surface, knock it back, form it into a ball and put it back into the oiled bowl and cover again. Leave to rise again, this should only take a couple of hours, and turn out onto a lightly floured surface. I didn’t use semolina but feel free to use whatever you like best.

Knock back and shape either onto a round or put into a floured banneton (which is what I did). Cover with a tea towel and leave to double in size.

Bread 004

Just before you are about to bake, turn your oven on to heat at top “volume” with an oven tray inside if you are going to turn out from a banneton. Once the oven has reached its temperature, carefully take the tray out and turn your loaf onto it. Slash with a very sharp or serrated knife, put it in the oven and turn the temperature down to 150C (Fan) and bake for about 55 minutes until nicely browned and it sounds hollow when tapped on it’s lovely wholemeal bottom.

Drive yourself crazy for a few hours while it cools with the wonderful smell of your freshly baked loaf and enjoy whichever way you most enjoy bread!

Sourdough Loaf Revisited

I’ve recently been experimenting with other types of bread, but the staple at home is my sourdough loaf, which I bake about every third day. It’s a large loaf, but hey, we eat a lot bread.

A few people were asking about it, some wondered if it was a bit of a palaver to make it. At first, I agree, it seemed all a bit complex, but you get yourself into a little routine, you plan ahead and it really isn’t all that much work if you find your rhythm.

Here’s a little step by step to how I make my bread….hope it helps any of you who are planning to take the first steps in sourdough baking. This particular loaf was left to rise too long and fell “splat” onto the baking tin – it still turned out fine, it’s so forgiving!  For a starter, head over to Sawsan’s blog

I feed my starter (kept in the kitchen in a cool spot)  each time I make my bread, so approx. every 3 days. If it’s any longer between bakes I’ll just feed it anyhow – ¼ cup of flour and ¼ cup of water to replace the half cup of starter I remove. Apologies for the photos but it was dark at most stages of making the bread….real life cooking!

So, the night before I want to bake my bread I put half a cup of starter into a bowl with 250g of strong flour and 300ml of water. This is what it (the sponge)  looks like a minute or two after mixing it up with a fork. Don’t forget to feed your starter to replace what you have removed.

DSC_0005

This is my sponge 15 minutes later.

DSC_0007

About 9 hours later, next morning, my sponge looks like this.

DSC_0009

Then I add a further 300g of strong flour, a teaspoon of salt and a tablespoon of olive oil (optional) and start to knead in my mixer with a dough hook. It looks lumpy and heavy at first.

DSC_0012

After 10 minutes on slow speed it looks glossy and comes away from the sides of the bowl and is ready.

DSC_0016

I tip it onto a lightly floured surface then sprinkle a little flour on top, it’s a wet dough but don’t worry, it comes together easily.

DSC_0017

Shape it into a round and place it into an oiled bowl then cover with cling film.

DSC_0019

Leave until doubled in size (or come back from work about 9 hours later to find this…don’t worry).

DSC_0020

Turn it out of the bowl onto a floured surface, flour the top gently and shape into a long sausage if you are using a floured banneton or put it into a bowl lined with greaseproof paper and cover with a tea towel.

DSC_0021

After an hour it will have almost doubled again in size.

DSC_0023

Flip out onto a hot baking tray (pop the tray into your oven as it heats up) or if you don’t have a banneton put your dough and greaseproof paper directly onto the baking tray or into a heated oven dish.

DSC_0024

Bake for about 40 minutes until golden brown at 180 degrees (fan) or 200 degrees regular oven.

DSC_0032

Cool on a rack before slicing.

Yes, you have to wait almost 24 hours for your loaf from starting the process, but good things, in this case, really are worth waiting for!

Monster Sandwiches with Celia’s Pan Cubano

We all know that one of the great pleasures of blogging comes from sharing, being inspired by fellow bloggers and getting excited by new recipe ideas.

Pan Cubano (1)

I baked the loaves late at night, sorry about the dark photo…

I’m a regular bread baker now.  My sourdough bread is made every 3 days or so, but sometimes I feel the need to shake it up and try a new recipe. A little while ago I saw a recipe over at Fig Jam and Lime Cordial. Celia is the Queen of Sourdough and her recipe for a bread called Pan Cubano really called to me. The fact that it used Lard was probably the part which called loudest! In Southern Spain the pig is King and lard is used in many recipes. I’m in England right now but I felt nostalgic.

I didn’t use rendered pig fat in the recipe, I turned to my massive supply of goose fat which came from cooking the Christmas goose. You only need about a heaped teaspoon though, so I still have plenty leftover for delicious roast potatoes.

The bread turned out fabulously, although I didn’t get the characteristic slit in the loaf as I had no leek or palm leaves to lay down the centre of the loaf. Slitting them didn’t seem to make any difference but the flavour and texture  of the bread was incredible. Celia advised me to freeze some of the loaves if we weren’t planning on eating them all at once. Great advice as I made four loaves, each of which gave me 2 massive, builder-sized sandwiches. The sandwiches were filled with thin slices of smoked gruyere and cold twice cooked pork – amazing!

Pan Cubano (4)

Thanks Celia – for the inspiration and the amazing lunch…Go on, Be Inspired!

And when she got there, the cupboard was bare….Olive Oil Tortillas

Old Mother Hubbard went to the cupboard
To get her poor dog a bone
When she got there, the cupboard was bare
And so the poor dog had none*

Olive Oil Tortillas (3)

Our little break Down by the Sea is over and yesterday we got back to Spain and are now back Up the Mountain. Today is Sunday, and of course in our rural area pretty much everything is closed.

We could have gone out for lunch but we are exhausted. Time to dig around in the freezer and the store cupboard and become an inventive Chica.

On opening my fridge I actually screamed with shock and slammed the door shut again. Big Man came running thinking I’d left something in there that had grown gills while we were away. But no, it was 3 weeks of tomatoes kindly picked and stored by our neighbours. Here’s a photo of about half of them…

There's still the salad basket below which is packed too!
There’s still the salad basket below which is packed too!

Well, there was definitely going to be a tomato salad on the menu. Every day for a long time.

The freezer kindly delivered up an Ottolenghi Chicken and Hazelnut dish and all I needed was bread. Did you know that most Mediterranean folk I know won’t even consider a meal complete unless there is a basket of bread on the table? In fact, I think if there was nothing on the menu in a restaurant they’d order bread with bread.

With not enough time or patience to make a loaf, I thought of tortilla wraps and headed over to check out Tandy’s brilliant recipe at Lavender and Lime. Of course, I had no butter but in the land of olive oil, a substitution was possible, and gave great results.

Olive Oil Tortillas

  • 180g plain flour
  • 30g olive oil (yes, I did this by weight and not volume!)
  • 1 teaspoon salt
  • Pinch of sugar
  • Up to 100ml water

Add the sugar and salt to the flour and mix then pour in the olive oil. Rub the oil into the flour until small lumps form and then rub for a moment or two more to break the little lumps down. Gradually add the water and knead for a few minutes until you have a smooth dough.

Rest the dough for 30 minutes (I just left it on the counter) and divide into four equal pieces. Roll out into thin rounds and dry fry in a very hot frying pan, pressing down with a spatula to stop air bubbles forming. Cook on both sides until lightly browned and keep warm by wrapping them in a tea towel.

Olive Oil Tortillas (1)

Enjoy your tortillas whilst asking your other half where all your glass jars with lids are for your tomato bottling session, only to find out he has thrown them all in the recycling.

*Rest assured that no dogs or even humans ever went hungry in our house!

For a delicious gluten free bread/wrap, take a look at my Socca recipe.

Third Time Lucky – Sourdough Loaf

Yes, my sourdough starter is now up and running and ready to make bread with. Apologies for the length of this post, it’s hard to explain what I did in just a few words, so if you’re not interested in the process, have a look at the photos and come back again soon for some quicker recipes – you’re always welcome here!

Third TIme Lucky Loaf!

First up I tried a recipe from the very good River Cottage Bread handbook, but it involved proving the bread 4 times (yes, 4 times!) which felt rather too much like a chore to me. The gas oven did not behave well and the recipe also involved trays of water and spraying the bread.

I did get a lovely tasting loaf, but the process was amazingly labour intensive. A recipe from the lovely Moro Cookbook involved very little work but my brain told me as I did it that it wasn’t going to work for me. And it didn’t. Flat as a very thick pancake bread.

I would have liked more holes in it, but it tasted wonderful...
I would have liked more holes in it, but it tasted wonderful…

I also struggled with proving and baking trays and came across a few folk who had used oven dishes with lids (or casserole dishes or Dutch ovens). Some dusted them with oatmeal to stop the bread from sticking and one person used greaseproof paper. I wish I could track her recipe down to acknowledge properly, but I can’t find it again…..apologies to the person who had this great idea.

Sourdough 2 (2)

So, with no further ado, I used a recipe from the River Cottage website, with a few tweaks of my own and the oven dish/greaseproof paper method of baking. Result? A beautiful looking and tasting loaf of sourdough bread. Now, if someone can advise me on how to make the bread denser and more sour tasting I’ll be a very happy bread baker!

For the sponge

•About 100ml active starter

•250g strong bread flour (white, wholemeal or a mixture)

•300ml warm water


For each loaf

•300g strong bread flour (white, wholemeal or a mixture)

•1 tbsp olive or rapeseed oil (optional)

•10g salt

The night before you want to bake your loaf, create the sponge: take about 100ml of your active starter, and combine it with 250g fresh flour and 300ml warm water in a large bowl. Mix well with your hands, or very thoroughly with the handle of a wooden spoon, then cover with clingfilm and leave overnight. In the morning, it should be clearly fermenting – thick, sticky and bubbly.

Moby Dick - a beast of a sourdough starter
Moby Dick – a beast of a sourdough starter

Now make your loaf: add a fresh 300g flour to the sponge, along with 1 tbsp oil, if you like (it will make the bread a touch softer and more silky, but is not essential), and 10g salt (which is essential). Squidge it all together with your hands. You should have a fairly sticky dough. If it seems tight and firm, add a dash more warm water. If it’s unmanageably loose, add more flour (but do leave it as wet as you dare – you’ll get better bread that way).  I did this and the next stage in my mixer with the dough hook.

Turn out the dough on to a lightly floured surface and knead until smooth and silky. This takes in the region of 10 minutes, but it can vary depending on your own style and level of confidence. Put the dough in a lightly oiled bowl and turn it so it gets a light coating of oil. Cover with lightly oiled clingfilm, or put the bowl inside a plastic bag, and leave to rise. Don’t expect it to whoosh up to twice its original size in an hour, as a conventional loaf does. Sourdough rises slowly and sedately. The best thing is to knead it in the morning then simply leave it all day (or knead in the evening and leave overnight) in a fairly cool, but draught-free, place, until it is more or less doubled in size and feels springy when you push your finger gently into it. Knock it back (deflate it) on a lightly floured surface.

The dough has risen - hallelujah!
The dough has risen – hallelujah!

You now need to prove the dough (i.e. give it a second rising). You are also going to be forming it into the shape it will be for baking. If you have a proper baker’s proving basket, use this, first dusting it generously with flour. I lined a bowl (which was roughly the same size as my oven dish) with greaseproof paper and sprinkled it with a little flour). When the dough had doubled in size (it only took a couple of hours as it was a warm day) I lifted the bread out with the paper and placed both the paper and bread into the oven dish (which I had heated for about 20 minutes) slashed the bread with a sharp knife, sprinkled it with a little flour and put the lid on the pot.

I cooked it on the high temperature the entire time for about an hour and removed the lid for the last 20 minutes of cooking.  Leave to cool completely (it’s hard to resist, but your bread really will have a better texture if you allow it to cool), enjoy!

100th Post – Banana Bread

One slice or two?

Well, I really can´t believe it, but WordPress tells me that this is my 100th post.  I still get a buzz from writing and posting, but equally I love to receive comments, to know that new friends “out there” are interested in what I have to say.  I love that I have “met” so many interesting people with amazing blogs about all the things that interest me, the way we share tips and ideas, encourage each other to try new things and share little glimpses of our lives with each other.  Thank you!  You´re all invited over for coffee and cake…

I´m not a huge banana fan.  I know they´re good for me and I sometimes force a really unripe one down before I go to the gym, and I don´t mind them in Banoffee Pie.  But when they start to ripen even just a little bit, the smell really turns me off.  Bizarrely I adore Banana Bread, so I have to overcome my feelings for overripe bananas and just get on with it.

When I first told Big Man (who is a huge banana fan but often responsible for forgetting to eat them and then leaving me with stinky overripe ones) I was making banana bread I got a very puzzled frown from him.  Maybe it´s because I translated it literally to him as “Pan de Platano”… I´m not quite sure what he was expecting, but he´s now hooked and even brags about what a great delicacy it is to those poor unfortunates not in the know.

I may need to bake a few more...

My recipe is on a scrappy piece of paper which is covered in grease and crumbs so I don´t know who to credit.  I think it was one of those recipes passed from friend to friend with alterations on the way.  It´s a recipe that always works for me, so without further ado, here it is.

Ingredients

½ cup of sultanas soaked in dark rum (or strong black tea) I usually heat this and let it cool while I make the cake

1 cup + 2 tablespoons of self raising flour

½ teaspoon salt

½ cup oil (I use olive oil)

½ cup sugar

2 large eggs

4 small ripe bananas mashed

¼ cup chopped nuts (I use almonds or walnuts)

1 teaspoon vanilla essence

Heat the oven to 180ºC and line either a large loaf tin or two small ones with greaseproof paper.  Beat the oil and sugar together then beat in the eggs. Add banana, nuts, sultanas and vanilla and stir then gradually stir in the flour. Pour into the prepared tin and bake for 1 hour (large tin) or about 45 mins (smaller tins).

And if you are a member of the Banana Fan Club, check out The Food Doctor´s incredible posts at Chef In Disguise which give some amazing ideas for using up those pesky little yellow fruits here, here and here.  And thank you to Sawsan, alias Chef in Disguise for very kindly passing on the Blog On Fire Award to me recently.  Honestly, this could all go to my head!