Smoked Haddock and Prawn Chowder

Oh the deliciousness of a beautiful piece of perfectly smoked fish, haddock in this case, a dish I cooked in England before we headed back to Spain. Simple, quick to cook and oh so satisfying.

Smoked Haddock & Prawn Chowder (3)

Ingredients (to serve 2 as a main course or 4 as a starter)

  • 1 tablespoon olive oil
  • 1 medium onion, finely chopped
  • 600ml milk
  • 400ml fish stock (can be made with 1 Fish Stock cube)
  • 2 medium potatoes, peeled and finely diced
  • 450g traditionally smoked haddock fillet, skinned
  • 225g raw peeled prawns
  • About a cup of creamed sweetcorn (I used tinned corn which I blended with the stick blender)
  • Lemon juice, to taste
  • Freshly ground black pepper
  • 1tbsp fresh parsley, chopped

Heat the oil in a large heavy pan. Add the onion and cook gently for 10 minutes until soft. Add the milk and stock and bring to simmering point.

Add the potatoes and simmer for about 10 minutes or until they are soft. Keep the heat gentle as you do this.

Cut the haddock into bite-sized pieces and add to the pan. Cook very gently for 2 minutes, then add the prawns, creamed corn, lemon juice and pepper. Cook for a further 2-3 minutes, taste and season, stir in the parsley and serve.

If you enjoy chowder, take a look at my Smoked Prawn and Bacon Chowder recipe.

And when she got there, the cupboard was bare … Almost Panzanella

You know what it’s like when you get back from a holiday and there’s nothing in the fridge apart from a sad carrot and a stinky piece of cheese you thought might just last until you got back? Yes? I thought so! Well, imagine how little there was at home for us after an absence of almost 5 months. A deeply sad situation. Thank god for the local bar/restaurant where we were welcomed with open arms on our first night and sent home with bread, tomatoes and onions to see us through the next morning.

After my favourite Spanish breakfast I got to thinking about how inventive we can all be when we have very little to play around with. Every country has a dish for leftover bread and the Italian bread and tomato salad called Panzanella came to mind.

Sunshine is a glorious extra!

We have litres and litres of our very own beautiful olive oil which was milled just a few weeks ago and our lemon tree is loaded with lemons. I added a tin of tuna from the larder (not very authentic but what the heck) and a handful of parsley from the garden. Honestly, I should leave the fridge bare more often so that I can remember to enjoy dishes like this.

Ingredients (you choose the quantities)

  • Stale bread cut into small cubes
  • Roughly chopped tomato and onion
  • Chopped parsley (basil is more authentic though)
  • A finely chopped clove of garlic
  • Coarse salt and freshly ground pepper
  • Lashings of olive oil and plenty of lemon juice or wine vinegar
  • Add some chopped cucumber if your fridge is being kind to you
  • Optional – a tin of tuna (omit to keep it vegetarian)

Put all the ingredients (except the seasoning and dressing) in a bowl and mix with your hands. Dress lavishly with oil, add lemon or vinegar to taste and season. Mix again with your hands, squishing the tomato a little so that the juices run out. Leave it for at least 10 minutes so that it can absorb all those wonderful flavours and enjoy!

Sourdough Loaf Revisited

I’ve recently been experimenting with other types of bread, but the staple at home is my sourdough loaf, which I bake about every third day. It’s a large loaf, but hey, we eat a lot bread.

A few people were asking about it, some wondered if it was a bit of a palaver to make it. At first, I agree, it seemed all a bit complex, but you get yourself into a little routine, you plan ahead and it really isn’t all that much work if you find your rhythm.

Here’s a little step by step to how I make my bread….hope it helps any of you who are planning to take the first steps in sourdough baking. This particular loaf was left to rise too long and fell “splat” onto the baking tin – it still turned out fine, it’s so forgiving!  For a starter, head over to Sawsan’s blog

I feed my starter (kept in the kitchen in a cool spot)  each time I make my bread, so approx. every 3 days. If it’s any longer between bakes I’ll just feed it anyhow – ¼ cup of flour and ¼ cup of water to replace the half cup of starter I remove. Apologies for the photos but it was dark at most stages of making the bread….real life cooking!

So, the night before I want to bake my bread I put half a cup of starter into a bowl with 250g of strong flour and 300ml of water. This is what it (the sponge)  looks like a minute or two after mixing it up with a fork. Don’t forget to feed your starter to replace what you have removed.

DSC_0005

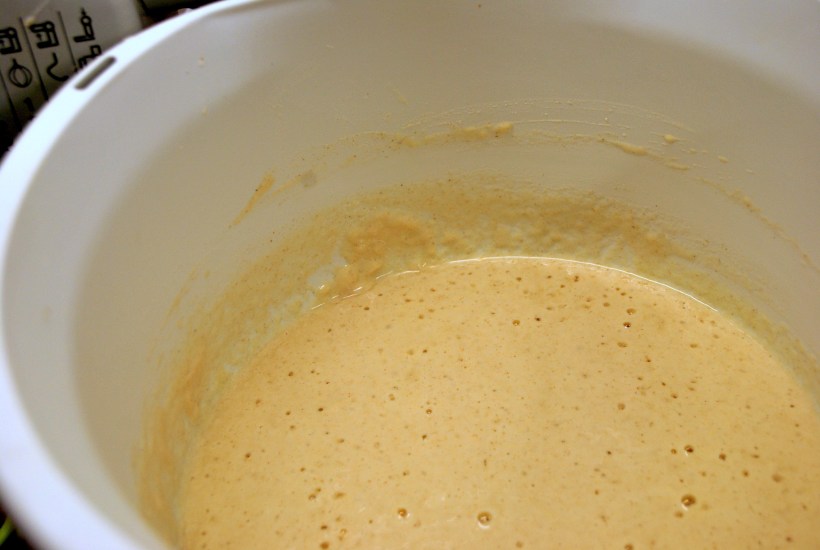
This is my sponge 15 minutes later.

DSC_0007

About 9 hours later, next morning, my sponge looks like this.

DSC_0009

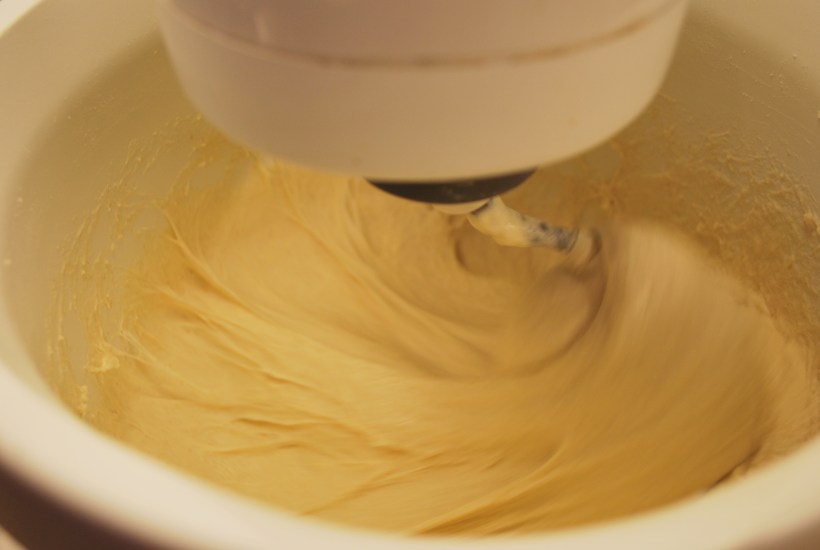
Then I add a further 300g of strong flour, a teaspoon of salt and a tablespoon of olive oil (optional) and start to knead in my mixer with a dough hook. It looks lumpy and heavy at first.

DSC_0012

After 10 minutes on slow speed it looks glossy and comes away from the sides of the bowl and is ready.

DSC_0016

I tip it onto a lightly floured surface then sprinkle a little flour on top, it’s a wet dough but don’t worry, it comes together easily.

DSC_0017

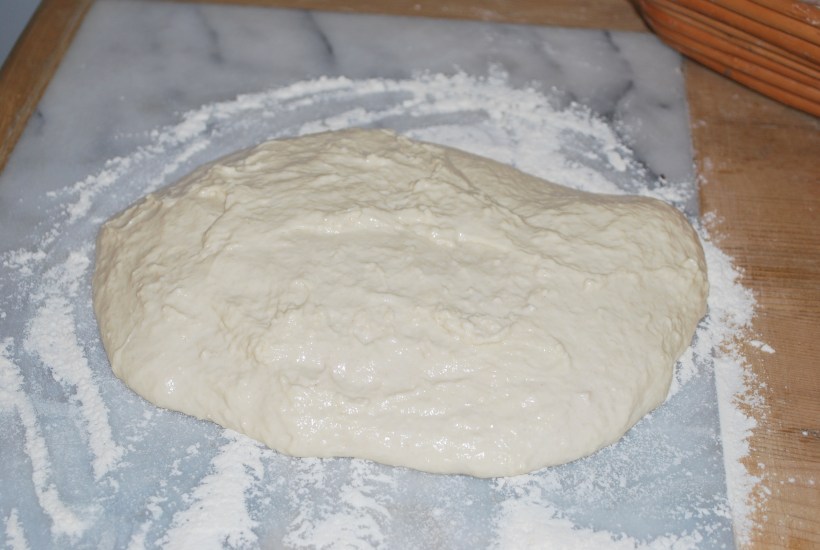
Shape it into a round and place it into an oiled bowl then cover with cling film.

DSC_0019

Leave until doubled in size (or come back from work about 9 hours later to find this…don’t worry).

DSC_0020

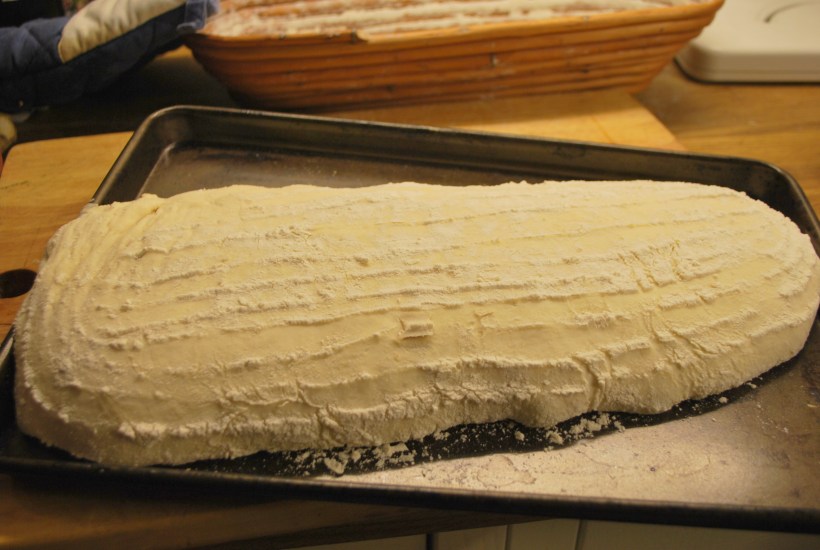
Turn it out of the bowl onto a floured surface, flour the top gently and shape into a long sausage if you are using a floured banneton or put it into a bowl lined with greaseproof paper and cover with a tea towel.

DSC_0021

After an hour it will have almost doubled again in size.

DSC_0023

Flip out onto a hot baking tray (pop the tray into your oven as it heats up) or if you don’t have a banneton put your dough and greaseproof paper directly onto the baking tray or into a heated oven dish.

DSC_0024

Bake for about 40 minutes until golden brown at 180 degrees (fan) or 200 degrees regular oven.

DSC_0032

Cool on a rack before slicing.

Yes, you have to wait almost 24 hours for your loaf from starting the process, but good things, in this case, really are worth waiting for!

Fideuá with Chorizo and Mushroom

Fideuá? What the heck? It’s a traditional dish from Valencia, Gandía to be more precise, which is very much like a paella but made with short noodles instead of rice. In Spain you can buy bags of noodles of varying thickness from “0” which is very fine up to 5 or 6, I think. For this dish a number 3 or 4 noodle is typically used but if you can’t find them where you are, use broken spaghetti (a thin one) instead.

Fideua de Chorizo (5)

This dish is made with seafood usually, in the same way as a paella, but I made one recently with some Spanish Chorizo. It’s also a good vegetarian dish – use what you like best! It’s quicker and easier to make than paella.  Measurements are a little rough, use as much or as little “filling” as you like. For a dry fideuá (so that it looks like a paella made with noodles) use about twice the volune of liquid to noodles, for a soupier version (which is how we like it), use up to 3 times the liquid.

Phew, that’s the maths over with, here’s how to do it!

Ingredients (for 2 people)

  • 2 chorizo chopped into small chunks
  • A few slices of finely chopped jamón (or pancetta or bacon)
  • 4 fat cloves of garlic crushed
  • 1 stick of celery, finely chopped
  • Half a red pepper, finely chopped
  • About 6 mushrooms, finely chopped
  • About half a cup of chopped tomatoes
  • 200g fideos (noodles)
  • About 400ml of vegetable stock (or chicken stock) for a dry dish and 600ml for a soupier version
  • A pinch of powdered saffron
  • A level teaspoon of sweet pimentón
  • A pinch of hot pimentón (optional)
  • Salt and Pepper
  • Olive oil for frying
  • Wedges of lemon and chopped parsley to serve

In a deep frying pan or paella pan gently fry the chorizo, jamón, garlic, celery, pepper, and mushrooms until the chorizo starts to crisp. Add the tomatoes and cook for a minute then add the fideos and stir them into the mix then add the stock, spices and season lightly.

Bring to the boil and then simmer for about 8 minutes until the fideos are nearly cooked. Add more stock if it gets too dry before it’s cooked.  Turn off the heat, cover with a lid or tea towel and allow to rest for 2 or 3 minutes. Check that the fideos are cooked to your liking and adjust the seasoning if necessary.

Serve sprinkled with freshly chopped parsley and wedges of lemon to squeeze over.

And if you have a few minutes and want to see a master in action, enjoy this video…(it takes a few seconds to start and is in Spanish bu the chef is … er… easy on the eye!)

Lazy Sunday Roast Chicken

Oh my, the rain, the wind. It’s getting us down. But do we complain? Well…yes…we do a little bit if I’m honest. What we also do is draw up plans for building an ark and cook some comfort food. This was last weekend’s Sunday lunch and if this weather continues we may have a  repeat performance again tomorrow!

I don’t think I can really claim this to be a recipe, as it just involves chopping, seasoning and putting something in the oven. But if you need inspiration for a family meal, or a meal for 2 with leftovers for another day (or two) then look no further.

Winter Roast Chicken (6)

This was lunch for a lazy Sunday. The sun finally came out for a few hours, after rain, storm and high winds. It was still blowing a bit of a gale so we headed to a nearby park instead of the beach where the pups could let off steam.  We all got thoroughly muddy but returned home with “roses in our cheeks” and “the cobwebs well and truly blown away” (as my grandmother used to say of walks in the sunshiny cold of England). We also returned home to the delicious smell of roasting chicken and a toasty warm kitchen. Perfect!

Ingredients (to serve 4 hungry adults)

  • 1 chicken weighing about 2kg
  • 4 carrots, 2 parsnips, 1 red pepper, 1 yellow pepper, 1 large sweet potato, 2 sticks of celery, half a fennel, a red onion, a white onion – all vegetables peeled and chopped into large chunks
  • 1 head of garlic, cloves separates but not peeled
  • About 3 tablespoons of olive oil
  • A small glass of white wine (or water)
  • 1 tablespoon of za’atar
  • 2 lemons, halved
  • Salt and pepper

Put all the vegetables and the garlic into a deep oven tray (line it with foil to save having to scrub the pan). Season with salt and pepper and pour over 2 tablespoons of the oil and the glass of wine and mix with your hands.

Winter Roast Chicken (3)

Sit the chicken on top of the vegetables, massage the rest of the oil into the chicken then season and sprinkle the za’atar over. Rub the seasoning in all over the chicken and put the halved lemons into the chicken cavity.

Cover well with a tent of foil and cook in a medium oven (about 180 degrees C fan or 200 degrees C normal oven) for 2 hours. Uncover about half an hour before you have finished cooking to brown the skin.

Winter Roast Chicken (8)

Leave to rest for 10 minutes before serving and make sure to spoon all the lovely juices over the meat and vegetables when you eat.

Leftovers (you know how much I love having leftovers) went into sandwiches and a delicious chicken and vegetable soup.

Monster Sandwiches with Celia’s Pan Cubano

We all know that one of the great pleasures of blogging comes from sharing, being inspired by fellow bloggers and getting excited by new recipe ideas.

Pan Cubano (1)

I baked the loaves late at night, sorry about the dark photo…

I’m a regular bread baker now.  My sourdough bread is made every 3 days or so, but sometimes I feel the need to shake it up and try a new recipe. A little while ago I saw a recipe over at Fig Jam and Lime Cordial. Celia is the Queen of Sourdough and her recipe for a bread called Pan Cubano really called to me. The fact that it used Lard was probably the part which called loudest! In Southern Spain the pig is King and lard is used in many recipes. I’m in England right now but I felt nostalgic.

I didn’t use rendered pig fat in the recipe, I turned to my massive supply of goose fat which came from cooking the Christmas goose. You only need about a heaped teaspoon though, so I still have plenty leftover for delicious roast potatoes.

The bread turned out fabulously, although I didn’t get the characteristic slit in the loaf as I had no leek or palm leaves to lay down the centre of the loaf. Slitting them didn’t seem to make any difference but the flavour and texture  of the bread was incredible. Celia advised me to freeze some of the loaves if we weren’t planning on eating them all at once. Great advice as I made four loaves, each of which gave me 2 massive, builder-sized sandwiches. The sandwiches were filled with thin slices of smoked gruyere and cold twice cooked pork – amazing!

Pan Cubano (4)

Thanks Celia – for the inspiration and the amazing lunch…Go on, Be Inspired!

Twice Cooked Melting Pork

Regular readers of this blog will know that last year I discovered the cookbook by Gok Wan and was converted to cooking simple Chinese dishes at home through his wonderful recipes. For new readers – welcome! – do check out this book if you get a chance. I know he’s …er…”famous” for fashion advice and you may be dubious (I certainly was) but take my word for it, it’s a great book.

Twice Cooked Melting Pork (8)

This one was recommended to me by best pal Maria and I’m so glad I took her advice. The original recipe calls for Belly of Pork, I used a boned shoulder joint. Just as tasty, perhaps a little less moist than the belly (less fat) but perfect nonetheless. It take a little while to prepare as there are two stages, but it’s not complicated and is a great dish to part prepare ahead, then finish off in the oven when you are ready to eat.

In the book it is called “Poppa Wan’s Show Stopping Twice Cooked Melting Pork” – it’s a recipe of his father’s. So cheers Mr Wan, we loved it!

Ingredients to serve 4 generously

  • 500ml rice wine or dry sherry (I used about 250ml of dry sherry and 4 tablespoons of white wine vinegar as I didn’t have rice wine) plus water
  • 2 star anise
  • A 5cm piece of fresh ginger, peeled and bruised
  • 3 cloves of garlic, peeled and bruised
  • 3 spring onions, finely chopped
  • 3 tablespoons of light soy sauce
  • 1.25kg pork belly (rind left on but unscored) I used 1kg boned pork shoulder joint

For the glaze – 4 tablespoons of runny honey mixed with 2 tablespoons of light soy sauce

Place all the ingredients except those for the glaze into a deep pan and add enough extra water to cover the meat generously. Bring to the boil then reduce the heat and simmer for about 1 ½ hours (until the meat is very tender and cool enough to handle.

Twice Cooked Melting Pork (5)

Preheat oven to 200 C/400 F/Gas 6. Remove the pork from the liquid and place onto a board. Remove the top layer of skin and place onto a baking tray lined with parchment paper.

Pour the marinade over (it will be runny) and cook for 20-30 minutes, basting frequently.

Place onto a serving dish and cut into slices or chunks. I served ours with mushroom and ginger rice and steamed pak choi. Wonderful and enough left over for sandwiches the next day…but more of them another time!

Stir Fried Kale with Bacon – A Speedy Side Dish or Pasta Topping

Don’t you just love winter greens? So green and vibrant – maybe their colour reminds us of the spring that is on its way, whilst doing us so much good packed full of iron and vitamins.

Kale (3)

Kale is a current favourite, although it can sometimes be a little tough. Not a problem if you like your vegetables really crisp, but easily dealt with by blanching for a few minutes first.

Ingredients to serve 2

  • About a dozen leaves of kale, washed, tough stalks removed and then finely chopped
  • 2 cloves of crushed garlic
  • 4 rashers of finely chopped smoked streaky bacon (or use mushrooms for a vegetarian dish)
  • Salt and pepper
  • Olive oil for frying

Blanch the chopped leaves for about 3 minutes if they are large and drain. Heat a little oil in a wok or large frying pan and fry the bacon until crispy then add the kale and garlic. Stir fry for a couple of minutes, season and enjoy as a side dish or mixed with pasta (add a little raw olive oil and a few drops of the pasta cooking water).

Bounce around the kitchen as you will be packed full of vitality!

If you’re lucky enough to have access to Baby Kale, check out this beautiful recipe for a Sunshine Salad from our blogging pal Smidge. Or how about Frugal’s Kale with Pasta – delicious!

Caramelised Red Onion Tart with Jamón and Stilton

WordPress tells me that the top search on my blog, pretty much constantly, is for Olive Oil Pastry. Those of you who regularly follow my blog will know that until recently I was a self-confessed pastry cheat, using ready made pastry most of the time. In the summer though, I experimented with the pastry made using olive oil instead of butter and in the autumn, with delicious English butter available, I tried out the deliciously naughty Rough Puff Pastry.

The olive oil pastry is a healthier option for more frequent use and as there are so many searches for this recipe, I thought I should make an effort to show some of the ways I use it in the kitchen. This is a delicious tart which serves 4 as a main course or 6 as a starter.

DSC_0011

Ingredients

  • 1 batch of olive oil pastry
  • 6 red onions
  • 2 small sprigs of thyme
  • Olive oil for shallow frying
  • 3 slices of jamón, prosciutto or bacon (omit if you want a vegetarian tart) cut into small pieces
  • About 3 tablespoons of crumbled stilton or some of your favourite cheese

No need for blind baking with this pastry, it goes crispy underneath, even when baked with the filling.

Half and finely slice your onions and fry slowly in about 3 tablespoons of olive until soft and slightly caramelised. This will probably take at least 20 minutes.  Season with a little pepper but you will probably not need salt if you are using the jamón and stilton which are both salty.

DSC_0015

Roll out the chilled pastry to fit your tart tin, prick the bottom and fill with the cooked onion mixture. Sprinkle over the jamón and cheese and bake at 200 (regular oven) or 180 degrees (fan assisted) for about 30 minutes or until the pastry is browned.

Leave to cool slightly – this is delicious served at room temperature with a salad.

The Little Grey Cells….

Fans of the fictional Agatha Christie Detective, Hercule Poirot will know what I am talking about. Those little grey cells in the brain which sort the information and keep things in order.

Clearly mine were on a go slow yesterday. I published a recipe for ravioli and today I was glossing paintwork and thinking about food, as you do. Thinking that it would be good to make more ravioli as they had been so good. Oh, I remembered, the taste of that fresh crab was amazing. Crab?! Yikes, I forgot to mention the key ingredient in my post. Which just goes to show that too many paint fumes combined with too much wine when cooking can indeed affect those little grey cells.

OLYMPUS DIGITAL CAMERA

So to calm things down, I’m taking myself off to a peaceful place – a beach in the Cook Islands I visited at this time of year 9 years ago on my Round the World trip. Enjoy the view and apologies for the temporary brain malfunction!