Lemon Rice With Cashew Nuts

I made this lemon rice dish to eat with the Rendang Style Beef I made recently. A local Indian restaurant serves lemon rice, and I always order it but felt it was time I learned to make it myself. As a vegetarian dish it would stand pretty well alongside some vegetables, and is great with many other dishes, not just curries.

Lemon Rice (3)

Ingredients (to serve 4-6)

  • 2 tbsp sunflower oil
  • 1  tsp black mustard seeds
  • 1 tsp ground coriander
  • ¼ tsp asafoetida (optional)
  • ½ small onion, finely chopped
  • 1 long green chilli (finely chopped and deseeded too if you prefer it less hot)
  • 10g fresh ginger, peeled and grated or chopped finely
  • About 10 fresh curry leaves
  • 100g unsalted cashew nuts
  • About 500g cooked and cooled basmati rice
  • juice of 1 large lemon plus the zest of ½ the lemonfinely grated
  • Optional – finely chop the remaining half of the juiced lemon
  • sea salt and freshly ground pepper

Heat the oil in a large pan or wok and add the mustard seeds, turmeric and asafoetida. Fry, stirring constantly, until the mustard seeds begin to pop.

Now add the onion, green chilli, ginger, curry leaves and the nuts and fry for a couple of minutes until the nuts take on some colour and the onion has softened.

Curry Night (9)

Add the rice into the pan and stir fry until hot (a few minutes) then add the lemon juice, zest and lemon pieces. Mix well and season with salt and pepper before serving.

Inspired by a recipe from The Hairy Bikers’ Great Curries.

Crackling and Stripping

That’ll be the crackling on a pork belly, and the stripping of a Victorian Fireplace. Not some traditional pre Christmas party games, sorry to disappoint!

First, the food…for who can work on an empty stomach? Inspired by a recipe in Hugh Fearnley-Whittingstall’s book “River Cottage Everyday” (his crackling was made with coriander and fennel seeds), I gave a thick piece of pork belly a few minutes of love before popping it into the oven with some whole sweet potatoes and ended up with a fabulous lunch and lots of lovely cold pork for leftovers.

Cumin & Anis Pork Belly 009

Ingredients (to serve 4)

  • 3 heaped teaspoons of cumin seeds (coriander in the original recipe)
  • 2 heaped teaspoons of fennel seeds
  • 1 piece of thick-end pork belly (scored, if possible) mine contained 4 ribs
  • sea salt and freshly ground pepper

Preheat the oven to 220C/Gas 7

Put the seeds into a mortar and crush them lightly. Rub the pork skin with the salt and pepper and just over half the seeds. Scatter the remaining seeds into a roasting tray and lay the meat on top. Cook on high for 30 minutes, turn the heat down to 180C/Gas 4 and continue to cook for 1 ½ hours.

If your crackling hasn’t fully crackled, turn the oven back up to high and check every few minutes until it is done to your liking. Remove the meat from the oven and leave it to rest in a warm placed (but uncovered) for about 15 minutes. It will stay warm and keeping it uncovered will keep the crackling “crackly”. If you need to leave it for longer before eating, remove the skin and keep that to one side, wrap the meat in foil and keep warm until serving.

Serve with your favourite veggies and be sure to make enough to enjoy leftovers another day!

Meanwhile, all other sensible folk are starting to get their homes in order for Christmas. We, on the other hand, pulled up some horrible carpet which will soon be gone permanently, then the floorboards in the dining room. This was to find the source of the mysterious bouncing floor. A rotten joist awaited us so Big Man set to repairing the damage.

Rotten Joist

Not wanting to be left out of the DIY session, I decided to start stripping the first of the three cast iron fireplaces which were fortunately not ripped out upstairs.

Little Bed Fireplace (1)

We have one in each of the bedrooms and one in the bathroom.

Little Bed Fireplace (3)Little Bed Fireplace (4)

As you can see, I think this may be a long job, but I have a lot of patience for jobs like this, and I love a challenge!

Rendang Style Beef and time to catch up with myself…

It’s been quiet on the blog for a while. Spain was hectic and by the time we got back to England just over four weeks ago we made a conscious decision to take things a little more slowly for a while. Old favourites were made in the kitchen, lots of comforting chickpea stews and delicious bowls of Spanish style lentils.

There was time for me to relax a little finishing off my summer quilt. It will have to wait to be used until next year as it’s enormous but thin. Not warm enough for the cold winter weather that has moved in here on the English South Coast.

Varios Nov 2015 042

Totally hand made, Every. Single. Stitch. And I loved making it!

Varios Nov 2015 045

Then I moved on to making my first proper socks for Big Man to keep cosy in. Thanks to Evie at Pendle Stitches for sending me this great pattern.

Varios Nov 2015 047

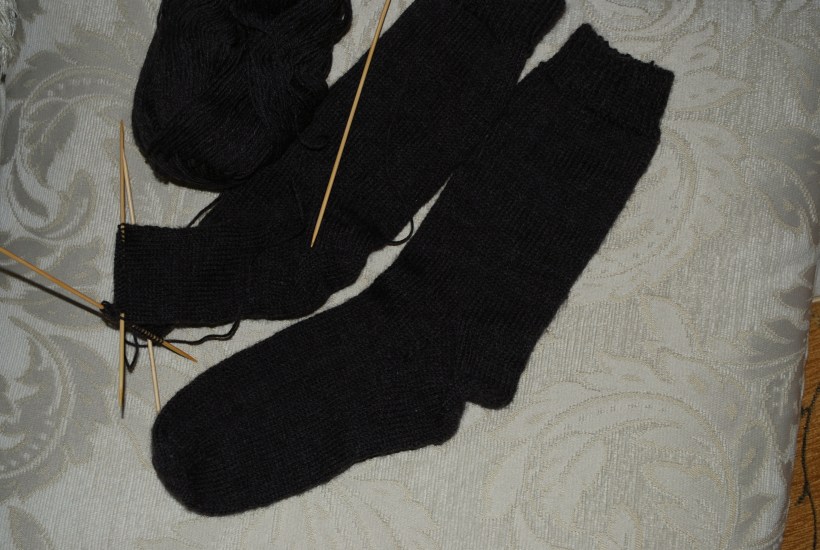
I know the heel looks a bit odd, but it is a proper one, I promise! It’s just a dodgy photo.

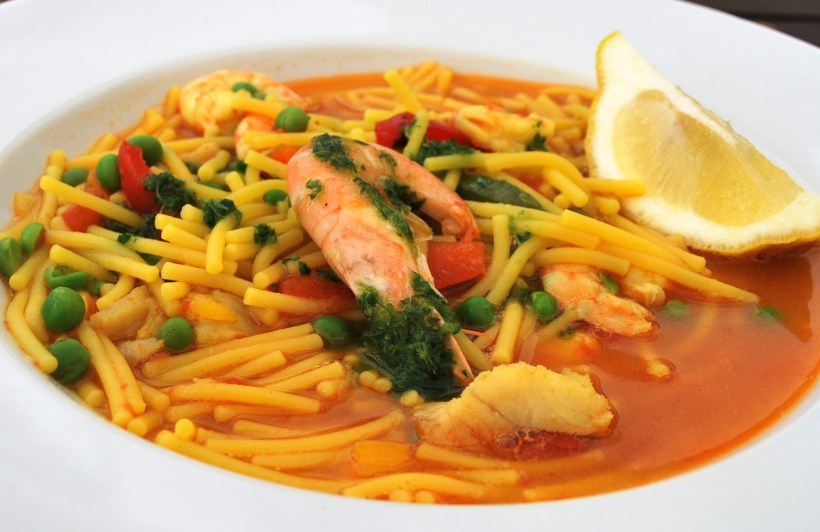
And now, as we are one day away from December (some of my pals on the other side of the world are already into December!), I am allowing myself to tentatively think about Christmas menus. But we also have another very important celebration on 27th December. Best pal Ria’s birthday, and I have the honour of cooking a meal for a group of us. Nothing remotely Christmassy, so we’ve chosen a curry menu. A mix of different curries, some old favourites like Monkfish and Prawn curry. And a new one. A Rendang Style Beef Curry.

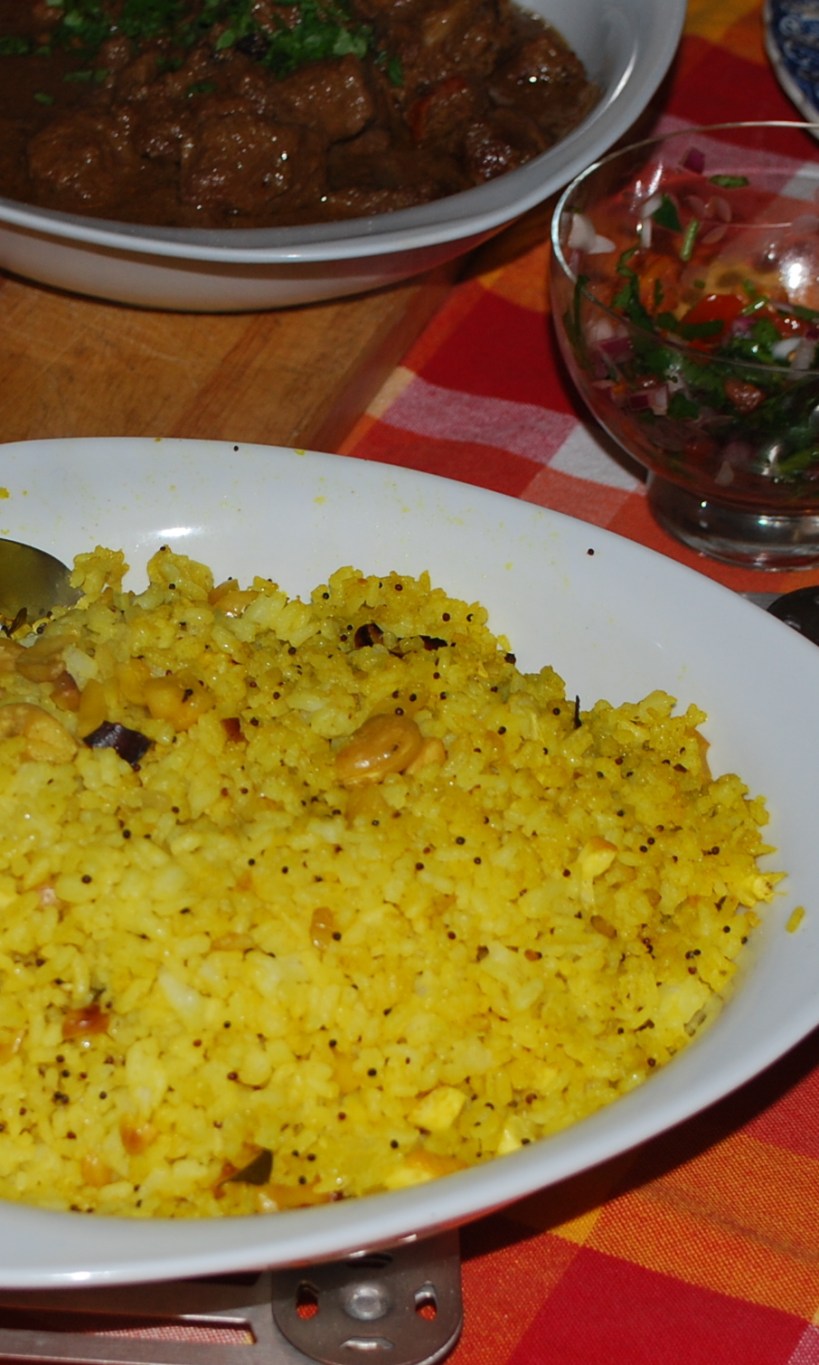
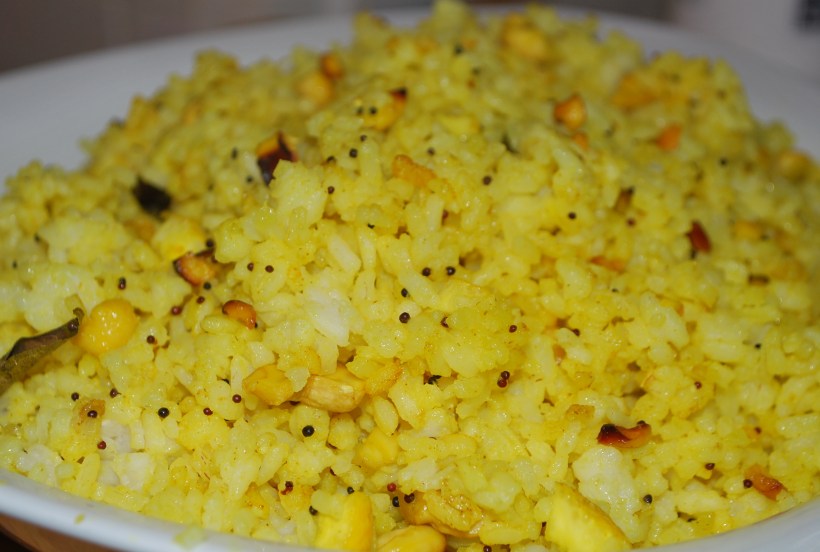
I say Rendang Style and not Beef Rendang as I don’t think the method of cooking it is entirely authentic. I’ve also been told that if the curry is saucy, it’s not a Rendang. So, a curry cooked differently, with plenty of sauce –  but well worth the time it takes to prepare and the longish list of ingredients. I had a trial run with it and (she says humbly) it was amazing! Fantastic flavours, meat that melted in your mouth, second and third helpings and clean plates all round.  I’ll post some of the other recipes in the coming week. Lemon and Cashew nut rice, potato and spinach curry and Keralan parathas to follow soon.

Beef Rendang

Ingredients (Recipe from Sainsbury’s Oct 2015 Magazine) Serves 6

  • 1 piece of brisket or silverside about 1.7kg cut into bite sized cubes
  • 1 tbsp vegetable or coconut oil
  • 8 green cardamom pods, crushed
  • 3 star anise
  • 1 bay leaf
  • 2 cinnamon sticks
  • 3 cloves
  • 1 teaspoon each of ground cumin, ground coriander, hot chili powder
  • 1 beef stock cube
  • 1 400ml tin of coconut milk
  • 1 ½ teaspoons of palm sugar or soft brown sugar
  • 1 tablespoons tamarind paste
  • 2 tablespoons of Thai fish sauce
  • 8-10 kaffir lime leaves
  • 4 stalks of lemongrass, lightly “bashed”
  • juice of 2 limes
  • Chopped coriander, toasted dessicated coconut and red chili slivers to garnish (optional)


For the Spice Paste

  • 2 shallots, chopped
  • 8 garlic cloves, peeld
  • 20g root ginger peeled and finely chopped
  • 20g galangal peeled and finely chopped (or use paste)
  • up to 6 birds eye chilis, stalks removed (I used a couple of my super hot, Bexhill grown chilis)
  • 3 tablespoons lemongrass paste
  • 2 tbsp vegetable oil

Make the paste by blending all the ingredients in a food processor with about 50ml water to make it smooth. Add to the beef and marinate overnight in the fridge.

I used a slow cooker but this can also be done in the oven which you will need to preheat to 160C, (fan 140c) or gas 3. Otherwise preheat your slow cooker.

Heat the coconut or vegetable oil in a large pan or your casserole dish if it can go on the stove top. Add the cardamom, star anise, bay leaf, cinnamon sticks, cloves and ground spices and stir fry until fragrant.

Chillies (2)

Add the beef and marinade, fry for a few minutes but you don’t need to brown. Then add the crumbled stock cube, coconut milk, tamarind paste, Thai fish sauce, lime leaves and lemongrass and bring to the boil.

Cover and transfer to the preheated oven for about 3 hours – I cooked mine in the slow cooker on low for about 8 hours.  Return to the hob and simmer, uncovered until the sauce has thickened and reduced. When you are ready to serve, stir in the lime juice and garnish.

I made mine ahead and found that when it has chilled there was a layer of oil from the cooking which solidified and was easy to remove. Of course, you don’t need to do this!

Curry Night (9)

We drank this with a delicious sauvignon blanc, but I think an ice cold beer would be great too.

There’s (almost) no such thing as a free lunch….

So, here we are, back in Spain. The sun is shining, the horrible hot wind we get in southern Spain (El Terral) has finally died down and we’ve caught our breath from the long drive.  We’re very lucky to have two lovely homes, but when you get back to a house that has been shut up for a few months, you find that the dust monsters have been to visit. We managed avoidance tactics for a few days with a combination of going out to catch up with people, and staying in feeling grumpy and full of cold (me)/Man Flu (Big Man) germs.

Finally the day came when we couldn’t ignore The Big Clean Up any more and today we made a start. Mrs and Mrs Mop began a vaguely systematic attack on the house and garden and, while there is still plenty more to be done, we felt satisfied that we deserved a nice lunch in the garden. Spring and autumn are perfect for outdoor lunchtime dining. Sometimes you get a lovely warm day in winter or a cool summer day which also permit al fresco lunches…but you definitely make the most of those perfect days.

In Spanish terms, it was almost dangerously vegetarian (well, apart from the seafood and salami). We didn’t worry, the village fiesta is upon us and we know we’ll be eating our own body weight in grilled meat and pinchitos (little kebabs) over the next few days. What did make us smile was the fact that pretty much everything we were eating had been gifted to us by kindly friends and family, or recycled from another meal. It’s good to be a frugal houseperson when the food is this good!

Lunch included:

Salmorejo (my very favourite cold soup) made from stale bread and tomatoes given to us by kindly brother-in-law. These are the ripe and ugly tomatoes which are used for soups and sauces

Almuerzo Sep 2015 (12)

Garnished with hard boiled eggs from kindly neighbour who adopted our chickens and jamon (bought from local butcher)

Salad made with leftover prawns and squid which had been barbecued the night before and avocados from kindly neighbour who also keeps us supplied with oranges later in the year to make marmalade.

Almuerzo Sep 2015 (10)

Tomato, mint and onion salad made with “tomates para picar” (tomatoes for chopping up!), again from kindly brother-in-law and mint from our garden.

Almuerzo Sep 2015 (9)

Salads dressed with our own olive oil and juice from our lemons

Almuerzo Sep 2015 (11)

Cheese and salchichon (salami). Salchichon given to us by kindly local bar owner as a welcome home present.

Apple Sorbet 003

Dessert was figs from our tree and apple sorbet made with apples from kindly cousin. Inspired by Rosemary’s ice cream making, I dug out my own ice-cream maker. To serve 2 people – 500g apples (peeled and cored), cooked with 2 tablespoons of sugar, 2 tablespoons of lemon juice then blended, cooled and churned in my machine. Maybe I should make more Apple Roses – I certainly have enough fruit!

Almuerzo Sep 2015 (17)

I drank a glass (or two) of Spanish wine, but Big Man was clearly feeling a bit nostalgic for England and opened a bottle of English beer.

Almuerzo Sep 2015 (14)

I thought we’d bought those beers with us as gifts for kindly friends and family. Ooops!

Almuerzo Sep 2015 (8)

PS. You know we hate waste here….the prawn shells are now bubbling away to make stock…maybe we’ll have an “arroz caldoso” in the next few days…

Down By The Sea Soda Bread

It’s been years (really, it has!) since I gave you a soda bread recipe. It doesn’t mean I’ve stopped baking soda bread, but mostly we’re a sourdough household right now.

Best friend Ria baked herself a loaf recently, so jumping on her soda bread bandwagon, I baked one too. I used the whey from curd cheese making, once again, but the recipe usually calls for buttermilk. This recipe is different from my Up The Mountain Soda Bread as it does not include oats or butter. Try both and see which one you prefer!

Soda Bread Sliced 002

Ingredients to make one loaf (keeps well for about 4 days)

  • 250g plain flour
  • 250 wholemeal or granary flour (I used granary which gives it a slightly sweeter, nuttier taste and a slightly chewy texture)
  • About 400ml of buttermilk or whey (if you don’t have either, squeeze half a tablespoon of lemon juice into milk, stir and leave it to stand for 30 minutes at room temperature and then it will be ready to use)
  • 1 teaspoon of Bicarbonate of Soda
  • 1 teaspoon of salt

Mix the flours together with the salt and bicarbonate. Gradually stir in the liquid with a wooden spoon or your fingers. You may find you don’t need it all, but you want to end up with a slightly sticky mixture.

Dust your worktop with flour and shape the mix into a round. Try not to knead too much, it just needs to come together.

Place the loaf onto a baking tin lined with greaseproof (or baking) paper. Cut a deep cross into the loaf, almost all the way through. This will allow the heat to penetrate and the alkaline of the bicarbonate and the acid of the buttermilk will work together to make your loaf rise. I’m afraid I’m no great scientist, so apologies if my explanation of the bread magic is somewhat simple!

Dust the loaf with flour, cover with a clean tea towel and leave, if possible, for 30 minutes, You can bake immediately if you choose but this extra 30 minutes really seems to allow the acid and alkaline to start doing their thing so that the loaf is raring to go when it reaches the heat of the oven. Don’t expect it to rise before baking like a regular loaf.

Soda Bread 002

Heat your oven to 200 degrees and when you are ready, bake the loaf for about 30 minutes. It should be browned on the top and sound hollow when tapped on the bottom.

Leave to cool, if you can resist, and enjoy in the same way as a regular bread.

Apple Roses

This summer I have been lucky enough to have been invited to two very lovely tea parties. I’m talking about the real deal here with smoked salmon sandwiches, cucumber sandwiches, lots of lovely cakes and scones, a choice of beautiful teas and a couple of cheeky glasses of champagne.  Afternoon tea is a lovely tradition, not one I have the opportunity to indulge in too often, but a lovely way to get together with friends and loved ones for a proper catch up and to enjoy some delicious food.

Apple Roses (13)

The first tea party was hosted by a very dear friend Barbara as an opportunity to get together with some of her girlfriends. It was a beautiful, sunny afternoon and she really pushed the boat out for us. I was particularly impressed by some little apple pies that she made which looked like beautiful, icing sugar dusted roses. She confessed they were pretty straightforward to make, so when my mum hosted a tea party too, I decided to make some for us all to share.

This post is photo heavy, and not such great photos at that, but if you decide you’d like to make these, it’s a useful “how to”.

Ingredients (to make 12 mini or 6 large pies)

  • 1 pack of all butter puff pastry (ready rolled is easier)
  • 2 large red apples
  • water
  • 2 teaspoons of apricot jam
  • a little lemon juice
  • a teaspoonful of honey or a heaped teaspoon of sugar
  • icing sugar

Preheat your oven to 200 degrees C and you will need some cupcake cases to support the pies while they are baking

Start by cutting the apples in half and removing the cores. Slice fairly thinly and put all the slices into a bowl with 3 tablespoons of water, the sugar or honey and about a tablespoon of lemon juice. Mixx, cover the bowl and microwave on high for 3 minutes. You can also do this in a saucepan if you don’t want to use the microwave, simply boil the apples gently in the water, lemon and honey for about 3 minutes.

Apple Roses (3)

Whichever method you use, drain the apples and leave them to cool down slightly.

Next, roll out your pastry (if it is not prerolled) into a large rectangle and cut into 6 strips (lengthways). Dust your work surface with a little icing sugar to prevent the pastry from sticking.

Apple Roses (1)

Melt the jam with a teaspoon of water (microwave or saucepan).

Working with one strip of pastry at a time, brush the pastry with the melted apricot jam and lay overlapping slices of apple along the edge. Allow a little of the top of the apple slice to come over the top of the pastry strip.

Apple Roses (4)

Fold the bottom half of the pastry strip upwards and press down gently.

Apple Roses (7)

For large pies, roll up the whole slice (like a snail shell!), for smaller pies, cut the appe and pastry slices in two and roll up into two smaller rolls.

Put them into a cupcake case to support them and bake for about 45 minutes until the pastry is golden.

Apple Roses (9)

Apple Roses (11)

Allow to cool and dust with icing sugar before admiring your bouquet of apples roses!

Summer Runner Beans With Tomatoes

I’m a person who thinks that most vegetables, especially those which have just been picked from the garden, don’t need too much messing around with. There are few vegetables that don’t respond well to blanching or steaming, a drizzle of olive oil and a squeeze of lemons. But let’s be honest, sometimes we fancy a change.

Lentejas y Judias Verdes 012

Any of you who grow your own vegetables will be faced at some point with a glut. While we are in England we are only managing to grow a few things. The tomatoes are STILL green and with only 3 runner bean plants, we’re not exactly dealing with kilos of them.

Runner Beans (1)

However, lovely fresh and sweet tomatoes from the next door county of Kent are being devoured daily and I decided to make a quick and fresh summer vegetable dish. Delicious as a side dish, or serve it at room temperature with some cheese and salamis, plenty of crusty bread and (of course) a chilled glass of wine.

Ingredients

  • About 200g runner beans, shredded or cut into chunks and blanched in salted, boiling water for about 3 minutes
  • 2 fat cloves of garlic, peeled and finely chopped or crushed
  • A few generous glugs of olive oil
  • About 4 ripe tomatoes (peeled or not, you decide), finely chopped, puréed or grated
  • Sea salt and freshly ground pepper
  • Half a teaspoon of smoked pimentón
  • A sprig of fresh rosemary (optional)

Slowly warm your olive oil in a small deep pan (if you have an earthenware cazuela, even better) into which you have put the chopped garlic. Once the garlic has softened, but not browned, and your kitchen is filled with wonderful warm garlicky smells, add the tomato, a little seasoning, the rosemary and the pimentón.

Continue to cook gently for two or three minutes until it all starts to come together, then add the blanched beans. Cook for a further couple of minutes to allow the beans to soften a little more, but not lose their colour.

Leave to cool down slightly, best served at room temperature.

And now a cloud shot from the other day – I just thought it was so weird and beautiful. I’m sure there is a special name for this kind of cloud formation, please do enlighten me if you know!

Clouds (2)

If you enjoy runner beans, why not try runner beans with garlic and bacon or perhaps with prawns and potatoes?

Raya a la Gallega – Galician Style Skate

Anyone who has followed this blog for some time (and I thank you!) will know that I am a great admirer of the food from Northern Spain. A great favourite is Pulpo a la Gallega – Octopus Galician Style which basically means served with boiled potatoes and seasoned liberally with fruity olive oil, coarse salt and pimentón. I used this style of serving with other fish and seafood, it works fantastically with scallops.

Raya a la Gallega (7)

Time this week to turn my attention to Skate, which I generally pan fry or oven cook. Why not try it “a la Gallega” as well? Online recipes told me that the fish is indeed served like this but more traditionally it’s poached. Sorry, no poaching for me I just didn’t fancy it.  I lightly griddled it before placing it on top of cooked, diced (well…”chunked”) potatoes and then dressed it with our own olive oil, Maldon sea salt and smoked pimentón.

Raya a la Gallega (1)

Perfect, two small skate wings made a fantastic sharing dish for two hungry folk but would have been ideal as a starter for 4-6 people. Definitely a dish to be repeated and absolutely perfect with a chilled glass of Albariño.

Fideuá de Pescado y Mariscos – Fish and Seafood Noodles

If Paella and Arroz Caldoso are half sisters to the Italian Risotto, then Paella and Fideuá are first cousins. The famous Paella is known to most of us, a delicious rice and seafood (or meat) dish which comes from the Valencia region of North East Spain. Less well known, outside of Spain at least, is its cousin…the Fideuá. It´s very similar to a paella but made with Fideos (short noodles). Fideos come in different sizes in Spain from very thin (called Angel Hair pasta) for dropping into broth right through to almost the thickness of spaghetti. This dish tends to use the ones at the thicker end of the scale, as they need to stand up to a little while cooking in the delicious broth.

Fideua de Mariscos (7)

Amounts used are flexible, use what you have, and play around with the ingredients. Like arroz caldoso, it’s quicker to cook than a paella and is a typical everyday lunch dish, for tucking into with a spoon (a plato de cuchara – a “spoon” dish), with lemon juice squeezed over and plenty of delicious bread. We can’t decide if we prefer arroz caldoso or fideuá caldosa – try them both and let me know what you think! I know Celia from Fig Jam and Lime Cordial enjoys making Arroz Caldoso for her family…Celia, I hope you like this version too!

Approximate Ingredients for 4 people (as a main dish)

  • 250g prawns (less if already peeled) – if they have the shells on peel them and use them to make a fish stock, if not use water or a cube
  • About 250g of mixed fish and shellfish (I used some white fish fillets but when I have mussels or clams I add them in too)
  • Half a red pepper finely chopped
  • A thin green pepper, finely chopped
  • A couple of tablespoons of peas
  • 2 cloves of garlic, minced
  • 1 large tomato peeled and finely chopped or half a cup of tomato conserva
  • 1 tablespoon of tomato purée
  • 1 teaspoon of sweet pimentón
  • A pinch of saffron
  • Seasoning
  • Olive oil
  • Approx 400g Fideos

Start by making a sofrito or tomato sauce. Lightly fry the garlic until soft then add the peppers and peas. Add the pimentón and saffron, cover the pan and let everything sweat gently until soft then add the tomato. Simmer for another 10 minutes.

Fideua de Mariscos (6)

For 4 people (and a soupy fideuá) add about 1.5 litres of stock and simmer for a further 10 minutes. If you have a paella pan, cazuela or a deep frying pan that you can use to serve, transfer the liquid to this. Now add your fideos – about 100g per person, but follow any guidelines on the packet. When they are about half cooked, add the fish (biggest chunks first) then the shellfish. Taste and season as necessary.

For a thick, dryer dish (more the consistency of a paella) you may need to use less liquid or just cook this way and spoon out some of the liquid at the end (save it for a light soup with some thin fideos thrown in!). Equally, if it looks a little dry as you are cooking it, just add a ladleful or two of hot stock.

Serve like paella with lemon juice, crusty bread and wine. A spoonful of alioli is also great with this dish.

Like a paella, you can vary the ingredients to make your fideuá according to what you have available. Make it veggie, or use meat instead of fish. It may not be absolutely authentic, but the influence will be there and the taste will be just as good!

Gigantes Plakis – Greek Style Giant Baked Beans

So, as you probably can guess, Gigantes refers to the size of the beans! And Plaki (I think) means that it’s something cooked in the oven or baked. Now, I’m not claiming that my version of this dish is authentically Greek. I’ve seen several versions, some which involved a few extra steps in the process, but here’s my interpretation of a delicious vegetarian dish which can be served as is, or as part of a meze. And you don’t even have to stress about it being served piping hot, Greek food is often dished up at room temperature!

Gigantes Plakis (4)

Ingredients (to serve 4)

  • 500g of large white beans (I used butter beans but others that can be used are lima beans) soaked overnight in water with a small pinch of bicarbonate of soda
  • About 500g of a simple tomato sauce made with tomatoes, garlic, some finely chopped celery (if you have it) and some chopped fresh parsley

Rinse the beans, cover with cold water and bring to the boil. Fast boil for 10 minutes, skim off any scum and reduce to a simmer for about an hour – you want them almost cooked but not quite.

Heat the oven to medium (about 160 degrees) and make sure your tomato sauce is hot. Drain the beans.

Gigantes Plakis (1)

Stir the beans and the tomato sauce together and put into an ovenproof dish. Bake for about 1 ½ – 2 hours until the beans are tender and a little dry/crispy on top. You may need to add a little water during cooking. Check for seasoning and adjust if necessary, add a little extra chopped parsley if you like and sit back and wait for them to cool down a little. Or just eat them piping hot and hope that no one reports you….