Fennel Scented Cauliflower with Griddled Sea Bream

No sooner did we get here than it’s time to head back to England. I’ll be sad to leave our beloved mountains again but work beckons and excitingly we’ll also be renovating a property for my parents close by.  We’ll all be round the corner from each other like one big Italian/Spanish family! My dad will even have space to store his beloved Vespa and to continue the family tradition of making their wine for the year with grapes imported from Italy. We have a celebration ahead with both my mum and Big Man reaching special birthdays within days of each other. Friends from Spain will be flying over to England to join us, so I’ll be able to share that with you.

Don't worry - we'll all be travelling in more comfort than this!
Don’t worry – we’ll all be travelling in more comfort than this!

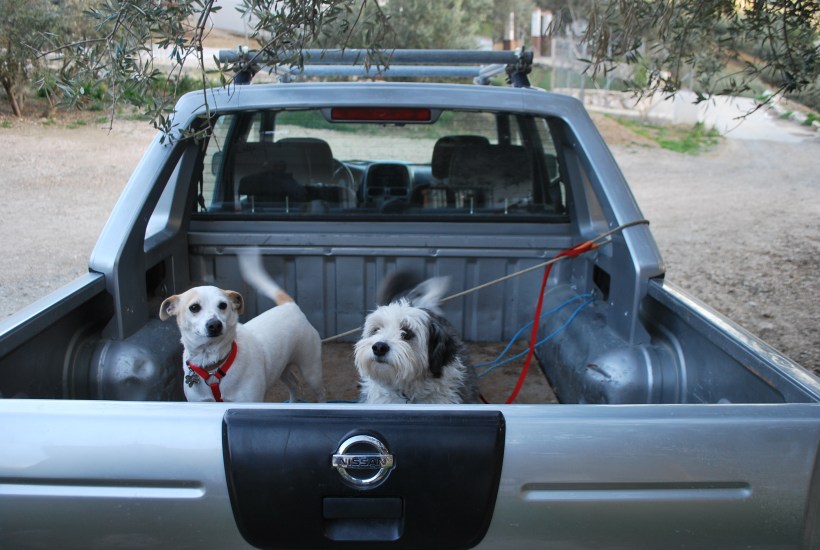
The packing up of the car starts today and we head off on Thursday morning to drive through Spain, right up the middle past Madrid then over the border at Irun and – all going well – resting for the night in Bordeaux. The next day we continue up through France and cross from Calais to Dover by ferry and then a couple of hours later we’ll be in Bexhill. Just over 2200km – loaded with paella burners and pans for pals, cheeses, wines, sausages and of course Luna and Alfi. We definitely don’t travel light!

We'll miss the view from the patio of one of our favourite local bars. And the dogs love it there too!
We’ll miss the view from the patio of one of our favourite local bars. And the dogs love it there too!

But today I have just a little time to look back on the last month in Spain and share another simple recipe which, for me, is full of one of the flavours of Andalucia- anis.

I’m one of those funny folk who love fennel and dill but can’t stand drinks like anis, pernod or raki. Use it in cooking though and it’s a whole other matter.

Anis is a popular drink here (sweet or dry) and is served with or without ice, or if you add a little slosh of it to coffee in the morning, it becomes a “Carajillo de Anis”. Most popular with all the old boys in the local bars to start their day! We always have a bottle of it at home but it’s one of those bottles that lurks around for ages getting a bit dusty.

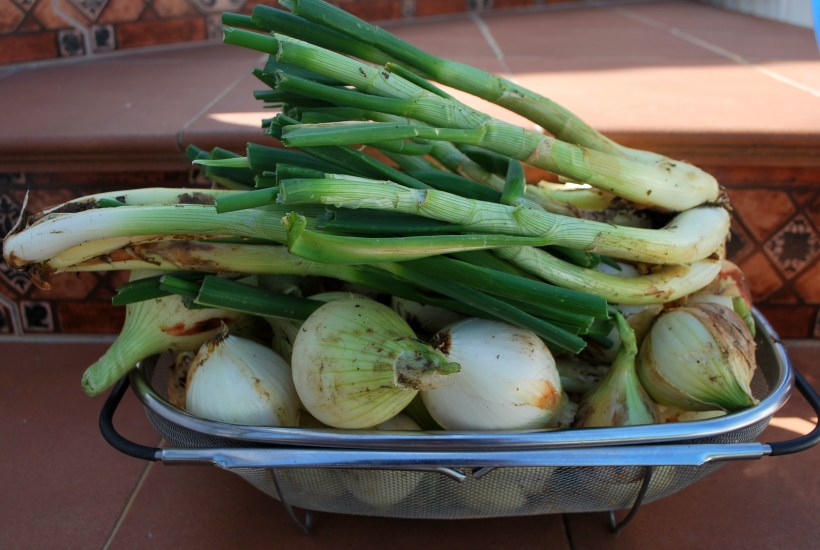
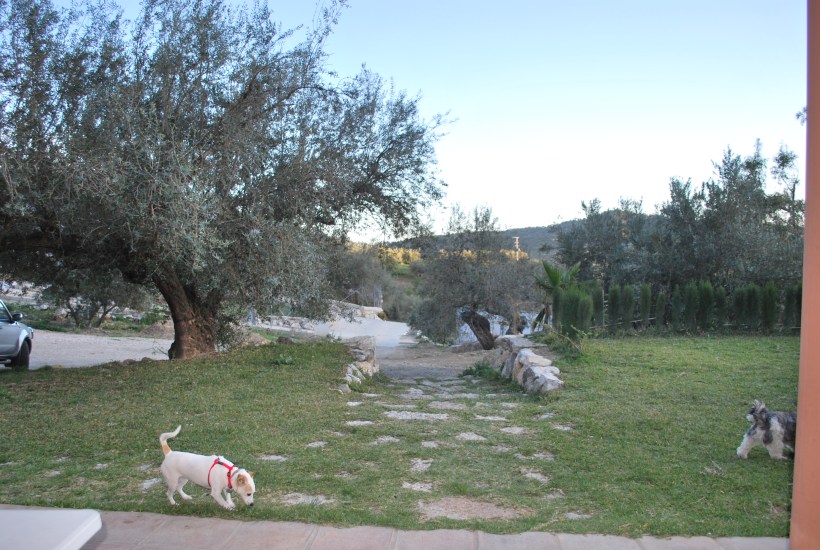
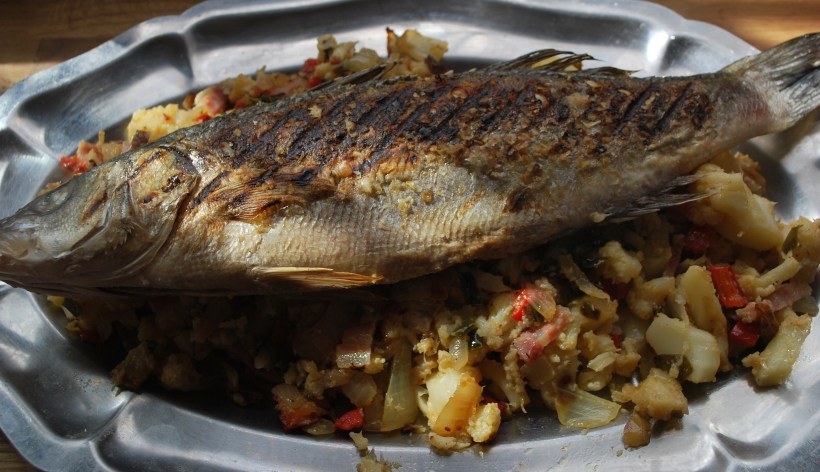
After resuming my mountain walks with the pups I have found plenty of wild fennel to pick – here it’s mostly the feathery fronds that are enjoyed, but you can also use the young stems in the same way you would use fennel. This recipe uses whatever veggies you have to hand, it’s all about the delicate aniseed flavours. We enjoyed ours with a whole bream stuffed with wild fennel which we cooked on the cast iron griddle and drizzled with a few drops of anis once it was cooked.

Sea Bream with Cauliflower (4)

Ingredients (to serve 2 as a side dish)

  • Half a cooked cauliflower chopped into small pieces
  • A leek, cleaned and cut into thin slices
  • A mix of red and green pepper, finely diced
  • 2 cloves of crushed garlic
  • Half an onion finely chopped
  • About 2 tablespoons of finely chopped fennel and fronds
  • A tablespoon of anis flavoured liqueur
  • Salt and pepper
  • Olive oil

Heat a few tablespoons of olive oil in a deep frying pan or wok and add the onions and peppers.  Fry gently until they are very soft (this will take about 20 mins) then add the leeks, garlic, fennel and cauliflower. Continue to cook until the leeks have softened, season and add the liqueur. Cook for a further minute and serve.

This would also be delicious served as a vegetarian main course on it’s own or stirred through rice or pasta.

Potato Topped Pizza and a Walk Up the Mountain

If, like me, you don’t fear the carbs (although realy I should), this is a tasty and economical pizza to feed a crowd. And then you take the crowd out for a walk to burn off the carbs!

Potato & Spring Onion Pizza (1)

Ingredients

  • One Quanity of Pizza Dough
  • About 2 cups of chopped tomatoes or your favourite pasta sauce
  • 1 large potato, boiled in its skin then peeled and cut into chunks
  • 1 ball of mozzarella, chopped into bite sized chunks
  • 1 clove of crushed garlic
  • Half a cup of grated cheese (I used a mix of parmesan and emmental)
  • 3 spring onions, finely chopped
  • 1 tin anchovies in olive oil (optional) omit for a vegetarian version

Turn the oven onto the highest setting while you prepare the pizza.  Put the tin or tray you will be using into the oven to heat up

Roll out your dough to fit the tin and place it on some greaseproof or baking paper. Cover with the tomato sauce. Mix the potato, cheeses, spring onion and garlic together in a bowl and spread this mixture over the pizza. Lay the anchovies over the top and pour over any oil from the tin.

Slide the pizza onto the hot tray (with or without the baking paper) and bake for about 12-15 minutes until the cheese starts to brown and the pizza is crispy.

Hope you enjoy the walk, click on the photos to see them in more detail.

Know Your Onions – Onions Braised in Wine and Balsamic Vinegar

What a funny expression that is. I struggled to find a decent explanation for it, although we use the expression to mean “knowing a lot about a subject”. If anyone can enlighten me, I’d love to know more!

Over on the beautiful prairies of the Midwest of America, our very dear friend Celia goes along each year to a big swapping fiesta. She usually comes home with some exotic and adorable creature like a white peacock or beautiful Boo the dog. Here, swapping is rife but generally restricted to gluts of fruit and vegetables and also poultry and eggs. As we’re not around so much right now, we can’t offer much but our dear friends and neighbours are busy keeping us supplied with delicious goodies.

Yesterday Big Man said he was popping out to see a man about some onions, as you do, and this is what he came home with.

Cebollas (3)

A lot of onions. And we’re due to be heading back to England in about a week, so there’s no way we can pack them into the car…we’d be asphyxiated by onion fumes. Time to get creative with onion recipes. Well, there’s Up the Mountain Onion Soup, of course. And maybe a caramelised onion tart. How about something different? Memories of my godmother, who came from the north of Italy, near Venice, and her method of cooking tiny onions in balsamic vinegar inspired me. I’m not sure if it’s exactly her recipe, but the taste was very similar and definitely worth buying onions to make specially.

Ingredients

  • Onions
  • Balsamic Vinegar
  • Olive oil
  • White or red wine
  • Salt and pepper
  • A few stems of a hardy herb like oregano (or you could use thyme or rosemary)

Chop the tops and bottoms off the onions so that they will sit flat in a deep frying pan or saucepan. Season with salt and pepper, drizzle over the balsamic vinegar (I used about 2 tablespoons for approximately a dozen onions), the same quantity of olive oil and pour over a glass of wine. I used Vino del Terreno (this translates as Wine of the Earth or Terrain) which is a wine many of our neighbours produce, a little rough and slightly sweet but oh so good with salty food. Scatter over the herbs and cover tightly with a lid or foil.

Cebollas (7)

Bring the pot to boiling point and then reduce to the lowest heat possible and cook gently, turning the onions once or twice, for about an hour. Just before serving, remove the lid and turn up the heat to reduce the delicious cooking liquid slightly. We ate these onions hot as a side dish but they would be delicious served at room temperature as a tapas or starter.

And just in case you don’t like wine but do like dogs (clearly not braised in wine and balsamic vinegar) here is a completely gratuitous shot of my pups Luna and Alfi hoping I don’t notice they are hogging the sofa.

No Dogs On The Sofa Please


Pasta with Smoked Pork Belly and Black Olives and Breakfast in Biarritz

Driving through France on our little road trip we bought a few foodie souvenirs to remind us of Bordeaux. Some delicious wines, a piece of deliciously pungent cheese which we ate as part of a picnic and some wonderful cured pork belly. It was sold in a market from a butcher’s stall and was in the section with the salamis and cured meats. My French is a little rusty now but I think the lady who ran the stall was telling me that they cured it themselves and sold two versions – one smoked and one salted and peppered. Of course, we bought both!

I was too busy chatting to the butcher to take a snap, so here's one of the fish stall!
I was too busy chatting to the butcher to take a snap, so here’s one of the fish stall!

After leaving Bordeaux we stopped off for breakfast in Biarritz – it’s somewhere I had often hoped to visit and imagined the glamour of bygone days. It really was a quick pit stop but enough time to enjoy the beautiful coastal views and breakfast!

Le Petit Dejeuner
Le Petit Dejeuner

Back to the Pork Belly….It’s delicious cut into tiny pieces and enjoyed as a nibble with a glass of ice cold rosé wine. It’s equally wonderful when heated, in the same way you would use lardons. I made a quick, fresh tasting  pasta sauce to bring out the smokey flavour of this wonderful cut of meat and if you ever come across it…do buy some!

Pasta with Smoked Pork Belly (2)

Pasta Sauce to serve 2 people

  • 2 cloves of garlic, crushed
  • 4 ripe tomatoes cut into small pieces (save the juices too)
  • 2 heaped teaspoons of tomato purée
  • About half a cup of chopped smoked pork belly (or use bacon or lardons)
  • Half a cup of chopped black olives
  • A good splash of white wine
  • Salt and pepper
  • Olive oil

Put the water for your pasta on to boil and then start your sauce. Gently fry the garlic for a minute or two, until it starts to soften then add the tomatoes with their juices and cook for a couple of minutes until they start to break down. By now it’s probably time to put your pasta into the water, so go ahead, the rest of the sauce doesn’t take long.

Add the rest of the ingredients  and continue to simmer while the pasta cooks. Check and adjust the seasoning, drain the pasta and add the pasta to the sauce. Pour yourself a glass of wine and enjoy your speedy and delicious meal.

Sourdough Loaf Revisited

I’ve recently been experimenting with other types of bread, but the staple at home is my sourdough loaf, which I bake about every third day. It’s a large loaf, but hey, we eat a lot bread.

A few people were asking about it, some wondered if it was a bit of a palaver to make it. At first, I agree, it seemed all a bit complex, but you get yourself into a little routine, you plan ahead and it really isn’t all that much work if you find your rhythm.

Here’s a little step by step to how I make my bread….hope it helps any of you who are planning to take the first steps in sourdough baking. This particular loaf was left to rise too long and fell “splat” onto the baking tin – it still turned out fine, it’s so forgiving!  For a starter, head over to Sawsan’s blog

I feed my starter (kept in the kitchen in a cool spot)  each time I make my bread, so approx. every 3 days. If it’s any longer between bakes I’ll just feed it anyhow – ¼ cup of flour and ¼ cup of water to replace the half cup of starter I remove. Apologies for the photos but it was dark at most stages of making the bread….real life cooking!

So, the night before I want to bake my bread I put half a cup of starter into a bowl with 250g of strong flour and 300ml of water. This is what it (the sponge)  looks like a minute or two after mixing it up with a fork. Don’t forget to feed your starter to replace what you have removed.

DSC_0005

This is my sponge 15 minutes later.

DSC_0007

About 9 hours later, next morning, my sponge looks like this.

DSC_0009

Then I add a further 300g of strong flour, a teaspoon of salt and a tablespoon of olive oil (optional) and start to knead in my mixer with a dough hook. It looks lumpy and heavy at first.

DSC_0012

After 10 minutes on slow speed it looks glossy and comes away from the sides of the bowl and is ready.

DSC_0016

I tip it onto a lightly floured surface then sprinkle a little flour on top, it’s a wet dough but don’t worry, it comes together easily.

DSC_0017

Shape it into a round and place it into an oiled bowl then cover with cling film.

DSC_0019

Leave until doubled in size (or come back from work about 9 hours later to find this…don’t worry).

DSC_0020

Turn it out of the bowl onto a floured surface, flour the top gently and shape into a long sausage if you are using a floured banneton or put it into a bowl lined with greaseproof paper and cover with a tea towel.

DSC_0021

After an hour it will have almost doubled again in size.

DSC_0023

Flip out onto a hot baking tray (pop the tray into your oven as it heats up) or if you don’t have a banneton put your dough and greaseproof paper directly onto the baking tray or into a heated oven dish.

DSC_0024

Bake for about 40 minutes until golden brown at 180 degrees (fan) or 200 degrees regular oven.

DSC_0032

Cool on a rack before slicing.

Yes, you have to wait almost 24 hours for your loaf from starting the process, but good things, in this case, really are worth waiting for!

Lazy Sunday Roast Chicken

Oh my, the rain, the wind. It’s getting us down. But do we complain? Well…yes…we do a little bit if I’m honest. What we also do is draw up plans for building an ark and cook some comfort food. This was last weekend’s Sunday lunch and if this weather continues we may have a  repeat performance again tomorrow!

I don’t think I can really claim this to be a recipe, as it just involves chopping, seasoning and putting something in the oven. But if you need inspiration for a family meal, or a meal for 2 with leftovers for another day (or two) then look no further.

Winter Roast Chicken (6)

This was lunch for a lazy Sunday. The sun finally came out for a few hours, after rain, storm and high winds. It was still blowing a bit of a gale so we headed to a nearby park instead of the beach where the pups could let off steam.  We all got thoroughly muddy but returned home with “roses in our cheeks” and “the cobwebs well and truly blown away” (as my grandmother used to say of walks in the sunshiny cold of England). We also returned home to the delicious smell of roasting chicken and a toasty warm kitchen. Perfect!

Ingredients (to serve 4 hungry adults)

  • 1 chicken weighing about 2kg
  • 4 carrots, 2 parsnips, 1 red pepper, 1 yellow pepper, 1 large sweet potato, 2 sticks of celery, half a fennel, a red onion, a white onion – all vegetables peeled and chopped into large chunks
  • 1 head of garlic, cloves separates but not peeled
  • About 3 tablespoons of olive oil
  • A small glass of white wine (or water)
  • 1 tablespoon of za’atar
  • 2 lemons, halved
  • Salt and pepper

Put all the vegetables and the garlic into a deep oven tray (line it with foil to save having to scrub the pan). Season with salt and pepper and pour over 2 tablespoons of the oil and the glass of wine and mix with your hands.

Winter Roast Chicken (3)

Sit the chicken on top of the vegetables, massage the rest of the oil into the chicken then season and sprinkle the za’atar over. Rub the seasoning in all over the chicken and put the halved lemons into the chicken cavity.

Cover well with a tent of foil and cook in a medium oven (about 180 degrees C fan or 200 degrees C normal oven) for 2 hours. Uncover about half an hour before you have finished cooking to brown the skin.

Winter Roast Chicken (8)

Leave to rest for 10 minutes before serving and make sure to spoon all the lovely juices over the meat and vegetables when you eat.

Leftovers (you know how much I love having leftovers) went into sandwiches and a delicious chicken and vegetable soup.

Stir Fried Kale with Bacon – A Speedy Side Dish or Pasta Topping

Don’t you just love winter greens? So green and vibrant – maybe their colour reminds us of the spring that is on its way, whilst doing us so much good packed full of iron and vitamins.

Kale (3)

Kale is a current favourite, although it can sometimes be a little tough. Not a problem if you like your vegetables really crisp, but easily dealt with by blanching for a few minutes first.

Ingredients to serve 2

  • About a dozen leaves of kale, washed, tough stalks removed and then finely chopped
  • 2 cloves of crushed garlic
  • 4 rashers of finely chopped smoked streaky bacon (or use mushrooms for a vegetarian dish)
  • Salt and pepper
  • Olive oil for frying

Blanch the chopped leaves for about 3 minutes if they are large and drain. Heat a little oil in a wok or large frying pan and fry the bacon until crispy then add the kale and garlic. Stir fry for a couple of minutes, season and enjoy as a side dish or mixed with pasta (add a little raw olive oil and a few drops of the pasta cooking water).

Bounce around the kitchen as you will be packed full of vitality!

If you’re lucky enough to have access to Baby Kale, check out this beautiful recipe for a Sunshine Salad from our blogging pal Smidge. Or how about Frugal’s Kale with Pasta – delicious!

Little Piggies and Potato Cakes

Near our village in Spain is another village with a restarant run by a lovely lady called Belén. Belén means Bethlehem in English, so although a bit unusual for English speakers, her name is quite apt as we creep up towards the Christmas season. Sorry, I promised myself I wouldn’t mention the C word until well into December and it’s only the 2nd today.

Belén runs a good bar and restaurant with all the usual offerings plus a few slightly different ones. An item on her menu is called “Guarrito” which translated means “little wild boar”. I don’t know if this is a typical dish, we’ve certainly never seen it anywhere else, so of course had to order it. And once ordered, we loved it and often go back for a little tapas of this with a glass of wine. So, what is “guarrito”? It’s simply thick slices of jamón cooked in a little olive oil (and Belén serves them on fried bread which makes them extra naughty and extra nice).

Guarrito (2)

We always said that these little morsels would be fantastic with a fried egg and baked beans, in a Full English Breakfast style. Or as a supper dish. Or any time really. So of course, now we make guarrito at home in England until we can get back to visit Belén again.

To accompany the guarrito I was inspired by Frugal’s Gluten Free Potato Cakes. He uses gram (chick pea) flour instead of regular flour and I pretty much followed his recipe with the addition of some roasted red peppers.

Being the sort of Chica who always cooks army rations instead of regular sized portions, I still had a little mashed potato left the following day, so I made another potato cake to go with some grilled meat and salad.

Ingredients to serve 2

  • About a cup of mashed potato
  • One beaten egg
  • Half a roasted pepper
  • A tablespoon of crème fraiche
  • Salt and pepper

Mix all the ingredients together and then blend with a hand blender or mash thoroughly – the mixture will be quite runny. Don’t panic!

Using a heavy based frying pan, pour in a little oil and get it quite hot. Now pour in the potato mix and turn the heat down. Cook slowly for about 10-15 minutes until it starts to get crispy. If you’re feeling brave slide it out onto a plate and then flip it back into the pan to cook the other side in the same way. For the fainter hearted, pop it under the grill until it starts to brown a little then flip and continue to fry.

Potato Cake (2)

Slide it out into a serving plate and enjoy your potato (pan) cake sliced into portions. Crispy on the outside, creamy soft in the middle. Now how economical and delicious is that?!

Pollo Cacciatore – Hunter’s Chicken

How many ways can you make Chicken Cacciatore? Quite a lot if you go by the recipes that pop up if you do an internet search. I imagine that the most authentic recipes rely on very few ingredients if they were cooked out doors by the hunters over an open fire. But perhaps they were cooked indoors by the hunters’ wives for their return.  I imagine that when they went out hunting they were probably tracking wild boar or something that really offered a sporting challenge. I don’t think Chicken Hunting would provide much of an adrenalin rush to the boys out for a day of testosterone, alcohol and guns.

Pollo Cacciatore (3)

Enough wondering about hunters and authentic recipes, here’s my version which relies mostly on store cupboard ingredients (well, I did have to hunt out my smoked pimentón from the back of the cupboard so I think it counts).

Ingredients to feed 6 hungry hunters

  • 1 large chicken jointed (I jointed mine into 14 pieces – 2 legs, 2 thighs, 2 wings, each breast cut in two, the rest of the carcass into 4 – all with the bone in)
  • About 2 cups of your favourite homemade tomato sauce or use tinned tomatoes
  • A tablespoon of tomato purée
  • 3 fat cloves of garlic, peeled and thinly sliced
  • An onion peeled, halved and cut into medium slices
  • About half a cup of olives
  • A large glass of red wine
  • Salt and Pepper
  • A teaspoon of smoked pimentón or paprika
  • A red pepper thinly sliced
  • About 6 rashers of smoked streaky bacon cut into small pieces (or use lardons)
  • A few sprigs of rosemary
  • Olive oil for frying

Start by heating a few tablespoons of oil in a large pan and (in batches) brown the chicken pieces and set aside. Add more oil if necessary. In the same pan gently fry the peppers, garlic and onions until soft then add the bacon and fry (on a higher heat) until the bacon starts to crisp.

Pollo Cacciatore (1)

Add the tomatoes, tomato purée, wine, rosemary, pimentón and seasoning and bring it up to a bubble. Add the wine, olives, chicken and rosemary and cover. Cook gently on the stove top for about an hour or in the oven on low for a couple of hours. Check every so often and if the sauce is starting to dry out, add a splash of water.

When ready to serve, cook for a few minutes on the hob to thicken up the sauce if necessary and serve with mashed potatoes or rice. Tastes even better if made the day before. Any leftovers are wonderful with pasta. And a little glass of that red wine…

Deep Fried Courgettes – Zucchini Fritti

Well, the title says it all, so if you don’t deep fry or don’t eat fried food, then this one is not for you…

(You could try Natalies beautiful Baked Courgettes instead and check out her fantastic blog which is packed full of amazing vegetarian recipes.)

But you can still enjoy this photo of some super fresh vegetables bought round for us from our lovely neighbours who picked our tomatoes while we were away. From the field to our plates in less than a couple of hours…how wonderful is that?!

Veggies (4)

When we are Down by the Sea, a local Italian restaurant does a side dish of deep fried courgettes. I used to order them and gorge on a portion myself, safe in the knowledge that Big Man was not a big fan of this gorgeous vegetable. Of course, the day finally came when he decided to give them a go and unfortunately for me, I now have to share. Must remember to stop saying “go on, try them, I think you’ll love them”. Sometimes you get what you asked for.

Zucchini Fritti (7)

Ingredients

  • One courgette cut into thick batons
  • A little milk
  • A few tablespoons of flour seasoned with a little salt and pepper
  • Oil for deep frying

Dip the courgette pieces first in the milk, then the seasoned flour and deep fry in very hot oil for a few minutes until lightly browned. Drain, sprinkle with coarse salt and serve. Alioli or garlic mayonnaise is great with them.

Zucchini Fritti (3)

Make double if you run the risk of having to share.