Monster Sandwiches with Celia’s Pan Cubano

We all know that one of the great pleasures of blogging comes from sharing, being inspired by fellow bloggers and getting excited by new recipe ideas.

Pan Cubano (1)

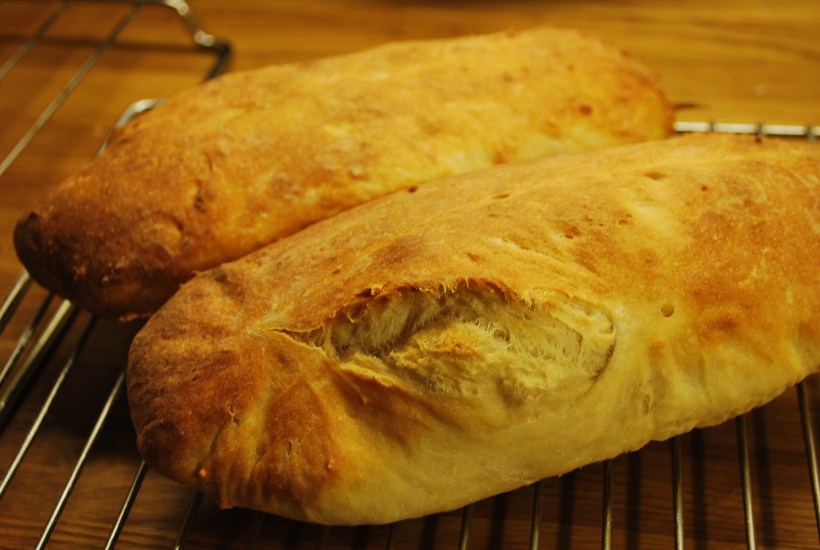
I baked the loaves late at night, sorry about the dark photo…

I’m a regular bread baker now.  My sourdough bread is made every 3 days or so, but sometimes I feel the need to shake it up and try a new recipe. A little while ago I saw a recipe over at Fig Jam and Lime Cordial. Celia is the Queen of Sourdough and her recipe for a bread called Pan Cubano really called to me. The fact that it used Lard was probably the part which called loudest! In Southern Spain the pig is King and lard is used in many recipes. I’m in England right now but I felt nostalgic.

I didn’t use rendered pig fat in the recipe, I turned to my massive supply of goose fat which came from cooking the Christmas goose. You only need about a heaped teaspoon though, so I still have plenty leftover for delicious roast potatoes.

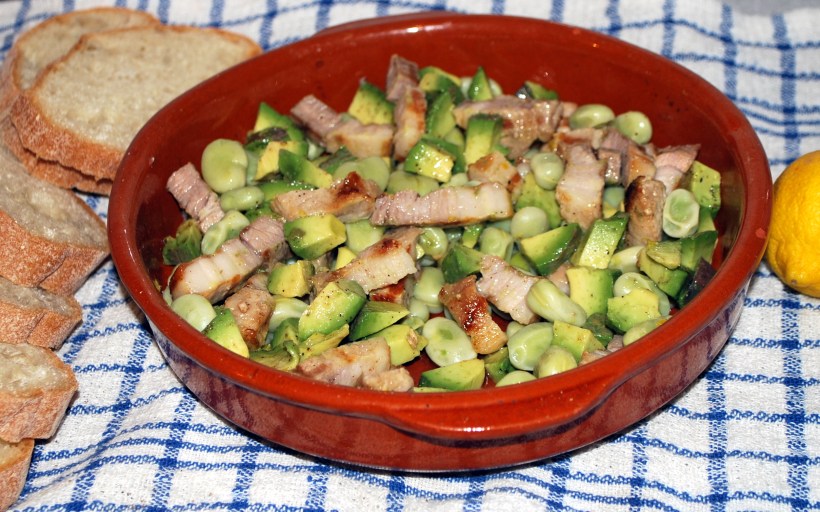
The bread turned out fabulously, although I didn’t get the characteristic slit in the loaf as I had no leek or palm leaves to lay down the centre of the loaf. Slitting them didn’t seem to make any difference but the flavour and texture  of the bread was incredible. Celia advised me to freeze some of the loaves if we weren’t planning on eating them all at once. Great advice as I made four loaves, each of which gave me 2 massive, builder-sized sandwiches. The sandwiches were filled with thin slices of smoked gruyere and cold twice cooked pork – amazing!

Pan Cubano (4)

Thanks Celia – for the inspiration and the amazing lunch…Go on, Be Inspired!

Twice Cooked Melting Pork

Regular readers of this blog will know that last year I discovered the cookbook by Gok Wan and was converted to cooking simple Chinese dishes at home through his wonderful recipes. For new readers – welcome! – do check out this book if you get a chance. I know he’s …er…”famous” for fashion advice and you may be dubious (I certainly was) but take my word for it, it’s a great book.

Twice Cooked Melting Pork (8)

This one was recommended to me by best pal Maria and I’m so glad I took her advice. The original recipe calls for Belly of Pork, I used a boned shoulder joint. Just as tasty, perhaps a little less moist than the belly (less fat) but perfect nonetheless. It take a little while to prepare as there are two stages, but it’s not complicated and is a great dish to part prepare ahead, then finish off in the oven when you are ready to eat.

In the book it is called “Poppa Wan’s Show Stopping Twice Cooked Melting Pork” – it’s a recipe of his father’s. So cheers Mr Wan, we loved it!

Ingredients to serve 4 generously

  • 500ml rice wine or dry sherry (I used about 250ml of dry sherry and 4 tablespoons of white wine vinegar as I didn’t have rice wine) plus water
  • 2 star anise
  • A 5cm piece of fresh ginger, peeled and bruised
  • 3 cloves of garlic, peeled and bruised
  • 3 spring onions, finely chopped
  • 3 tablespoons of light soy sauce
  • 1.25kg pork belly (rind left on but unscored) I used 1kg boned pork shoulder joint

For the glaze – 4 tablespoons of runny honey mixed with 2 tablespoons of light soy sauce

Place all the ingredients except those for the glaze into a deep pan and add enough extra water to cover the meat generously. Bring to the boil then reduce the heat and simmer for about 1 ½ hours (until the meat is very tender and cool enough to handle.

Twice Cooked Melting Pork (5)

Preheat oven to 200 C/400 F/Gas 6. Remove the pork from the liquid and place onto a board. Remove the top layer of skin and place onto a baking tray lined with parchment paper.

Pour the marinade over (it will be runny) and cook for 20-30 minutes, basting frequently.

Place onto a serving dish and cut into slices or chunks. I served ours with mushroom and ginger rice and steamed pak choi. Wonderful and enough left over for sandwiches the next day…but more of them another time!

Beef and Mushroom Pie

Flushed with the success of my recent rough puff pastry I decided to use it again in a warming pie.  Of course, I turned to my pal Mad Dog for recipe inspiration and came across his gorgeous recipe for Steak and Kidney Pie. Using this as the start point, I gathered together my ingredients and got going.

Steak and Mushroom Pie (3)

Ingredients (serves 4): 

  • About 1kg of braising steak
  • 2 medium onions (finely chopped)
  • 1 stick of celery (finely chopped)
  • 1 carrot (finely chopped)
  • About 20 button and chestnut mushrooms (finely chopped)
  • 5 cloves of garlic (crushed)
  • a pinch of crushed chilli or chili powder
  • ground sea salt, black peppercorns, and a tablespoon of finely chopped fresh rosemary, 2 bay leaves
  • 2 tablespoons of tomato purée
  • Half a bottle of red wine plus enough beef or chicken stock to cover the meat and vegetables
  • Flour for coating the meat and extra (if needed) to thicken the sauce
  • olive oil as needed for frying
  • 1 beaten egg
  • extra salt and pepper to taste
  • 1 batch of rough puff pastry

Make your pastry and leave to rest in the fridge while you get on with the pie filling.

Cut the meat into small cubes and toss them in seasoned flour.

Fry in a little olive oil until browned on the outside (you may need to do this in batches) and set aside but don’t clean out the pan. Add more oil if necessary and gently fry the onions, carrots and celery until the onion is soft and transparent.

Return the meat to the pan and add the mushrooms and garlic. Cook for a few minutes until the mushrooms start to soften then add the seasoning, herbs, tomato purée and liquid. Bring to a gentle boil and transfer to a casserole dish with a lid and continue to cook either on the stove top for about 2 hours on a very low flame or in a low oven until the meat is very tender for 2-3 hours.

Beef & Mushroom Pie (5)

Check for seasoning and adjust if necessary. If the casserole is too liquid, thicken with about a heaped teaspoon of flour mixed with a teaspoon of butter and dropped into the pot and stirred gently until the sauce starts to thicken.

Allow the filling to cool (overnight is best as the flavours will develop) and then you can assemble your pie. Pour the filling into a pie dish and cover with your pastry, cutting a few holes to allow the steam to escape and brushing with a beaten egg.

Beef & Mushroom Pie (2)

I tried to get artistic like Mad Dog but my attempts were more reminiscent of the devil we saw last year on our trip to Jersey. Eek! Luckily I made a double batch of filling and I left the second pie plain…much more appetising.

DSC_0094

Bake for about 30-40 minutes at 220 degrees C until golden brown. Sigh!

Spiced Ham

So, here we are in 2014 and a very happy and healthy New Year to you all and thank you for all your good wishes! This is a dish I made over Christmas, but it was so good I’ve just bought another smoked ham joint to make it again.

Spiced Ham (2)

Perfect hot or cold, great as a main course with chips, mashed potatoes or jackets or in sandwiches or as a sneaky midnight feast….

I was inspired by this recipe I found over on the BBC Good Food site, but of course I changed it a little. Well, life would be dull without a few twists and turns! Big Man and I were back to work today at the house renovation and tonight the limbs are aching. A few days off have turned me into a useless Lady Builder. Or maybe it was the food and alcohol…

Is it just me or does my ham look like a grumpy face?!

Ingredients for a 3.5kg ham joint (but they’re flexible)

  • 3.5kg cured ham or gammon (smoked or unsmoked, the choice is yours)
  • 2 litres of ginger ale (plus you may need extra water to cover the meat)
  • The zest and juice of 2 tangerines and one orange
  • 2 bay leaves
  • 1 onion
  • 6 cloves
  • 1 cinnamon stick
  • 10 peppercorns
  • 1 dried chili

For the glaze

  • 3 tbsp molasses or treacle
  • 3 tbsp thick cut marmalade

Put the meat into a large pot and add all the first set of ingredients (and extra water if needed to cover the joint). Bring to a boil, skimming off any scum then simmer, partly covered for about 3 ½ hours. Leave to cool in the stock and use the stock to cook lentils with or make soup –  it’s amazing!

Spiced Ham (6)

If you want to glaze your ham (you don’t have to but it’s worth doing), warm the molasses and marmalade together in a small saucepan until melted.  Peel the skin off you ham if it has skin on and score the skin. Pour the glaze over your ham (which you will need to put into a heavy oven tray lined with greaseproof paper to save ruining your oven tray) and bake at about 220 degrees C for 30-40 minutes until the glaze starts to brown. Baste it every 10 minutes while it is cooking.

Serve hot or cold – it will keep for about 10 days (in theory) but I bet you won’t be able to resist scoffing the lot before then.

And if you have any leftovers…well, I’ll tell you what to do with them another day.

Smokey Pork Belly Strips with Roasted Vegetables

Pork belly is a big favourite in our house but from reading recipes and comments on other lovely blogs, I’ve realised that not everyone can get hold  of whole pieces of pork belly. In fact, in Spain I have to ask the butcher to not slice it up as it’s also more typical to sell belly slices.

Smokey Pork Belly (3)

Usually pork belly slices are barbecued in Spain but here in the UK in December the weather doesn’t really lend itself to outdoor cooking – not that I wouldn’t grab the chance if the weather was perfect at the right moment!

I wanted to use belly slices and to try to recreate some of the smokey flavours in my kitchen without setting off the smoke alarm and causing panic amongst the neighbours. Easy…use the oven Chica!

Ingredients (to service 2)

Turn oven on to almost the highest setting

  • A mix of root vegetables cut into large chunks (I used sweet potatoes, potatoes and carrots)
  • An onion cut into thick slices and about 6-8 whole garlic cloves
  • 6-8 pork belly slices
  • 1 heaped teaspoon of mustard powder
  • 1 heaped teaspoon of smoked pimentón or paprika
  • Salt and pepper
  • Olive oil

Put all the vegetables with the onion and garlic into an oven tray, season, drizzle well with oil and mix to ensure all the vegetables are coated.

Rub the pork belly slices in the mustard powder and the pimentón and season lightly.

Cook the vegetables in the oven for about 20 minutes until the vegetables start to soften. Lay the pork belly slices over the top of the vegetables and continue to cook for about another 20 minutes or until the pork belly is browned and crisp.

Enjoy with a warming glass of red wine and if you have any vegetables left over, add some stock the next day, blitz and enjoy a delicious roasted root vegetable soup.

For another pork belly recipe, check out my Smokey Pork with Pimentón and Peppers or Crispy Pork Belly with Stir Fried Cabbage.

Stir Fried Beef with Ginger

A recent discovery is that our local “Big” supermarket sells packs of thin beef steaks. Ok, it may not be a patch on what we can get in England, but for dishes that require quick cooking, it’s tender and surprisingly tasty.

You may recall I recently made the “acquaintance” of Mr Gok Wan and his cooking and his book travelled back with me to Spain. Sudden temperature highs of around 30 degrees mean it’s time for food that is quickly prepared and cooked.

Stir Fried Beef with Gnger (3)

I served this beautifully fragrant beef dish with pak choi (or bok choy), but more of that another day. If you invest a few minutes (or ten) in getting everything ready, the cooking is quick and ready to serve in just a few minutes. I had to make some adaptations, as ever, and Big Man asked if this was “Cocina Ibero-Chino” (Spanish-Chinese Cooking). I am sure that if had used sesame oil and carrot (which were the things I had to substitute) it would have been even more delicious, but as we didn’t have a scrap left over, I think it was a success!

To serve 2

  • About 4 tablespoons of cornflour
  • Salt and pepper (the recipe calls for white, I used black
  • About 300g steak (the recipe calls for sirloin, I think mine is called “flash fry)
  • Oil for frying (original recipe says groundnut, I used olive oil)
  • 4cm piece of fresh ginger, peeled and finely chopped
  • 3 spring onions, chopped
  • 1 medium carrot peeled and cut into matchsticks (I used a small courgette)
  • 2 tablespoons light soy sauce
  • 1 teaspoon caster sugar
  • 1 teaspoon sesame oil (I used olive oil)
  • 1-2 teaspoons rice or cider vinegar

Coat the meat strips in the cornflour and seasoning and fry in a hot wok or frying pan until browned. I did this in batches. Remove and place on kitchen paper.

Wipe the pan and add a little more oil then add the ginger, garlic, spring onions and carrot. Fry on high for a minute or two until the edges of the onions start to brown a little. Add the soy sauce, sugar, sesame oil, vinegar, a pinch of pepper and about 3 tablespoons of water and cook until the sugar has dissolved. Taste and adjust the flavours to your liking (I added a little more vinegar as I found it quite sweet).

Add the beef into the pan and gently mix into the sauce. Remove from the heat and (optional) garnish with chili flakes.

A beautiful dish, aromatic and quick to prepare.

For another beautiful Chinese Beef dish, check out Mandy’s Shanghai Steak over at The Complete Cookbook.

Crispy Pork Belly with Stir Fried Cabbage and Mushrooms

Another easy recipe from my Gok Wan Cookbook. You do need to plan ahead, just to make sure the pork is good and dry before cooking, but other than that, it’s a doddle.

Crispy Pork with Chinese Spiced Cabbage (1)

Ingredients

  • 1 pork belly (or piece, mine weighed about .75kg)
  • 1 Tablespoon rice wine vinegar
  • Juice of 1 lemon
  • 1 heaped teaspoon Chinese Five Spice Powder
  • 1 teaspoon of ground white pepper
  • Sea (kosher) salt

For the vegetables (a Chica recipe!)

  • About half a savoy cabbage, shredded
  • 6-8 mushrooms, finely sliced
  • Soy Sauce
  • A teaspoon of fresh grated ginger
  • 2 cloves of crushed garlic
  • Light soy sauce

Dry the pork belly well with kitchen paper, prick the skin all over with a fork and score the meat and skin with cuts about 5cm apart.

Rub the skin with the vinegar and lemon juice and rub the neat with the Chinese Five Spice powder, the pepper and some salt. Rub the skin with salt and leave overnight (uncovered) on a grill tray with an oven tray underneath in the fridge or a cool place.

Return the pork to room temperature before cooking (about 2 hours in the kitchen). Heat the oven to 170 degrees C/325 F/Gas 3 and cook for about 40 minutes on its rack. Turn the oven up to high and cook for a further 25 minutes until the skin is crispy. Leave to rest for about 15 minutes before slicing. As you can see, mine didn’t crisp all over and I recommend popping it under a hot grill to sort this out. Or just eat and enjoy!

For the veggies, heat a little oil in a wok (I used a mixture of sesame and sunflower) and put the garlic, ginger, cabbage and mushrooms in and stir fry over a high heat until the cabbage starts to wilt.  If you like the cabbage softer, add a tablespoon or two of water and cover and cook gently for a few minutes.  Add a few dashes of soy sauce to taste and serve.

Chinese Leftovers Soup (1)

Leftover veggies can be added to stock, throw in a handful of noodles (I used angel hair vermicelli), spice it up with chili sauce and serve as a delicious next day leftovers soup. Add any leftover pork if you have it and don’t want a vegetarian soup, your choice.  Two meals for the price of one!

Lamb & Beef Meatballs with Broad Beans & Lemon – The Colours of Spring on a Plate

Broad Beans to me mean spring. Perhaps because in Spain we would normally be harvesting our own from early spring. That beautiful vibrant green of the inner pod is the colour of new life springing from the earth. It’s enough to make you start writing poems about daffodils and wandering lonely as a cloud.

Well, it’s enough to inspire me to cook with them and the discovery (yes, at heart I’m a country girl who normally reaps what she sows) of frozen broad beans has been very exciting for me. Add to this the delightful recipes of Mr Yotam Ottolenghi and his Jerusalem cookbook (again) and I had no choice but to make his Meatballs with Broad Beans and Lemon.

Meatballs with Broad Beans Main Photo

Enough waxing lyrical and on with the cooking.

Ingredients

  • 4 ½ tablespoons of olive oil
  • 350g broad beans (fresh or frozen)
  • 4 whole thyme sprigs
  • 6 garlic cloves, sliced
  • 8 spring onions cut into 2cm segments, at an angle if you want to be fancy
  • 2 ½ tablespoons of lemon juice
  • 500ml of chicken stock
  • Salt & black pepper

For the meatballs

  • 300g of minced beef
  • 150g minced lamb
  • 1 medium onion, finely chopped
  • 120g fresh breadcrumbs (I used a little less and it was fine)
  • 2 tablespoons each of chopped flat leaf parsley, mint, dill and coriander plus about ½ tablespoon of each to finish the dish
  • 2 large garlic cloves, crushed
  • 1 tablespoon of baharat spice mix (I had to make mine but it was easy)
  • 1 tablespoon of ground cumin
  • 2 teaspoons of chopped capers (I couldn’t find any but it was still tasty without)
  • 1 egg, beaten

Makes about 20-24 meatballs about the size of ping pong balls

Place all the meatballs ingredients into a large bowl and add salt and pepper to taste and mix well with your hands. Form into small meatballs and sear them in batches with some of the olive oil until browned. Remove from pan and wipe the pan clean.

Blanch the broad beans in boiling salted water for about 2 minutes then run under cold water. Remove the skins from about half the beans and discard the skins. Keep the beans separate from each other.

Lamb & Beef Meatballs (2)

Heat the remaining oil in the pan you used previously and add the thyme, garlic and spring onions and sauté over a medium heat for about 3 minutes. Add the unshelled broad beans, 1 ½ tablespoons of lemon juice, 80ml of stock, a little salt and plenty of black pepper. Cover the pan and cook on a low heat for about 10 minutes.

Now add the meatballs and remaining stock, cover and continue to simmer for about 25 minutes. This can be made ahead but as they cool, the meatballs will continue to absorb the stock. If necessary, add a little water when reheating. Before serving taste for seasoning, add the remaining herbs, lemon juice and the shelled beans.  Delicious with rice.

It’s a fabulous dish to make for guests as it can be prepared ahead and pulled together at the last minute. I do confess to having been outraged at having to buy all the herbs I would normally just step outside my back door to pick. But..buying or picking, it’s a stunning dish and well worth the little bit of effort you have to put in.

For another beautiful Ottolenghi meatball dish, check out my recipe for Lamb with Quince, Pomegranate and Coriander.

Faggots and Onion Gravy

Faggots are an old fashioned English dish made from offcuts of meat (usually pork) and offal. I remember as a child my grandmother waxing lyrical about them and me turning my nose up in disgust. Of course, now I’m almost grown up, my tastes have changed and having lived in Spain for 7 years, I am used to enjoying every part of the pig, including the oink.

A local butcher in Bexhill on Sea sells home made (or butcher shop made) Faggots for the princely sum of 50p each. That’s less than a euro or a US dollar and I mistakenly bought 6 for Big Man and I to try. Bad plan. Two was plenty for him and I managed one and a half (although I did serve the leftovers cut up cold the next day meatloaf style and the dogs feasted too)!

Faggots & Onion Gravy (5)

This is not a recipe for making them. As I started typing this I thought, I’ll pop over to Mad Dog’s blog, he’ll have something on there about faggots. Of course he did. My method for preparing them to serve was very similar, but different. If you know what I mean.

I cooked my faggots in the oven in a deep oven dish covered tightly with foil for about 40 minutes on a medium heat. I had drizzled them with a little olive oil and a splash of water.

While they were cooking I fried off lots of thinly sliced onions until tender and starting to brown. Then I added the cooking juices from the faggots, some tomato purée and a splash of red wine and seasoning. Then I thickened with a heaped teaspoon of butter mixed with a heaped teaspoon of flour (I’m sure there’s a proper name for this, please enlighten me) which I dropped into the gravy and allowed to cook gently whilst it thickened. Next time (and there will most definitely be a next time) I’ll brown the faggots at the end of cooking while I’m finshing off the gravy so that they don’t look so in need of a week in the sun.

Pre cooking
Pre cooking

We served it with plenty of creamy mashed potato and a good glass (or three) of wine. An economy meal fit for a king. What more can you want on a cold winter’s night?

Broad Beans with Griddled Pork Belly

Reading a beautiful recipe over at Cooking in Sens which involved broad beans stimulated a craving for those little green beauties. Back home in Andalucía right now I would normally just pop out into our veggie garden and pick me a basket full.  I haven’t seen any here in England yet but they do have excellent frozen broad bean pods.

Broad beans with pork belly (3)

I decided to make a little dish with echoes of home as a pretty substantial tapas which we enjoyed with some lovely crusty bread from my dad’s Italian baker pal, wine from a recent jaunt over the channel to France, juice from some of our lemons that Big Man bought back recently and locally reared pork. You can’t say we don’t embrace all that is available to us!

Ingredients as a main course for one or starters for two

  • 1 cup of broad beans cooked until tender and drained
  • 2 thin slices of pork belly cooked on the griddle until browned and cut into small pieces (or use bacon or lardons, or mushrooms for a vegetarian version)
  • 1 avocado cut into small chunks
  • Olive oil
  • The grated rind of one lemon and the juice of half
  • Sweet pimentón
  • Salt & Pepper
  • Chopped parsley to finish (I didn’t have any but I think it would be perfect)

Mix together the still warm beans, pork and avocado. Add the lemon rind, about 2 tablespoons of olive oil (more if necessary) and the lemon juice. Season with the pimentón, salt and pepper and mix again. That’s it. Tricky wasn’t it?!